This article was co-authored by wikiHow staff writer, Janice Tieperman. Janice is a professional and creative writer who has worked at wikiHow since 2019. With both a B.A. and M.A. in English from East Stroudsburg University, she has a passion for writing a wide variety of content for anyone and everyone. In her free time, you can find her working on a new crochet pattern, listening to true crime podcasts, or tackling a new creative writing project.
There are 15 references cited in this article, which can be found at the bottom of the page.
This article has been viewed 97,270 times.
Learn more...
Dyson fans keep your home cool and are much less bulky than a typical box fan. You may not realize it, but these fans can collect dust and other dirt particles over time. With basic household cleaning supplies, you can keep your Dyson fan in top condition during any hot weather.
Steps
Cleaning the Outside of the Fan
-
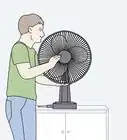
1Unplug the fan. Before cleaning your Dyson fan, make sure to unplug it. This prevents any risk of injury, and allows you to clean the fan thoroughly.[1]
-
2Wipe the inside of the fan with a moist cloth. Dyson fans do not have blades, which makes the cleaning process a lot easier. Use a moist cloth to wipe inside the circular surface of the fan in long, swift motions. This process probably won’t take you more than 30 seconds.[2]Advertisement
-
3
-
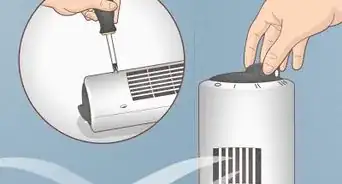
4Attach a tube or brush extension to your vacuum. Find the attachment tube on your vacuum that allows you to clean smaller areas. Depending on your vacuum, you may have different kinds of attachments. Add a long, thin tube or the brush attachment to your vacuum before continuing.[6]
- If you don’t think you have the right vacuum attachment, consider purchasing one from an online marketplace (i.e, Amazon, eBay).
-
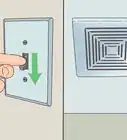
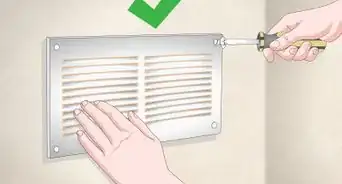
5Locate the back vents by searching for circular grooves. The location of the back vents may differ depending on your fan model. You can easily identify these vents by finding rows of circular grooves in a square pattern towards the bottom of your Dyson fan.[7]
-
6Vacuum the back vent of the fan. Turn on the vacuum and hold the tube or brush extension tightly in one hand. Using careful and methodical movements, clear the dust from the back vent of your Dyson fan. Ideally, you do not want to see any dust particles once you have finished vacuuming.[8]
- If you don’t have a vacuum or vacuum extension, feel free to use a can of compressed air. You can purchase this at most office supply stores.[9]
-
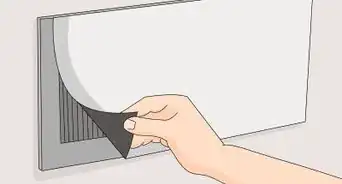
7Brush off any remaining dust with a paper towel. Once you have finished vacuuming the back vents of the Dyson fan, examine the surface for any lingering dust or dirt. Using a dry paper towel or cloth, remove any excess dust with long, quick movements.[10]
- Repeat this process if you still see a significant amount of dust.[11]


Wiping out the Inside of the Fan
-
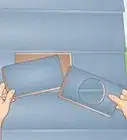
1Twist off the top part of the fan. Use one hand to hold the bottom portion of the fan in place, and use your other hand to twist off the top, circular portion. Twist in a counter-clockwise motion when working to separate the two pieces of the Dyson fan.[12]
- Don’t be discouraged if you’re unable to remove the top part. Check your fan’s user manual for more specific instructions on how to disassemble it.
- There should be a visible line that separates the rounded portion of the fan from the rest of the machine.[13]
-
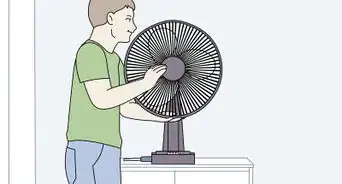
2Remove any dust from inside the fan with a wipe. While a Dyson fan does not have blades, there is a mechanical portion visible inside the fan after you’ve separated the two pieces. Use quick, delicate motions to lightly clean this inner portion with a damp cloth.[14]
- You can use a can of compressed air instead of a damp cloth.[15]
-
3Clean out the top part of the fan with a moist wipe. Using both hands, hold the circular portion upright so that you can examine the inside for dust. Depending on how much dust you find, use a damp cloth to clean and remove any dirt particles from inside the fan. Use small, careful motions during the cleaning process when wiping any rounded edges of the inner fan.[16]
- You can also use a baby wipe for this.[17]
-
4Reassemble the fan. Once both pieces of the fan are dust-free and completely dry, use a clockwise motion to reattach the top portion to the rest of the fan. It may help to use one hand to secure the fan in place while using your other hand to reattach the circular piece.[18]
- If you are uncertain of how to reassemble your fan, double check the instructions that came with the fan when you purchased it.


Things You’ll Need
- Damp cloth
- Vacuum
- Brush or tube extension
- Baby wipes (optional)
- Compressed air can (optional)


References
- ↑ https://www.consumerreports.org/all-purpose-cleaners/how-to-clean-all-fans/
- ↑ https://youtu.be/kE6L7fg_k34?t=0m37s
- ↑ https://youtu.be/kE6L7fg_k34?t=0m41s
- ↑ https://experthometips.com/39-unexpected-uses-for-baby-wipes-adults
- ↑ https://experthometips.com/39-unexpected-uses-for-baby-wipes-adults
- ↑ https://m.youtube.com/watch?feature=youtu.be&v=kE6L7fg_k34?t=1m26s
- ↑ https://youtu.be/kE6L7fg_k34?t=1m07s
- ↑ https://m.youtube.com/watch?feature=youtu.be&v=kE6L7fg_k34?t=1m53s
- ↑ https://www.bobvila.com/articles/how-to-clean-a-fan/
- ↑ https://youtu.be/kE6L7fg_k34?t=2m10s
- ↑ https://youtu.be/kE6L7fg_k34?t=2m10s
- ↑ https://youtu.be/kE6L7fg_k34?t=2m41s
- ↑ https://m.youtube.com/watch?feature=youtu.be&v=kE6L7fg_k34?t=2m44s
- ↑ https://youtu.be/kE6L7fg_k34?t=3m20s
- ↑ https://www.bobvila.com/articles/how-to-clean-a-fan/
- ↑ https://m.youtube.com/watch?feature=youtu.be&v=kE6L7fg_k34?t=4m16s
- ↑ https://experthometips.com/39-unexpected-uses-for-baby-wipes-adults
- ↑ https://m.youtube.com/watch?feature=youtu.be&v=kE6L7fg_k34
- ↑ https://m.youtube.com/watch?feature=youtu.be&v=kE6L7fg_k34?t=4m58s
About This Article
To clean your Dyson fan, first unplug it so it’s completely off. Use a damp cloth to wipe down the inside of the fan’s circular surface. Then, wipe down the outer surface. Attach a tube or brush extension to your vacuum and clean the vents on the back of the fan to remove dust and debris inside. Next, twist the top of the fan counterclockwise to remove it from the bottom. Wipe down the inside of both pieces with a damp cloth. Finally, reassemble your fan and plug it back in.