X
This article was co-authored by wikiHow Staff. Our trained team of editors and researchers validate articles for accuracy and comprehensiveness. wikiHow's Content Management Team carefully monitors the work from our editorial staff to ensure that each article is backed by trusted research and meets our high quality standards.
This article has been viewed 101,397 times.
Learn more...
Clogs in your iPhone's microphone can result in bad audio on voice recordings or poor call quality. Cleaning out your microphone is a quick and simple solution! You can use tools or specially designed cleaning products to remove the blockage efficiently.
Steps
Method 1
Method 1 of 2:
Using a Tool to Dislodge Debris
-
1Use a toothpick to carefully pluck out any dust or dirt. Take the point of the toothpick and poke it just barely into the microphone hole, twist it around, and pull it back out. Repeat as needed until clean. To avoid damaging your iPhone:
- Don’t push the toothpick too far into the microphone. It may be helpful to start at an angle. Insert the point so it’s just past the inner rim of the opening but not farther.
- You can puncture the microphone if you jam it in down the center. You’ll feel it pop if you’ve gone too far.
- Make small, gentle movements and go slowly.[1]
-
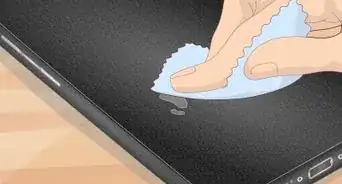
2Try a super-soft bristled toothbrush for a more gentle method. If the idea of shoving a wooden stick into your phone is too scary, try using a clean toothbrush with super-soft bristles. Gently brush the microphone hole to sweep away any blockages.[2]Advertisement
-
3Opt for a small paint brush if you don't have a spare toothbrush. If you happen to have a small craft brush like the kind that comes with a children’s watercolor kit, you can use it as a cleaning tool. Brush around the microphone and allow the thin bristles to poke into the hole.[3]


Advertisement
Method 2
Method 2 of 2:
Using a Cleaning Product to Remove Dirt
-
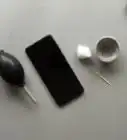
1Use compressed air to gently puff away any stuck debris. Compressed air is a great tool for cleaning dust and dirt from inside electronics and other hard to reach places. Pick up a can at your local retailer. Some tips for success:
- Never blow the air directly into the hole as that can damage your phone.
- Aim the blast at an angle parallel to the microphone for best results.[4]
-
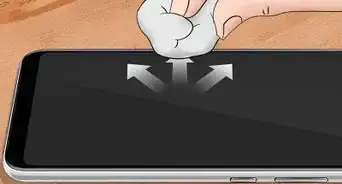
2Use an electronics cleaning putty to pull out any stubborn gunk. You can purchase the sticky cleaning product online or in stores. Take a palmful of the putty and press it gently into the microphone hole and quickly remove. Repeat as needed til your microphone is squeaky clean.[5]
- Do not allow the slime to sit for more than a couple seconds or it can begin to ooze and ruin the device.
-
3Make your own cleaning putty if you'd rather do it yourself! If you’d like to make your own cleaning putty you’ll need 12 ounces of warm water, ¼ cup of borax, and 5 ounces of white school glue. To put it together, follow these directions:
- In a paper cup, dissolve the borax in 8 ounces of warm water. Set aside.
- In a separate bowl, combine remaining water and school glue. Mix well.
- Add the borax water mixture and stir together until firm.
- Knead the substance for about 5 minutes or until it forms into a dry ball of ooze.
- Use your homemade cleaning putty as you would store bought.
- If the putty will not form into a ball do not use as a cleaner. Try adding more borax until it reaches the right consistency.[6]


Advertisement
Warnings
- Do not use liquids or chemical cleaners.⧼thumbs_response⧽
- Do not allow cleaning putty to sit for more than a couple of seconds.⧼thumbs_response⧽
- Never blow compressed air directly into the microphone.⧼thumbs_response⧽
- Do not stick tools too far into the microphone hole.⧼thumbs_response⧽
- Do not use homemade cleaning putty if it won’t form into a ball.⧼thumbs_response⧽
Advertisement


References
- ↑ https://youtu.be/0kPLXRe2j98?t=61
- ↑ https://www.padandquill.com/blog/2016/04/01/how-to-clean-iphone/
- ↑ https://www.padandquill.com/blog/2016/04/01/how-to-clean-iphone/
- ↑ https://youtu.be/QJlfUDbnFVE?t=51
- ↑ https://smartphones.gadgethacks.com/how-to/right-way-clean-your-dirty-phone-tablet-0164075/
- ↑ https://www.cnet.com/how-to/how-to-make-cleaning-slime-for-electronics/
About This Article

wikiHow Staff
wikiHow Staff Writer
This article was co-authored by wikiHow Staff. Our trained team of editors and researchers validate articles for accuracy and comprehensiveness. wikiHow's Content Management Team carefully monitors the work from our editorial staff to ensure that each article is backed by trusted research and meets our high quality standards. This article has been viewed 101,397 times.
How helpful is this?
Co-authors: 2
Updated: July 13, 2022
Views: 101,397
Categories: Cell Phone Maintenance
Advertisement