This article was co-authored by wikiHow staff writer, Nicole Levine, MFA. Nicole Levine is a Technology Writer and Editor for wikiHow. She has more than 20 years of experience creating technical documentation and leading support teams at major web hosting and software companies. Nicole also holds an MFA in Creative Writing from Portland State University and teaches composition, fiction-writing, and zine-making at various institutions.
This article has been viewed 23,834 times.
Learn more...
This wikiHow teaches you how to organize your inbox with colorful labels using Gmail on a computer. After setting up your color-coding system, you can use Gmail's smart filters to automatically color-code messages based on certain criteria. Though you can assign text labels to messages on your Android, iPhone, or iPad, there are no color-coding options in the mobile app.
Steps
Creating Color-Coded Labels
-
1Sign in to https://www.gmail.com. You can use any web browser on your computer to create and assign color-coded labels to your Gmail messages. The mobile app does not support color-coded labels, so you'll need to use a computer.
- The colored labels you create and assign will appear on the message's subject in the inbox.
- Labels also behave like folders. Your label list appears in the Inbox menu along the left side of Gmail, and you can click a label to view all of its corresponding messages.
-
2Advertisement
-
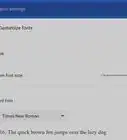
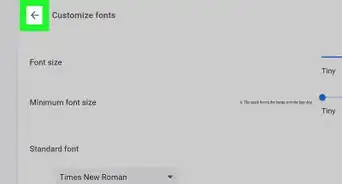
3Click Settings. It's near the middle of the menu.
-
4Click the Labels tab. It's near the top-center part of the page below the "Settings" header.
- If you want to change the label color of an existing label rather than create a new one, skip to step 6.
- Labels that are automatically created by Gmail appear at the top of the page under the "System labels" header. Scroll down to the "Labels" header near the bottom of the page to find any labels you've created yourself.
-
5Scroll down and click Create new label. It's under the "Labels" header, which is toward the bottom of the page.
-
6Enter a label name and click Create. The name you assign the label is how it will appear on your message. You'll also see the label name appear in the panel that runs along the left side of Gmail.
- If you want to nest this label under an existing label, check the "Nest label under" box, then select an existing label from the menu. For example, if you have a Work label and want to create a label called Human Resources, you'd select the Work label from the menu.
-
7Click the ⁝ menu on the label name. You should find the label at the bottom of the label list, which is in the left panel. The three-dot menu appears when you hover the mouse over the label's name.
- If you don't see the label, scroll to the bottom of the list and click More to expand the rest of the option.
-
8Click Label color. It's at the top of the menu. This expands the color panel.
-
9Select a color. Click one of the existing colors, or click Add custom color to choose font and background colors of your own.
- The label icon that appears with the label name in the left column will change to reflect the color you selected.
- If you click Add custom color, you can click a background color for the label in the left panel, a font color from the right panel, and then click Apply.
-
10Select the message(s) you want to label. You can select multiple messages clicking the checkboxes to the left of each message's subject. Once you've selected at least one message, some icons will appear along the top of the inbox.
- You can also search for messages to label. How to Find Old Emails in Gmail for tips on searching for messages.
- Once you get the hang of labels, check out the Color-Coding Automatically with Gmail Filters method to learn how to automatically color-code new and existing messages based on sender, subject, and other criteria.
-
11Click the label icon. It the next-to-last icon above the inbox and looks like a gift tag (a rectangle with a pointed right side).
-
12Select your label. This assigns the colored label to the selected (messages) in the inbox. The label also appears at the top of the message when you open it.
- Assigned labels will appear on your messages in the Android, iPhone, and iPad apps, but they won't be color-coded.
- Since messages can have more than one label, you can repeat these steps to add more labels.
- To remove a label from a message, open the message, then click the X on the tag at next to the subject.
-
13Browse messages by label. Once you've added your color-coded label(s) to messages, you can quickly find those messages in two ways:
- Search for the label's name in the Search bar at the top of the screen.
- Click the label's name in the Inbox menu on the left side of Gmail to display all messages with that label.


Color-Coding Automatically with Gmail Filters
-
1Sign in to https://www.gmail.com. Once you've created color-coded labels, you can use them with Gmail's filtering system to automatically color-code incoming messages based on certain criteria. Start by opening Gmail in the browser of your choice.
- If you haven't already done so, you should create at least one color-coded label before you proceed. See Creating Color-Coded Labels to learn how.
-
2
-
3Click Settings. It's near the middle of the menu.
-
4Click the Filters and Blocked Addresses tab. It's near the top-center part of the page below the "Settings" header. If you have any existing email filters, they will appear here.
-
5Click Create a new filter. It's one of the blue links in the top section.
- To edit an existing filter, click edit to the right of the filter's name.
-
6Select the criteria for adding the label. The color-coded label you've created will automatically be assigned to all messages that match the criteria you enter here. Here are some examples:
- If you want to assign your pink wikiHow label to all messages coming from "webmaster@wikihow.com," you'd enter webmaster@wikihow.com into the "From" field.
- To assign the label to all messages coming from anyone with an "@wikihow.com" email address, you'd enter *@wikihow.com instead.
- If you want to assign the label to messages from webmaster@wikihow.com that includes the text "Hello," you'd enter webmaster@wikihow.com into the "From" field and Hello in the "Has the words" field.
-
7Click Create filter. It's the gray link at the bottom of the window.
- If you're editing an existing filter, this button will say Continue instead.
-
8Check the box next to "Apply the label." It's near the center of the options list.
-
9Select a label from the "Choose a label" menu. Clicking a label's name will add it to the filter.
- You can also create a new label here by clicking New Label. You'll just need to assign its colors after creating the filter, which is easy to do using the steps in the "Creating Color-Coded Labels" method.
-
10Check the box next to "Also apply the filter to matching conversations." It's at the bottom of the options list. This ensures that messages which already match these criteria are also color-coded properly.
-
11Click Create filter. It's the blue button at the bottom-right corner of the window. The filter is now created. Color-coded labels will be added to all new and existing messages that match the filter's criteria.


About This Article

1. Sign into Gmail.com.
2. Click the gear.
3. Click Labels.
4. Create and save a label.
5. Click the three-dot icon on the label.
6. Click Label color.
7. Select a color.
8. Apply the label to messages.