This article was co-authored by wikiHow Staff. Our trained team of editors and researchers validate articles for accuracy and comprehensiveness. wikiHow's Content Management Team carefully monitors the work from our editorial staff to ensure that each article is backed by trusted research and meets our high quality standards.
wikiHow marks an article as reader-approved once it receives enough positive feedback. This article received 40 testimonials and 95% of readers who voted found it helpful, earning it our reader-approved status.
This article has been viewed 2,551,106 times.
Learn more...
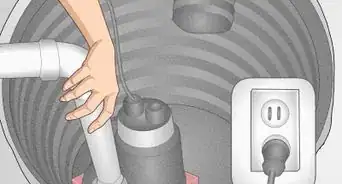
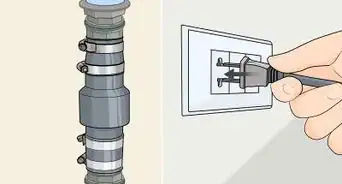
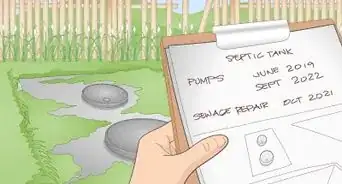
Most private septic systems are made up of two parts: the holding and digesting tanks, and the dispersal field.[1] As the first holding tank fills up, the liquid waste will transfer to the second tank. Once the second tank fills with liquid, it will disperse into the soil below it. The system shown here is a small system, designed for limited use by two people with no laundry. The tank is much smaller than required by building codes, and the design is missing some important items such as internal baffles and a qualified site assessment. This system uses two 55 US gal (210 L) drums, as opposed to the 1,000–2,000 US gal (3,800–7,600 L) tanks used for a standard home septic system. The system also has a dispersal field about one third that of a large home.
Property owners planning a system similar to this one should be aware that this system would not pass inspections from any public health department in the USA and could subject the owner to a fine if the system was discovered in use.[2] On the other hand it is better to safely dispose of waste than not to. Today's water-saving toilets use less than two gallons per flush. This system will handle such a load. For people living in places without septic treatment, it could be a lifesaver.
Steps
Cutting the Tanks
-
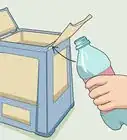
1Cut a hole in the top of each drum that’s the same size as the toilet flange’s outside measurement. Measure the outside diameter of the toilet flange you’re using. Place the hole against the edge of the drum so you can easily connect them to pipes. Use a saber saw to cut through the drums.
-
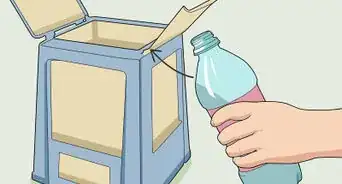
2Attach a 4 in (10 cm) toilet flange to each hole. Push the flanges into the top of each tank so they fit flush. Screw the flanges into the tanks so they don’t move or shift after you place them.Advertisement
-
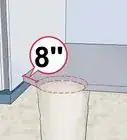
3Cut a 4 in (10 cm) hole in the first drum on the opposite side as the hole in the top. Place the hole about 4–5 inches (10–13 cm) down from the top of the drum and make sure it lines up with the hole on top of the tank. Cut the hole with a saber saw or a hole saw.
-
4Cut 2 holes in the side of the drum at 45-degree angles from the center of the hole on top. Find the center line running through the middle of the hole on top of the drum. Make 45-degree angles from either side of the centerline and mark it on the second drum. Use a saber or hole saw to cut through the side of the barrel and make your holes.


Placing the Tanks Underground
-
1Dig a trench that’s 4 × 26 × 3 ft (1.22 × 7.92 × 0.91 m). Use either a shovel or an excavator to make a hole in the spot where you want your tank. Keep digging until the hole is 4 feet (1.2 m) wide, 26 feet (7.9 m) long, and 3 feet (0.91 m) deep.[3]
- You can usually rent excavators for digging from a heavy machinery supply store. Check for equipment rentals online.
-
2Place the drum with 1 side hole at the end of the trench. Make sure the drum is level when you set it down. Check that the top of the drum is at least 4 inches (10 cm) below the surface.
-
3Dig a hole 1 ft (30 cm) deeper for the placement of the second drum in front of the first. Make your hole the same diameter as the drum you’re placing in it so it has a tight fit and doesn’t move around.
-
4Level the hole with gravel until the 90-degree bend fits from the hole in the side of the top drum to the toilet flange of the lower drum. Dry-fit the 90-degree bend between the 2 drums to see if the holes line up well. Dig the hole slightly deeper if you need to make the pipe line up better.
-
5Cut 3 1⁄2 and 2 1⁄2 in (8.9 and 6.4 cm) pieces of 4 in (10 cm) ABS pipe and glue them onto the bend. Cut the ABS pipe pieces, or nipples, with a hacksaw. Fit the pieces into the bend and use PVC glue to secure them in place.
-
6Test the fit for alignment between the two drums. Fit the end of the 2 1⁄2 in (6.4 cm) nipple into the side hole on the first drum. Make sure the nipple on the other end lines up with the hole on top of the second drum.
-
7Glue the end of the 3 1⁄2 in (8.9 cm) nipple into the toilet flange on the second tank. Use PVC glue to secure the bend in place. Don’t worry about the connection to the first drum yet since you’ll connect it later.
-
8Glue a Y-bend to a 3 1⁄2 in (8.9 cm) nipple and add a 45-degree bend to the angled portion of it. Use your PVC glue to secure a nipple to the end of the Y-bend. Align the angled pipe on the Y-bend so it meets the incoming waste line, and glue it into the toilet flange.
-
9Cut and glue 2 1⁄2 in (6.4 cm) nipples to one end of the 45-degree bends at and insert them in the side of the lower drum. Point the ends of the 45-degree bends so they’re perpendicular to the bottom of the trench.


Connecting the Drain Pipes
-
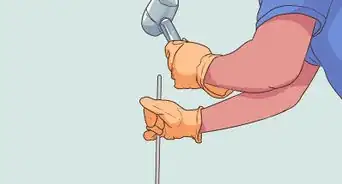
1Pound a stake into the ground so that the top of the stake is level with the bottoms of the 45-degree bends. It doesn’t matter what kind of stakes you use. Drive the stakes into the ground using a mallet or a hammer.
-
2Tape a 1 in (2.5 cm) wide block to the end of a 4 ft (1.2 m) level. This will help make sure you create sloped drain pipes so your tanks can empty out.
-
3Place another stake about 3 7⁄8 ft (1.2 m) down the trench from the first one. Use your hammer or mallet to drive the stake down until it’s the same height as the first.
-
4Lay the end of the level without the block on the first stake and the block on the second. Pound the second stake down until the level is balanced. The second stake is now 1 inch (2.5 cm) lower than the first, or 1⁄4 inch (0.64 cm) lower per 1 foot (30 cm).
-
5Repeat this process until you have stakes the length of the trench. Continue adding stakes down the rest of the trench every 3 7⁄8 feet (1.2 m) from the last one so the stakes slope away from the drums.
-
6Place gravel in the trench until the top of the gravel is level with the top of the stakes. The gravel will now slope away from the drums at 1⁄4 inch (0.64 cm) per 1 foot (30 cm) of horizontal distance.
-
7Place 20 ft (6.1 m) of perforated drain pipe onto each hole on the second drum. Slide the ends of the drain pipes into the 45-degree bends on the lower drum. Make sure the holes in the pipes face down so liquids can soak back into the ground.
-
8Check the pipes with the level to see if the 1⁄4 in (0.64 cm) grade is consistent along the length of the pipe. Adjust the slope by adding or removing gravel under the pipe.
-
9Seal the 45-degree and 90-degree bends to the lower and upper drums, respectively. Use a 2-part epoxy or silicone caulk for the best seal on your drain pipes. Try using flex pipe for this, so that if the ground shifts it will give a little.
-
10Fill the lower drum with water to prevent it from collapsing under the weight of the gravel. Bury the trench to the top of the bottom drum with the remaining gravel.
-
11Lay landscape fabric over the gravel. This will prevent the soil from seeping into the gravel and ensure that you maintain good drainage on your tanks.
-
12Fill the remaining trench area with soil, compacting well to the original grade. Make sure the ground is level when you finish filling in the area with your soil. Leave the top pipe from the first tank exposed so you can easily access the tanks if you need to drain them later.
-
13Fill the upper drum with water. Pour the water directly down the exposed pipes from the top drum. Continue filling the drum until it’s full and place a cap on top to seal it.


Community Q&A
-
QuestionWhat is considered low usage?
 Community AnswerLow usage is under 125 gallons per day.
 -
QuestionWhat is the purpose of the 'y' elbow on the first tank? Is that left open or sealed when completed? If left open, won't it stink?
 Community AnswerThat's your clean out, it takes a threaded cap or plug.
 -
QuestionHow much water do you fill it with?
 Community AnswerThe key word is "fill." Continue to place water into the drum until the level no longer increases.
Warnings
- This is a very small capacity system. This is not designed to meet the needs of a large household. It is designed for a small travel trailer and two people. To maximize the life of this mini system, do not put anything in the septic system except water, human waste, and toilet paper. Otherwise, you may have to pump the upper drum once a year or so. The system shown here only needs to be pumped twice in 5 years.⧼thumbs_response⧽
- Don't drive over the area that contains the drums.⧼thumbs_response⧽
- Follow local Septic Regulations when constructing a septic system. It is illegal to install a septic system without a permit. The permit will detail the local requirements for installation of a septic system.[4]⧼thumbs_response⧽
- Don't place your septic system too close to trees, as tree roots will grow into your line, and cause them to clog and with time, cause harm to your system.[5]⧼thumbs_response⧽
Things You'll Need
- 9 cubic yards (6.9 m3) of 3/4 or 1 1/2 crushed rock or blue metal
- 80 square feet (7.4 m2) of landscape fabric
- 2 plastic drums that are 55 US gal (210 L)
- 10 feet (3.0 m) of 4 in (10 cm) ABS plastic pipe
- 4 in (10 cm) ABS 90-degree bend
- 4 in (10 cm) ABS Y-bend
- 3 ABS 45-degree bends with 4 in (10 cm) diameters
- 40 feet (12 m) of 4 in (10 cm) perforated drain pipe
- 2 drain pipe couplers with 4 in (10 cm) diameters
- 2 toilet flanges with 4 in (10 cm) diameters
- Level
- 10 wood Stakes
- PVC glue
- Two-part epoxy or silicone sealant
- Wood block that’s 1 in (2.5 cm) thick
- Duct tape
- 4 in (10 cm) ABS removable cap


References
- ↑ https://www.epa.gov/septic/how-your-septic-system-works
- ↑ https://www.tn.gov/environment/permit-permits/water-permits1/septic-systems-permits/ssp/permit-water-septic-system-construction-permit.html
- ↑ https://www.youtube.com/watch?v=uX-pvPDl9T4
- ↑ https://www.cardinia.vic.gov.au/info/20051/building/22/get_a_permit_for_a_septic_system#section-7-enquiries
- ↑ https://doh.wa.gov/community-and-environment/wastewater-management/septic-system/caring-your-system
About This Article