This article was co-authored by Josh Goldbach. Josh Goldbach is an Outdoor Education Expert and the Executive Director of Bold Earth Adventures. Bold Earth leads adventure travel camps for teenagers all over the world. With almost 15 years of experience, Josh specializes in outdoor adventure trips for teens both in the United States and internationally. Josh earned his B.A. in Psychology from Eckerd College in St. Petersburg, Florida. He’s also trained as a wilderness first responder, a Leave No Trace master educator, and a Level 5 Swiftwater rescue technician.
This article has been viewed 10,228 times.
Whether you’re on a camping trip or in your backyard, there’s just something so primal and appealing about cooking over an open fire. Cooking over a campfire isn’t actually that different from using a barbeque, and some techniques are even similar to cooking on a stove, so you’ll probably be able to pick it up pretty quickly. Once your fire is blazing away and you have some hot coals ready to go, choose a cooking technique based on the type of food you want to cook and the utensils you have available. As with all types of cooking, feel free to get creative with your recipes and techniques and try to have fun!
Steps
Getting Your Fire Going
-
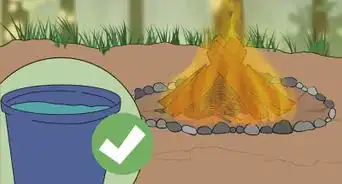
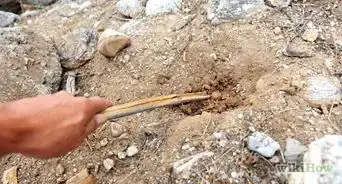
1Choose a safe, clear location for your campfire. Pick a safe spot to build your fire like a pre-dug fire pit or a flat dirt area without any flammable materials, such as dried leaves or pine needles, on the ground that could catch on fire. Make sure there are no low-hanging tree branches or power lines and that the sides of the fire are clear of things like tents for about 10 ft (3.0 m) in every direction.[1]
- Other things on the ground to avoid when selecting a campfire site include tree roots and grass.
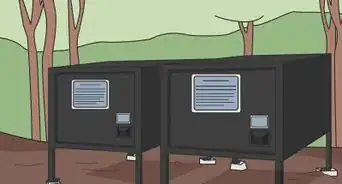
- Pre-built fire pits at campsites are ideal because they usually already have high metal sides and sometimes even a built-in grill.
- A general rule is that you should have at least 3-times the height of the fire of clear space above the fire.
-
2Create a complete rock ring or a U-shaped rock wall to contain your fire. Gather some large rocks from the area and build the containing wall for your fire. Build a full circle if you plan to use the fire for more than just cooking, like if you want to sit around the fire and hang out all night after dinner. Make a U-shaped wall if the sole purpose of the fire is to cook because this shape makes it easier to add wood while you’re cooking.[2]
- As an alternative to rocks, you can use green wood logs, which is wood that is fresh and still contains moisture, so it won’t catch on fire easily like dry, dead wood.
- You can create a kind of makeshift chimney by placing a large, tall rock at the back of your fire pit, which will help direct the smoke away towards the back.
Advertisement -
3Build a small fire at least 30-45 minutes before you plan to start cooking. Place crumpled newspaper, dry leaves and brush, or a firestarter brick in the center of the firepit and arrange kindling over it, then light the pile on fire to get your campfire started. Wait for the kindling to catch fire, then add some of your smallest wood pieces and let the fire burn down for 30 minutes. Add large pieces of wood one at a time as needed after the initial fire burns down.[3]
- An ideal cooking fire consists mainly of hot coals with just 1-2 burning logs at a time. Building your fire patiently and letting it burn down gently for at least 30-45 minutes will help you achieve this.
- Don’t be tempted to add all your firewood near the beginning and make a huge fire to start with. Big fires burn too fast and you’ll just be left with a bunch of coals that are too hot for cooking—not to mention you’ll be out of wood!
-
4Use dry hardwood like oak, ash, and beech to fuel your fire, if possible. Hardwoods burn for a long time and provide slow, steady heat. Purchase or gather this type of firewood for your campfire if you can find it.[4]
- You can still fuel your fire with softwoods like pine if you don’t have any other option, but just keep in mind that they will burn much faster and hotter, which isn’t as good for cooking.
- Avoid any pieces of wood that are painted or treated because they can release harmful chemicals when burned.
- Many gas stations and rural stores sell bundles of firewood if you can’t find dry, dead wood lying around.
-
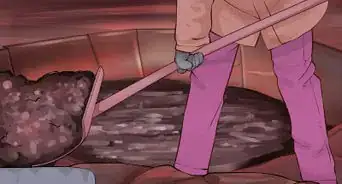
5Move the coals to one side of the fire pit and burn wood on the other side. Use a fire poker or a long stick to push the coals and burning wood around to arrange your fire pit this way. This will give you a continuous supply of fresh, hot coals to cook over.[5]
- Whenever you need to add another log or two to the fire, move new coals over from the burning side to the coal side first. Then add the new wood to the side where you’re burning logs.
- Just like cooking on a charcoal barbeque, the best spot to cook over your campfire is usually over the hot coals, rather than directly over the flames, so that’s why it’s best to organize your fire like this.


Using Different Cooking Techniques
-
1Skewer simple campfire foods like hotdogs and marshmallows. Stick 1-2 hot dogs or marshmallows onto the end of a long metal campfire skewer or a sharp, sturdy stick. Hold the end of the skewer with the food on it above the coals in your campfire at a level that the food starts to brown, but doesn’t burn. Rotate the skewer every few minutes until the food is browned to your liking.[6]
- The exact height to hold skewered foods over a fire depends on how hot the fire is, so you’ll just have to experiment to find the sweet spot that works best for you.
- Keep in mind that the handle of a metal skewer can get hot if you hold it too close or for too long over the fire. You can wrap a hand towel or something similar around the handle if it gets too hot.
- If you’re using a stick as a skewer, make sure you don’t hold it directly over any flames or it can catch on fire easily.
-
2Grill things like steaks, pieces of chicken, and burgers. Place a metal grate across the fire so the sides of the grill are supported by the rock ring. Put anything you want to cook on the part of the grill over the coal side of the fire and grill the foods on both sides.[7]
- The technique for grilling over a fire is the same as grilling on a barbeque grate.
- Different foods have different cook times and doneness requirements. You can use a meat thermometer to check when things like chicken and pork are all the way done or to know when to remove a steak from the grill for the perfect doneness.
- For example, pieces of chicken might take 15 minutes per side to cook all the way through until they reach a safe internal temperature of 165 °F (74 °C). Something like steak that doesn't have to cook all the way through might only take 5-10 minutes per side to achieve your desired doneness.
-
3Cook vegetables or fish wrapped in foil. Wrap things like sliced onions, bell peppers, and zucchinis in foil to make roast vegetables, wrap whole potatoes to make baked potatoes, or wrap fillets of fish up to cook them hassle-free over your campfire. Place the foil packets on a grill or directly onto the coals towards one side of the fire where the coals are cooler than in the middle.[8]
- Cook times are super variable based on the type of foods you’re cooking and how hot the part of the fire you’re cooking over is. Something like sliced vegetables or a fish fillet might take about 20 minutes to cook, whereas a whole baked potato might take 40 minutes or more.
- You can add seasonings to the foil packets, such as olive oil or butter, salt and pepper, and any herbs or spices you like.
-
4Roast whole chickens or joints of meat on a spit. Place supports, like Y-shaped sticks or metal poles with hooks, on either side of the fire. Shove a straight stick or a metal pole through a whole chicken or something like a rack of lamb and place it on the supports over the fire. Turn the spit every few minutes for at least 2 hours to cook all sides evenly and cook the chicken or meat all the way through.[9]
- When dealing with chicken, it is important to be mindful of cross-contamination. If you don't have lots of resources to keep everything clean on your camping trip, it's a better idea to bring pre-cooked chicken.
- There is no exact height to roast something on a spit over a fire. Just make sure it is out of the reach of the flames so it cooks instead of burns.
- You can purchase a metal campfire spit kit that comes with the supports and the spit for under $100 USD. These usually allow you to adjust the height of the spit and some even have electric motors to turn it for you automatically.
- If you don’t have an actual campfire spit kit, you can improvise one out of sturdy sticks.
-
5Fry foods like bacon and eggs in a cast iron skillet. Place a heavy cast iron skillet or frying pan on a grill over your fire or directly onto the coals of the fire. Cook foods you would normally fry just like you’re doing it on the stove at home.[10]
- The pan will get very hot, so make sure you only handle it with an oven mitt or glove after it’s been on the fire. A long-handled grill spatula and set of tongs are also super useful tools, so you don’t have to reach too close to the fire to flip foods over in the frying pan.
- Never use a frying pan with a rubber or plastic handle that could melt or catch on fire.
- The amount of time it takes to cook something like bacon and eggs depends on what style of eggs you're making and how crispy you want your bacon. If you are just making a sunny-side-up fried egg and want medium-crispy bacon, it might just take 2-3 minutes for the egg and 5 minutes or so for the bacon.
-
6Make stews or soups in a cast iron pot or Dutch oven. Put the pot or Dutch oven on a grill over your fire or directly onto the hot coals. Add some oil or butter to the pot and toss in your sliced and diced vegetables, meats, and any seasonings or broths your recipe calls for. Wait for the dish to cook, which usually takes about 20 minutes longer over a fire than on a stove burner.[11]
- You can make anything you would make in a pot at home over a campfire using this technique.
- For example, you can try making curries, chilis, chowders, or hearty beef stews this way.
- You can also boil water in a cast iron pot or Dutch oven if you want to do something like boil potatoes or vegetables.


Expert Q&A
-
QuestionHow do you make a campfire that lasts all night?
 Josh GoldbachJosh Goldbach is an Outdoor Education Expert and the Executive Director of Bold Earth Adventures. Bold Earth leads adventure travel camps for teenagers all over the world. With almost 15 years of experience, Josh specializes in outdoor adventure trips for teens both in the United States and internationally. Josh earned his B.A. in Psychology from Eckerd College in St. Petersburg, Florida. He’s also trained as a wilderness first responder, a Leave No Trace master educator, and a Level 5 Swiftwater rescue technician.
Outdoor Education ExpertFor that, make sure that the fire has an adequate amount of oxygen. You're going to need some larger sticks that are going to form the long duration of your fire and continue feeding small- to medium-sized sticks for a period of time.
Warnings
- Always build your campfire in a safe, clear area where there is nothing nearby that could potentially catch on fire.⧼thumbs_response⧽
- Keep raw perishable foods like meats packed in a cooler on ice until right before you’re going to cook them.[14]⧼thumbs_response⧽
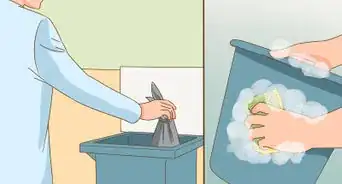
- Always remove anything that’s not wood ash, such as bits of foil, from the fire pit when you’re cleaning up and put it in a trash bag to dispose of properly.[15]⧼thumbs_response⧽


Expert Interview
Thanks for reading our article! If you’d like to learn more about camping, check out our in-depth interview with Josh Goldbach.
References
- ↑ https://koa.com/blog/how-to-cook-food-over-a-campfire-pro-campfire-cooking-tips/
- ↑ https://koa.com/blog/how-to-cook-food-over-a-campfire-pro-campfire-cooking-tips/#how-to-cook
- ↑ https://www.thekitchn.com/5-rookie-mistakes-to-avoid-when-cooking-over-an-open-fire-232730
- ↑ https://getoutside.ordnancesurvey.co.uk/guides/cooking-over-a-wood-camp-fire/
- ↑ https://www.thekitchn.com/5-rookie-mistakes-to-avoid-when-cooking-over-an-open-fire-232730
- ↑ https://www.realsimple.com/food-recipes/cooking-tips-techniques/campfire-cooking
- ↑ https://getoutside.ordnancesurvey.co.uk/guides/cooking-over-a-wood-camp-fire/
- ↑ https://koa.com/blog/how-to-cook-food-over-a-campfire-pro-campfire-cooking-tips/#how-to-cook
- ↑ https://getoutside.ordnancesurvey.co.uk/guides/cooking-over-a-wood-camp-fire/
- ↑ https://getoutside.ordnancesurvey.co.uk/guides/cooking-over-a-wood-camp-fire/
- ↑ https://www.outsideonline.com/2415125/dutch-oven-campfire-cooking
- ↑ https://getoutside.ordnancesurvey.co.uk/guides/cooking-over-a-wood-camp-fire/
- ↑ https://www.thekitchn.com/5-rookie-mistakes-to-avoid-when-cooking-over-an-open-fire-232730
- ↑ https://www.realsimple.com/food-recipes/cooking-tips-techniques/campfire-cooking
- ↑ https://getoutside.ordnancesurvey.co.uk/guides/cooking-over-a-wood-camp-fire/
About This Article