wikiHow is a “wiki,” similar to Wikipedia, which means that many of our articles are co-written by multiple authors. To create this article, volunteer authors worked to edit and improve it over time.
There are 10 references cited in this article, which can be found at the bottom of the page.
This article has been viewed 29,845 times.
Learn more...
Combat Application Tourniquets (CATs) are typically used in a combat environment by soldiers to control severe bleeding. The tourniquet is made of a self-adhering band with a windlass strap, a rod and a clip. It is an ideal tourniquet in combat because it small, lightweight and can be placed on the injured area using only one hand. But a CAT can also be used commercially to stop severe bleeding in the arms and legs. While a CAT is an effective way to address hemorrhaging or trauma on a wound, it is a temporary solution until a medical team arrives at the scene or other medical treatment is available.
Steps
Part 1: Preparing the Wound for a Combat Application Tourniquet
-
1Only apply a CAT on wounds on the arms and legs. These are areas where bleeding from the wound cannot be controlled by direct pressure.[1]
- A tourniquet does not work on the wounds on the head, neck, chest or abdomen; never apply a tourniquet on these areas as it can lead to further injury such as nerve damage.[2]
-
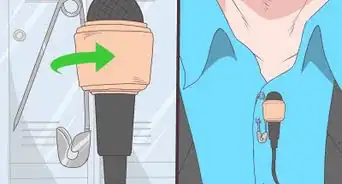
2Ask someone at the scene to call Emergency Medical Services. Call the person at the scene by their full name, if you know the person, and instruct them to call EMS immediately while you apply the CAT on the injured person or on yourself.
- If you don’t know anyone at the scene, point at someone close by and instruct them to call EMS. For example, “You in the black, please call EMS immediately”.
Advertisement -
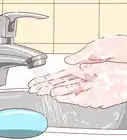
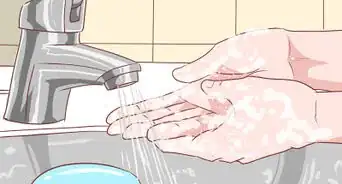
3Wash your hands thoroughly with antibacterial soap and clean water. This will prevent the transmission of harmful microorganisms into the wound.[3]
-
4Prepare the necessary materials. You’ll need:
- Combat Application Tourniquet - you can purchase one online or at your nearest medical supply store. If you do not have one readily available, you can use alternative material like a rope, belt, or elastic bandage.
- Two or three sterile dressings or a clean cloth.
- Sterile gloves.
- Medical tape.
- Scissors.
-
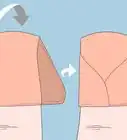
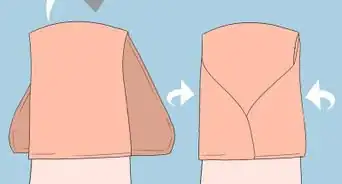
5Open the sterile dressing package. Do this by holding the upper two edges of the package and pulling it sideways to easily open it.
- Do not touch its content as this can make it unsterile.
-
6Explain the procedure to the injured person. Speak clearly to them and be honest by explaining the procedure will be quite painful. This will prepare them, and let them know what to expect. It will also establish trust and cooperation.[4]
-
7Put the sterile gloves on. Doing this will prevent the transmission of harmful microorganisms by creating a physical barrier between your hands and the surface or any fluids it comes in contact with.[5]
-
8Use the scissors to cut around any of the person’s clothing to expose the wound. You want to make sure you can see all of the wound so you know the extent of their injury.
-
9Take the sterile dressing or clean cloth and apply direct, firm pressure to the wound for five minutes. Applying direct firm pressure into the wound without interruption stops bleeding by compressing the sides of the torn blood vessel, thus reducing blood flow.[6]
- If the sterile dressing or clean cloth is already soaked, get another one and put it on top of the first sterile dressing or clean cloth. Doing this will help to absorb more blood from the wound.
-
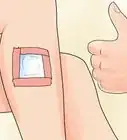
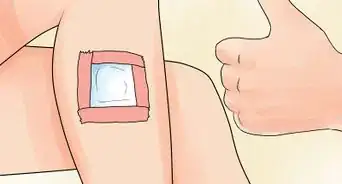
10After five minutes of continuous pressure, assess the wound. If bleeding has stopped, get a new sterile dressing or clean cloth and apply it on top of the wound. Secure the edges with medical tape and use the scissors to cut the tape.
- If the bleeding has stopped or appears under control, you do not need to apply a tourniquet.


Part 2: Applying the Combat Application Tourniquet
-
1Prepare to use a CAT if the wound is still bleeding. Keep in mind the use of a CAT should only be used as a last resort because it is a painful and prolonged application that can result in nerve damage.
-
2Instruct the injured person to take deep and slow breaths as you apply the CAT. As the procedure will be a painful one, slow, deep breathing will then slow down their sympathetic nervous system, which is responsible for pain perception. This will block pain signals travelling to their brain.[7]
- You can also talk to the person to distract them as you apply the tourniquet.
-
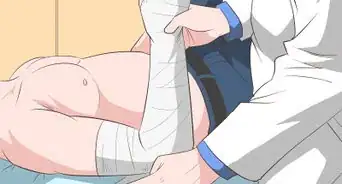
3Wrap the tourniquet at least 2 inches above the wound. The constriction caused by the CAT prevents blood from flowing into the wound, thus stopping the bleeding.
- Do not place the tourniquet below the injured area since it will not stop the bleeding and may even make it worse.
-
4Pass the tip of the CAT into the slit of the buckle and pull it tightly. This should be done the same way you would secure a belt around your waist.
-
5Twist the rod in either direction until the bleeding stops. You can twist it counterclockwise or clockwise.
-
6Place the rod inside the clip of the tourniquet to secure it. If bleeding from the wound still continues, get another CAT tourniquet and place it 2 inches above the first CAT tourniquet.
-
7Call for help immediately or check to make sure EMS is on its way. The faster help arrives the sooner medical treatment can be given and the less blood from the wound will be lost.
- When a tourniquet is in place, it will likely be uncomfortable since the area under pressure. There may be a heavy grip or tightening feeling around the wound. This is normal as the tourniquet is trying to prevent further blood loss.
-
8Loosen the tourniquet once EMS arrives at the scene or if the person indicates they are in severe pain. If the injured person cannot take it anymore and is screaming in pain, this may be a sign of compartment syndrome, where increased pressure builds up in the person’s muscles.[8]
- Adjust the tourniquet slowly while checking to see if there is still any bleeding from the wound. If there is no bleeding you may loosen the tourniquet but do not remove it. This is a precautionary measure in case bleeding starts again.


Part 3: Understanding When to Use a CAT
-
1Be aware of how a tourniquet works. When the self-adhering band on a tourniquet is tightened, pressure is placed at the site of bleeding, specifically in the artery that was injured. The pressure on the artery stops blood flow and blood loss from the wound.[9]
-
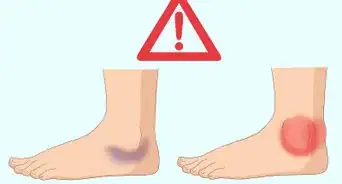
2Only use a CAT if there is heavy bleeding from a wound or life threatening injuries. Do not place the tourniquet on minor injuries as it may cause more harm than good due to the lack of blood supply to the lower area of the wound.[10]
- Heavy bleeding is characterized as excessive and continuous bleeding. Applying pressure to this injury may have no effect, so you’re only resort is a tourniquet.
- Heavy bleeding usually occurs from injured arteries located in the wrist, neck, upper arms and the thighs.
- There may also be heavy bleeding from large wounds on a person’s extremities.
-
3For slight injuries or bleeding, apply pressure to the wound and a bandage before using a tourniquet. If the bleeding does not stop, place a bandage on the wound.
- If it still does not stop, then you may use a tourniquet.
-
4Always remove the tourniquet if it has been on the wound for more than two hours. Prolonged use of a CAT can lead to nerve damage.[11]
- If the injured person’s leg or arm was amputated, do not remove or loosen the tourniquet. Amputation in the legs or arms may cause massive bleeding, so the tourniquet should remain in place.[12]
-
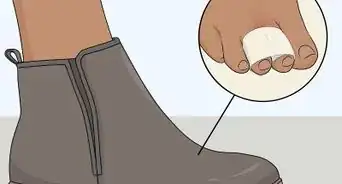
5Understand that CATs are painful to apply. While pain may vary from individual to individual, tourniquets will cause a level pain in the area. This could be a sharp, dull, throbbing or excruciating pain. As well, the longer the tourniquet is on, the more intense the pain becomes.
-
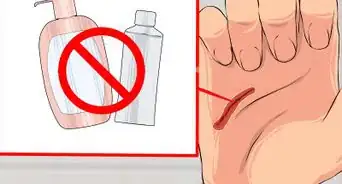
6Use cheaper, alternative material if you don’t have access or can’t afford a CAT. Though tourniquets are easy to use and reusable, they are not cheap. The estimated cost of a CAT is about $25.[13] So if you don’t want to spend money on a CAT or are in a situation where a CAT is not readily available, you can use alternative or cheaper material like a rope, a cloth, or an elastic bandage.
-
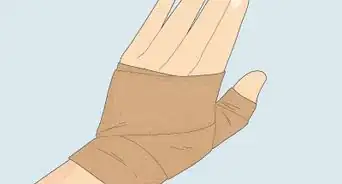
7Practice using a CAT on yourself. The most effective way to learn how to correctly apply a tourniquet is to try it on yourself first.
- Studies have shown that the incorrect use of the Combat Application Tourniquet can cause death. So, proper placement and use of the tourniquet is essential to prevent blood loss and death.[14]
- Take precautions when practicing since this procedure will cut the blood to your extremities. Do not keep the tourniquet in place for a long time. If you feel any numbness on the practice area, remove the tourniquet.


Things You'll Need
- A Combat Application Tourniquet (or alternative material like a rope, belt, or elastic bandage)
- Two or three sterile dressings or a clean cloth
- Sterile gloves
- Medical tape
- Scissors


References
- ↑ McCullough, J., 2007, September 17
- ↑ McCann, J., 2011, October 24
- ↑ Potter and Perry, 2005
- ↑ Potter and Perry, 2005
- ↑ Potter and Perry, 2005
- ↑ Thygerson, A., Thygerson, S., 2011, March 25
- ↑ Busch V., Magerl W., 2012, February
- ↑ Birch, K., n.d.
- ↑ National Association of Emergency Medical Technicians: Prehospital trauma life support: Military version. 6th ed. Mosby: St. Louis, Mo., 2006.
- ↑ National Association of Emergency Medical Technicians: Prehospital trauma life support: Military version. 6th ed. Mosby: St. Louis, Mo., 2006.
- ↑ Miller, R., Pardo, Jr., 2011
- ↑ Kragh JF Jr, Walters TJ, Baer DG, et al: “Practical use of emergency tourniquets to stop bleeding in major limb trauma.” Journal of Trauma. 64(2 Suppl):S38–S50, 2008.
- ↑ Walters, T., Baer, D., et al, 2004, August 11
- ↑ National Association of Emergency Medical Technicians: Prehospital trauma life support: Military version. 6th ed. Mosby: St. Louis, Mo., 2006.