X
This article was co-authored by wikiHow Staff. Our trained team of editors and researchers validate articles for accuracy and comprehensiveness. wikiHow's Content Management Team carefully monitors the work from our editorial staff to ensure that each article is backed by trusted research and meets our high quality standards.
This article has been viewed 18,141 times.
Learn more...
There are many finishes to choose from when you are deciding how to texture concrete. A “cove finish,” also known as a “mag swirl finish,” has become especially popular for driveways and outdoor areas that need a little bit of extra traction without holding too much dirt. All-in-all, the process and technique is relatively easy to pick up!
Steps
Part 1
Part 1 of 2:
Choosing the Right Tools for the Job
-
1Get a steel trowel with serrated edges. Almost any home improvement store will sell these tools. They are not specific to the cove finish, but it gives the surface the grainy texture needed for the traction once it cures.
- Avoid wood or homemade trowels because they often don’t have a truly straight edge that is needed to make the cove finish look professional.
-
2Find two solid knee pads or stadium seat cushions. The finish requires moving across your concrete surface before it is fully dry. You need to have a flat surface under your knees and toes to keep you from accidentally making impressions in the concrete as you move.[1]
- Be sure your pads are smooth surfaces that won’t absorb or transfer moisture.
- You need one pad to go beneath both of your knees together and one to go under both of your feet together, in a kneeling position.
Advertisement -
3Have another trowel handy as leverage. Your other hand will need something to hold onto as you lean out while your trowel hand works. By choosing another steel trowel, you can be smoothing excess concrete as you move.
- Never plant your balancing hand where you have already worked. This may be difficult, but you do not want to have to rework an area.
- If you have a stronger back and are able to keep leaned out and over for the period it takes to work, you can do without something for your non-working hand.


Advertisement
Part 2
Part 2 of 2:
Applying the Cove Finish
-
1Work your concrete to the point of floating. The finish comes after you float the surface, i.e. have compacted and let the surface partially dry. Where you typically see instructions to trowel or broom the surface is where you will do the cove.[2]
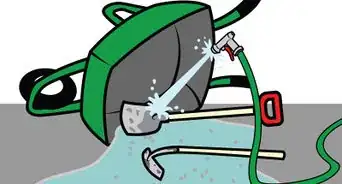
- Lay your concrete, screed it (level the excess concrete), and smooth the surface. Go ahead and run your edges and joints once before the finish so you know your boundaries.
- Float the surface by hand, compacting and removing moisture from the surface.
- Refer to your specific concrete mixture instructions for timing on how long it will take to partially dry. Temperature, humidity, and the mixture itself are all variables in determining how the concrete will dry that day.
-
2Start in the upper-left corner of each section. You will move left-to-right for a row and then right-to-left on the next row (think zig-zag). This will make for the most efficient work since sliding down to the end of a row can take up unnecessary time.[3]
- If you feel awkward working in the opposite direction of a previous row, you can move in the same way as before (more like reading the words on a page than a zig-zag). Just be careful scooting the pads and yourself around, especially if you are out in the middle of a pad of semi-wet concrete.
-
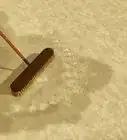
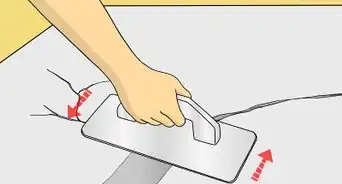
3Sweep the trowel in a semi-circle motion. The radius of your semi-circle will be about as wide as your trowel. Make sure the serrated edge is on the trailing end of your motion to leave the texture in the concrete instead of the smoothed-edge.[4]
- The more practice you have, you can typically do this in a single semi-circle. If it does not look like you want it, simply do another pass over it quickly.
- Apply gentle pressure with the trailing edge, lifting slightly towards the end of the motion. This will make sure the texture imprints but does not make a mess of the previous section or edge.
-
4Continue down the row overlapping the edges slightly. It will only need to overlap approximately 1 to 2 in (2.5 to 5.1 cm). The slight overlap will smooth out any over-exaggerated texture between the arcs.[5]
- Slide your pads carefully as you work. A toe-print down the line may need re-leveling.
- If you get to your last sweep of a row and don’t have room for a full arc, make one anyways overlapping the previous one. You’re better off texturing everything rather than leaving off an arc.
-
5Move down a row and continue overlapping the first slightly. Just as you overlapped left-to-right, you will also want a slight overlap with the top of your new row and the bottom of the previous one.[6]
- Continue overlapping right-to-left or left-to-right as well.
- Work to the end of that row and repeat the process until you are totally finished with your sections.
-
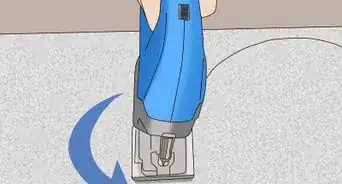
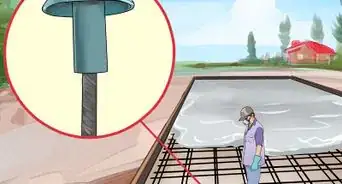
6Re-edge and groove your joints. Simply run the edging tool and joint tool you used previously along the seams again. The finishing may have smudged your edges slightly, so giving them another pass will make them clean again. That’s all there is to it![7]
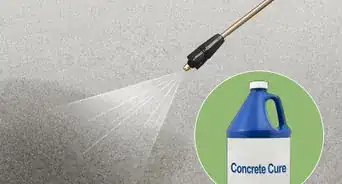
- You can now let your concrete cure and finish hardening. This typically involves wetting and covering the concrete with a plastic sheet.[8]
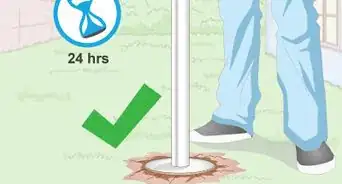
- Foot traffic is usually permitted after 24 hours, cars after about 2 weeks, and full curing after a month. Refer to your specific mix’s instructions to see what is required.[9]
- After about a month, you should also apply a sealant to make it more moisture resistant and easy to clean.[10]


Advertisement

References
- ↑ https://www.youtube.com/watch?v=T-hFQqjWv8E
- ↑ https://www.familyhandyman.com/masonry/pouring-concrete/how-to-finish-concrete/view-all/
- ↑ https://www.youtube.com/watch?v=T-hFQqjWv8E
- ↑ https://www.youtube.com/watch?v=T-hFQqjWv8E
- ↑ https://www.youtube.com/watch?v=T-hFQqjWv8E
- ↑ https://www.youtube.com/watch?v=T-hFQqjWv8E
- ↑ https://www.familyhandyman.com/masonry/pouring-concrete/how-to-finish-concrete/view-all/
- ↑ https://www.familyhandyman.com/masonry/pouring-concrete/how-to-finish-concrete/view-all/
- ↑ https://www.familyhandyman.com/masonry/pouring-concrete/how-to-finish-concrete/view-all/
About This Article

wikiHow Staff
wikiHow Staff Writer
This article was co-authored by wikiHow Staff. Our trained team of editors and researchers validate articles for accuracy and comprehensiveness. wikiHow's Content Management Team carefully monitors the work from our editorial staff to ensure that each article is backed by trusted research and meets our high quality standards. This article has been viewed 18,141 times.
How helpful is this?
Co-authors: 2
Updated: December 30, 2020
Views: 18,141
Categories: Working with Concrete and Cement
Advertisement