X
wikiHow is a “wiki,” similar to Wikipedia, which means that many of our articles are co-written by multiple authors. To create this article, volunteer authors worked to edit and improve it over time.
This article has been viewed 66,975 times.
Learn more...
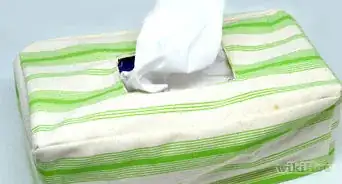
A shoebox is a handy size for all sorts of things from gift giving to storage of knick knacks, photos and papers. However, the standard shoebox isn't that pretty even though it's functional; if you want to use it as part of your home décor, you'll probably prefer that it blends in with the theme rather than advertising its former contents. Covering a shoebox with either paper or fabric will overhaul the box and make it suitable for many reuses.
Steps
Method 1
Method 1 of 2:
Covering a shoebox with fabric
-
1Choose the fabric. Select fabric that matches with your décor or storage area. It can be fabric you already own or you might wish to purchase fabric especially for the project.
-
2Cut the fabric covering to size. You'll need to cut the fabric for the narrow ends, the long sides and the lid, as follows:
- Measure the narrow ends of the shoebox, allowing for an equal overlap around the edges of 5cm/2 inches width and 7.5cm/3 inches to the depth. Using this measurement, cut two squares of fabric.
- Measure the sides of the shoebox, making the length just slightly short of the full side length and allowing for an overlap of 7.5cm/3 inches for the depth of each side. Using this measurement, cut two rectangles of fabric.
- Measure the lid. The measurement should be the same as the lid plus double the depth of the lid's sides. Cut a fabric rectangle to this dimension.
Advertisement -
3Cover the shoebox. Attach the end fabric pieces first. Ensuring that the fabric piece overlaps equally all of the way around, adhere it to the first end with fabric glue. At the corners, cut into the fabric to make vertical slits that will allow you to fold the fabric down around the corner. Spread the glue into the areas of overlap, then press down all the overlapping edges of the fabric, sticking the side overlaps first, then the top and finally, the base overlap.
- Be sure to smooth out the fabric as you go.
-
4Attach the side pieces to the shoebox. Check that the overlap is equal. Glue the fabric to the sides, ensuring that the overlap is glued inside the box and under it.
- Be sure to smooth out the fabric as you go.
-
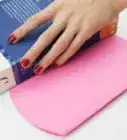
5Attach the fabric to the box lid. Place the fabric facing wrong side up onto a flat surface. Apply glue to the shoebox lid, then carefully place it down onto the fabric, taking care to ensure that there is even overlap all of the way around the lid. Turn the lid over and smooth out the fabric. Cut the corner edges into a slit to make it easy to fold over the fabric. Then glue the overlap pieces over the sides and tuck them under to complete the cover.
-
6Allow to dry thoroughly. Once dried, add embellishments if using, such as gluing on a bow, some buttons or drawing a design on the fabric with fabric markers or paint. Alternatively, simply leave the covered shoebox as it is.
- If you want to know what the box contains, glue on a fabric label and use a fabric marker or fabric paint to stencil on the word representing the contents.
-
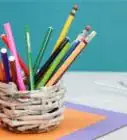
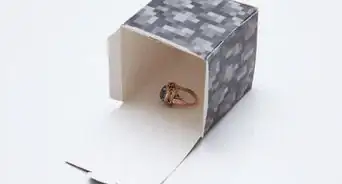
7Done. The fabric covered shoebox is now ready for using as storage. Items that will fit well inside include photos, jewelry, craft supplies, small bottles, perfumes, herbs and spices in their containers, clothes pins, and so forth.


Advertisement
Method 2
Method 2 of 2:
Covering a shoebox with paper
-
1Choose the paper. Find good quality wrapping paper. If the box is to be used for a gift, choose paper that suits the recipient. If the box is for storage of your items, choose paper with a pattern, design or color that you like.
-
2Cut the paper covering to size. You'll need to cut the paper for the narrow ends, the long sides and the lid, as follows:
- Measure the narrow ends of the shoebox, allowing for an equal overlap around the edges of 5cm/2 inches width and 7.5cm/3 inches to the depth. Using this measurement, cut two squares of paper.
- Measure the sides of the shoebox, making the length just slightly short of the full side length and allowing for an overlap of 7.5cm/3 inches for the depth of each side. Using this measurement, cut two rectangles of paper.
- Measure the lid. The measurement should be the same as the lid plus double the depth of the lid's sides. Cut a paper rectangle to this dimension.
-
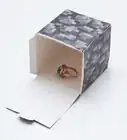
3Cover the shoebox. Attach the end paper pieces first. Ensuring that the paper piece overlaps equally all of the way around, adhere it to the first end with paper glue. At the corners, cut into the fabric to make vertical slits that will allow you to fold the paper down. Spread the glue into the areas of overlap, then make a crisp crease to fold the paper down firmly over each of the overlapping edges of the box, sticking the side overlaps first, then the top and finally, the base overlap.
-
4Attach the side pieces to the shoebox. Check that the overlap is equal. Glue the paper to the sides, ensuring that the overlap is glued inside the box and under it.
-
5Attach the paper to the box lid. Place the paper facing wrong side up onto a flat surface. Apply glue to the shoebox lid, then carefully place it down onto the paper, taking care to ensure that there is even overlap all of the way around the lid.
-
6Turn the lid over and smooth out the paper as needed. Cut the corner edges of the paper into a slit each side, to make it easy to fold it over the corner. Make very crisp creases to fold the overlap paper over, then glue the overlap pieces over the sides of the lid, tucking them under to complete the cover.
-
7Allow to dry thoroughly. Once dried, add embellishments if using, such as gluing on a ribbon or burlap bow, drawing a design or gluing on some ribbon. Alternatively, simply leave the covered shoebox as it is.
- If you want to know the contents of the box, add a paper label and neatly write or stencil on the word describing the contents. Using a calligraphy pen is another option for an elegant flair.
-
8Done. The paper covered shoebox is now ready for using as storage. Items that will fit well inside include photos, jewelry, craft supplies, small bottles, perfumes, herbs and spices in their containers, clothes pins, and so forth.


Advertisement
Community Q&A
-
QuestionWhat if the shoebox lid is attatched to the main box?
 StarWarsStarWarsCommunity AnswerUse a bigger piece of fabric or paper. Attach it the same way you would normally.
Advertisement
Things You'll Need
- Shoebox in good condition and clean
- Either fabric or paper, sufficient to cover the shoebox
- Scissors
- Ruler or measuring tape
- Pencil
- Markers
- Fabric or paper glue/craft glue
- Embellishments such as ribbon, burlap, bows, buttons, etc., as preferred (optional)

About This Article
Advertisement