This article was co-authored by wikiHow Staff. Our trained team of editors and researchers validate articles for accuracy and comprehensiveness. wikiHow's Content Management Team carefully monitors the work from our editorial staff to ensure that each article is backed by trusted research and meets our high quality standards.
There are 11 references cited in this article, which can be found at the bottom of the page.
The wikiHow Video Team also followed the article's instructions and verified that they work.
This article has been viewed 16,148 times.
Learn more...
Crocheted baskets are elegant looking, and they are so easy to make! You can quickly whip up a crocheted basket using jumbo sized yarn, which is ideal for giving the basket its structure. Try making a crocheted basket for a unique addition to your home décor, or as a gift for someone special!
Steps
Creating the Foundation Circle
-
1Choose a jumbo sized yarn and a US size Q (15 mm) crochet hook.[1] Using jumbo sized yarn will help to give your basket its structure. Otherwise, it will not stand up on its own. Choose a jumbo (size 7) yarn in the color and texture of your choice.[2]
- For an unconventional material, try using cotton clothesline. This will give your basket an even sturdier structure.
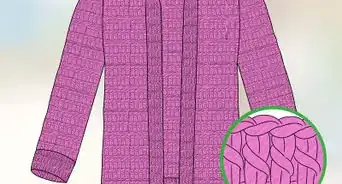
- If you don't have jumbo yarn, try holding 3 strands of super bulky yarn together and knitting with those.
-
2Make a magic circle. Wrap the yarn around all 4 of your fingers 2 times. Then, insert the crochet hook into the circle, and loop the yarn over the hook 1 time. Pull it through and yarn over the hook again. Pull through to lock the stitch and secure the circle.[3]
- Make sure to leave a 2 to 3 in (5.1 to 7.6 cm) tail extending from the circle. You will need to pull this to tighten the circle after crocheting the first round.
Advertisement -
3Single crochet 7 times into the magic circle. Insert the crochet hook into the circle and loop the yarn over the end of the hook. Pull this yarn through the circle and yarn over again. Pull through the first loop on the hook, then yarn over again and pull through the remaining 2 loops on the hook to complete the stitch.[4]
- Repeat this 6 more times to finish the first round.[5]
-
4Pull the tail to tighten the circle and then slipstitch. Grasp the tail and tug until the center of the circle is closed and the stitches are tight. Then, slipstitch to connect the first and last stitches. Insert the hook into the first stitch in the round, yarn over, and pull through.[6]
- This completes the first round.

Working the Bottom of the Basket
-
1
-
2Single crochet 2 times into every stitch in the round. For round 2, you will be doubling the total number of stitches. Insert your crochet hook into the first stitch in the round and work a single crochet stitch into it. Then, work a second single crochet stitch into the same stitch.[8]
- Repeat this for each stitch in the round.
-
3
-
4Work additional increase rounds to expand the base of the basket. You can make the basket as big as you want it to be. You will just need to keep increasing the base until you are ready to build up the sides of the basket. To do this, continue to work increases as follows:[11]
- 2 SCs in 1 stitch followed by 1 SC in 1 stitch, repeat all the way around, slipstitch to connect the first and last stitches.
- 2 SCs in 1 stitch followed by 2 SCs in the next 2 stitches, repeat all the way around, slipstitch to connect the first and last stitches.
- 2 SCs in 1 stitch followed by 3 SCs in the next 3 stitches, repeat all the way around, slipstitch to connect the first and last stitches.
- 2 SCs in 1 stitch followed by 4 SCs in the next 4 stitches, repeat all the way around, slipstitch to connect the first and last stitches.
Building up the Sides of the Basket
-
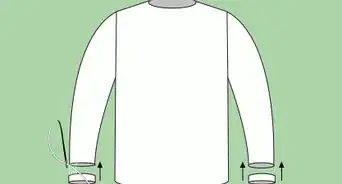
1Single crochet 1 into all stitches in the round to build up the sides. Once you are satisfied with the size of the basket base, you can begin building up the sides of the basket. Single crochet 1 time into each of the stitches in the round. This will start to create height going up from the circular base you have created. Keep working rounds until the basket is the desired height.
- For a short basket, you might work only 3 or 4 rounds.
- For a medium height basket, you might work 6 to 8 rounds.
- For a tall basket, work 10 to 12 rounds.
-
2Slipstitch to connect the first and last stitch in the last round. When the basket is the desired height, insert your hook into the first stitch in the last round, yarn over, and then pull this yarn through.[12] This will connect the first and last stitches and complete the round.
- The slipstitch will pull both sides of the round together so that your basket has a seamless finish.
-
3Tie off and cut the excess yarn to secure the stitches. Cut the yarn about 8 inches (20 cm) from the last stitch. Then, pull the loop on the hook to bring the end of the yarn out through the last stitch. Insert the end through the stitch and tie a knot to secure it. Then, cut the excess yarn about 0.25 in (0.64 cm) from the knot.
- This completes your basket! Put some things inside of it to try it out!

Things You'll Need
- 1 skein of jumbo yarn or 2 clotheslines
- A US size Q (15.00 mm) crochet hook
- Scissors
References
- ↑ https://www.craftyarncouncil.com/standards/yarn-weight-system
- ↑ https://www.youtube.com/watch?v=by436c8EyF8&feature=youtu.be&t=34s
- ↑ https://www.youtube.com/watch?v=by436c8EyF8&feature=youtu.be&t=40s
- ↑ https://www.craftyarncouncil.com/mar06_crochet2.html
- ↑ https://www.youtube.com/watch?v=by436c8EyF8&feature=youtu.be&t=56s
- ↑ https://www.youtube.com/watch?v=by436c8EyF8&feature=youtu.be&t=2m23s
- ↑ https://www.youtube.com/watch?v=by436c8EyF8&feature=youtu.be&t=3m7s
- ↑ https://www.youtube.com/watch?v=by436c8EyF8&feature=youtu.be&t=3m11s
- ↑ https://newstitchaday.com/how-crochet-slip-stitch/
About This Article