wikiHow is a “wiki,” similar to Wikipedia, which means that many of our articles are co-written by multiple authors. To create this article, volunteer authors worked to edit and improve it over time.
This article has been viewed 19,142 times.
Learn more...
There are many programs to choose from for DJing, but none of these programs shine like Ableton Live does. This software allows you to take DJing a step further and opens many creative possibilities. This step by step guide will be a comprehensive overview of how to perform with Ableton. This includes: setting up your audio interface with Ableton, using grid based controllers to launch clips, and how Ableton's session view is utilized to perform music in a live setting.
Steps
Setting Up Your Hardware With Ableton
-
1Configure your audio interface properly with Ableton. This is done within Ableton's options (located near the top left corner). The default audio device will be your computer's built in soundcard, which needs to be changed to the external audio device you will be using.
- Connect your interface to a computer and open Ableton Live. Most interfaces will connect via USB or Firewire connection.
-
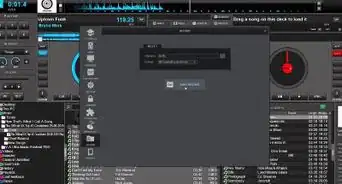
2To select your interface in Ableton choose: Options > Preferences > Audio.Advertisement
-
3Under the audio device section, select your audio interface from the drop down menu.
- If there is a driver associated with your interface, you will need to select the appropriate driver as well from the drop down menu. The appropriate driver can be found in the instruction booklet that came with your interface, or on the manufacturer's website.
-
4Select which output ports you will be using. To do this select: Channel Configuration > Output Config.
- If you do not have intentions to cue tracks with headphones, the only output ports that need to be selected are 1 mono/2 mono, 1/2 stereo.
-
5
-
6Verify that sound is coming through your monitors. Turn down the master volume on your interface. Engage the metronome by selecting it and press play. Slowly turn up your volume until you hear the tick of the metronome. Once you are satisfied with the volume, disengage the metronome by selecting it once more. Press the stop button.
-
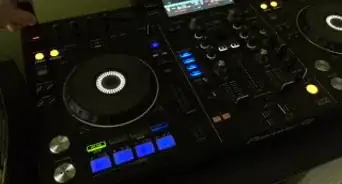
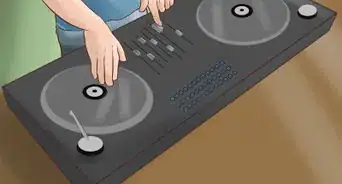
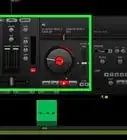
7Connect your DJ controller(s) to the computer.
- Most controllers connect via USB and may require an external power source.
-
8Set your controller if needed. If your controller is not recognized immediately, it will need to be selected as a MIDI device under Ableton's preferences.
-
9Select Options > Preferences > Midi/Sync
-
10Under the list of control surfaces, select your device and verify that it has input and output MIDI. The APC40 and Ableton Push are just examples of controllers. The name of your MIDI device will be listed under the control surface drop down menu. Simply select your device.


Performing With Ableton
-
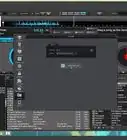
1Have the screen open on Session view and label each track. When you open Ableton, the default view is session view.
- If you are using a grid based controller, you should see a colored box outlining specific clips that the controller is viewing.
-
2Populate the Session with audio and/or MIDI clips.
- To make performing easier, keep each clip consistent to the same length (ie. 4, 8, or 16 bars).
- Group similar clips together onto the same track (drums, bass, synths, etc.).
-
3Group songs into one block of clips. Leave a space between each block of clips.
-
4Attach the BPM to the first scene launch button of each song. To do this, simply rename that button to your desired BPM. Right click (CTRL+R) to rename the button.
- Pressing a launch button with a BPM attached to it will launch that row of clips at your desired BPM. This will allow for quick and easy transitions between songs of different tempos.
-
5Add follow actions to your clips. Select one or more desired clips by clicking on them (using shift+click to select a large amount). Open the Launch section of the clip(s).
-
6Set the follow action to play the next clip after a desired amount of bars have passed. For example, if the clip is 8 bars long, set the follow action to take place after 8 bars have passed).
- Select the drop down menu below the follow action and pick "next."
- This will play the next adjacent sequential clip after the current clip has finished playing.
-
7Add a Limiter on the Master track. This will prevent digital audio clipping during playback of your clips.
- On the left side of the screen, select audio effects.
- Drag a Limiter onto the Master channel.
-
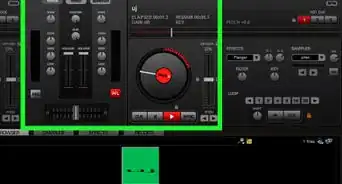
8Launch clips from Session view.
- To launch a clip, simply click on it.
- To launch an entire row of clips (scene), click on the scene launch button.
-
9Use your DJ controller to experiment with launching clips from different songs or sections simultaneously.
- Grid based controllers will make launching clips extremely easy.
-
10Add effect racks to different channels and experiment using them. Ableton has preset effect racks under Audio Effects > DJ & Performance. Simply drag the effect rack onto the desired channel.
- Performing with Ableton frees up time that a DJ would normally spend beatmatching every track. This allows for the user to add live effects and remix with ease.


Community Q&A
-
QuestionI lost my village, what can I do?
 Community AnswerIt is likely gone unless you have back up data.
Warnings
- Practice performing your Ableton Live set before playing to a crowd.⧼thumbs_response⧽
- If you are having issues setting up an audio interface with Ableton, make sure that all necessary drivers are installed properly. If you need further help, seek customer support from the manufacturer.⧼thumbs_response⧽
- If your controller is not functioning properly with Ableton, seek customer support from the manufacturer.⧼thumbs_response⧽
- Do not just play back each song without any variation. Ableton allows you, as the performer, to get extremely creative with your set by mixing individual tracks with different songs to achieve a unique performance.⧼thumbs_response⧽
Things You'll Need
- A computer running Ableton Live
- An audio interface
- A MIDI controller
- Speakers
- Necessary cables (USB A to B, XLR cables)