This article was co-authored by Claire Donovan-Blackwood. Claire Donovan-Blackwood is an Arts & Crafts Specialist and CEO of Heart Handmade UK, a site dedicated to helping people live a happy, creative life. With over 13 years of experience, Claire uses art as a form of therapy and focuses on mindfulness in the making of art. She makes crafting easy and accessible for those she works with. Claire received her B.A. in Photography & Visual Imagery from The University of Huddersfield.
There are 7 references cited in this article, which can be found at the bottom of the page.
This article has been viewed 28,027 times.
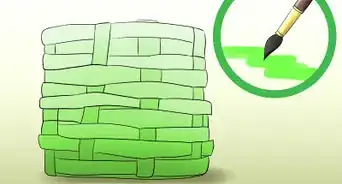
Flowers are colorful and inviting, but sometimes the planters they're in can be a bit drab. If you want to spice up your home or garden, decorate your flower pots with paint, decoupage, or intricate mosaics. A chic planter can totally tie together your decor and show your personality!
Steps
Painting Your Flower Pot
-
1Clean your flower pot. No matter what material your flower pot is made from, make sure the areas you want to paint are clean. Use soap and water if there is any lingering dirt or dust. A spotless surface will help your painting last.
- Remove any stickers or price tags.
- If you’re painting a terracotta pot, soak it in water for a few hours first. Scrub the entire thing with a stiff brush to get rid of dust or dirt. Wait 24 hours before painting, as terracotta is porous and will stay wet for a long time.[1]
- Allow your flower pot to dry completely before painting.
-
2Choose acrylic paints in the colors of your choice. The color possibilities are pretty much endless, but make sure you use acrylic paints.[2] Acrylic dries extremely quickly and is water-resistant when dry. It works on terracotta, clay, plastic, and ceramic.
- Use spray paint or liquid paint, as long as it's acrylic. Spray paint is a faster option, but liquid will allow you to use brushes and get a detailed design.
- If your planter will be staying outside, you can use an outdoor paint meant for withstanding weather.
Advertisement -
3Plan out your design. Take a look at your pot and decide what look you're going for. If your planter is going to be inside, think about what might look good with the color of your walls or floor. If it's going to be outside, think about what colors might pop in your yard or garden.
- Use tape to segment off sections if you only want to paint certain parts.
- Add words to label herb plants to offer little motivational phrases.
- A pure white flower pot is a sleek, modern option.
- Use stencils to creative intricate shapes.
-
4Paint the first coat. There are no limits to what you can paint onto your flower pots, so let your creative juices flow! Use a large foam brush to put down a base coat. Choose a single color so you have a simple canvas to decorate further.
- Put down newspaper or towels and wear clothes you don’t mind getting dirty.
- If you want to leave half of your pot unpainted, tape off that section.
-
5Let your flower pot dry. A dry base coat will make sure the next application won't smudge or run. Be patient!
- If you want a solid, single-color flower pot, it might be done already!
-
6Apply a second layer of paint. Use foam brushes of all sizes to complete the look. Reapply the base coat if you want a more vivid color, otherwise go ahead and create your piece of art. Use whatever stencils, brushes, sponges, or freehand techniques you want.
-
7Apply a clear sealer once your design is dry. When you’re happy with your new piece of art, it’s time to make sure everything stays in place. To prevent fading or chipping, apply at least two layers of clear, water based acrylic sealer.[3] Get an acrylic sealer from your local craft store.
- It may take a few days for the paint to dry if you used several coats of paint.
- Using spray sealer is recommended, but you can also get cans of varnish and paint in on. This might leave brushstrokes behind.
- Choose a matte or shiny finish depending on what you like.
- Once protected, a painted design can last for years!


Decorating Your Flower Pot with Decoupage
-
1Clean your flower pot. Decoupage glue sticks best to clean, dry surfaces. Get rid of any dirt or dust with water and soap, then dry your flower pot completely.
- Remove any stickers or price tags.
-
2Find decoupage material from books, magazines, or newspapers. Carefully cut out pictures of flowers, birds, or whatever fits your aesthetic. Cut out enough to cover the entire pot or cut out one small design for the front. It’s totally up to you how much decoupage you want!
- It can be fun to use patterns or colors that contrast with the type of plant you’ll be using in the planter.
- Try geometric shapes cut from solid paper for a modern style.
- You can also use decorative fabric, paper napkins, or wallpaper.
-
3Brush Mod Podge or craft glue onto your pot. You can find glue meant for decoupage at any craft store, and usually it’s pretty cheap. Use a foam brush to saturate the designated area as evenly as possible.
- Wear gloves to keep glue off your skin.
- A thin layer will do.
-
4Apply your decoupage cutout. While the glue is still wet, carefully place the piece of decoupage onto the flower pot. Go slow to make sure the placement is exactly how you want it.[4]
- If you make a mistake, you might be able to peel it off and try again, but try to get it right the first time.
- Smooth out any bubbles with your hands or a squeegee tool.
-
5Add another layer of Mod Podge. Using a foam brush, apply a generous layer over your decoupage piece to keep it in place. This will make sure it’s protected from wetness when you water your plant.
- Allow your decoupage to dry completely before touching or moving the flower pot.
- Paint it on slowly evenly to minimize brush lines.
- Don’t worry, Mod Podge will dry clear.
- Mod Podge might have a slightly sticky texture even when dry.[5]
-
6Apply a sealer. Just like with paint, you’ll need to protect your decoupage from scratches and weathering. Put at least two coats of clear, water based acrylic varnish over your lovely work.[6]


Creating a Mosaic on Your Flower Pot
-
1Find something to break into your mosaic pieces. While it is possible to buy small pieces of glass or tile, it can be fun to make your own, unique shapes. Buy household tiling from a hardware store, a ceramic plate from a thrift store, or some interesting glassware from a garage sale.
- Mirrors can look really neat on a flower pot.
- If you have any damaged dishware in your kitchen, use that!
-
2Break your chosen item into small pieces. Wrap your tile or plate in a thick cloth and strike it with a hammer. This can be a fun process, but you'll only need one or two hits. Take a look the shards to see if they’re small enough. If not, feel free to wrap it up and hit it again.
- Try to get a variety of shapes and sizes.
- If needed, modify tile or ceramic pieces with cutting pliers.
- Wear safety glasses to protect your eyes.
- Wear cloth gloves to protect your hands.
-
3Lie a clean flower pot down and mosaic one side at a time. Otherwise, gravity might mess up your design. Cradle the pot in a towel to keep it from rolling away. With a butter knife, apply tile adhesive onto each piece and place them according to your design. Press hard onto the side of the pot to make sure they stay attached.
- Spell out your initials or name for a personal touch.
- The consistency of the adhesive should be like peanut butter.[7]
- Wear cloth/gardening gloves to keep the adhesive from getting on your skin.
-
4Let each side set for a couple hours, then rotate. When turning your pot, make sure that the pieces you already places don't come loose. Rotate carefully and slowly, and use the towel to keep it steady.[8]
-
5Let your flower pot sit overnight. This will give the tile adhesive time to dry, and makes sure your mosaic will last. If you notice any pieces slipping, adjust them and press them back into place.
-
6Spread grout between the pieces of your mosaic. It’s a messy process, sure, but having grout between the tile or ceramic pieces will complete the look. Use a grout float to flatten and spread out the cement-like substance.
- Mosaics can be intricate and small, so make sure you get every crevice.
- Wait 15 minutes, and then wipe away any excess with a damp cloth.[9]
- Wear gloves.
- Grout will take a few days to dry fully.
- After it’s dry, clean everything will a soft, dry cloth.


Expert Q&A
Did you know you can get expert answers for this article?
Unlock expert answers by supporting wikiHow
-
QuestionHow do you decorate a large flower pot?
 Claire Donovan-BlackwoodClaire Donovan-Blackwood is an Arts & Crafts Specialist and CEO of Heart Handmade UK, a site dedicated to helping people live a happy, creative life. With over 13 years of experience, Claire uses art as a form of therapy and focuses on mindfulness in the making of art. She makes crafting easy and accessible for those she works with. Claire received her B.A. in Photography & Visual Imagery from The University of Huddersfield.
Arts & Crafts SpecialistThere are countless options to decorate a flower pot. You could use patterned napkins to decoupage, fabric for a collage, or use oil-based paints. Try using stencils and decorating with flowers. For a terracotta pot, you can do a single, bold stripe of color on the bottom or use a marbling technique.
Support wikiHow by unlocking this expert answer.
Warnings
- Wear gloves and safety glasses when shattering tiling or glass.⧼thumbs_response⧽
- Protect your floor or tabletop from paint and/or glue and/or glitter with newspapers.⧼thumbs_response⧽
Things You'll Need
Painting Your Flower Pot
- Clean flower pot
- Acrylic paints of assorted colors, spray or liquid
- Foam brushes of varying sizes
- Stencils
- Newspaper or towels
- Clear spray acrylic varnish, spray or liquid
Decorating Your Flower Pot with Decoupage
- Clean flower pot
- Scissors
- Gloves
- Decoupage paper
- Mod Podge or other decoupage glue
- Clear spray acrylic varnish, spray or liquid
Creating a Mosaic on Your Flower Pot
- Clean flower pots
- Mosaic tiles or glass
- Hammer
- Gloves
- Safety glasses
- Tile adhesive
- Butter knife
- Towel or cloth
- Grout
- Grout float


References
- ↑ https://www.finegardening.com/article/painting-clay-pots
- ↑ https://www.practicallyfunctional.com/how-to-seal-painted-flower-pots/
- ↑ http://www.patriciaspots.com/howtopaintapot.htm
- ↑ https://town-n-country-living.com/decoupaged-flower-pots-transform-grocery-plants.html
- ↑ http://www.patriciaspots.com/howtopaintapot.htm
- ↑ http://www.patriciaspots.com/howtopaintapot.htm
- ↑ http://www.birdsandblooms.com/backyard-projects/diy-garden-projects/decorate-flower-pots-mosaic-tiles/
- ↑ http://www.womansweekly.com/craft/how-to-make-a-mosaic-flower-pot-12173/
- ↑ http://balconygardenweb.com/18-brilliant-diy-mosaic-ideas-for-garden/
About This Article

The easiest way to decorate your flower pot is to paint it. To do this, start by cleaning the pot so the paint can last longer. Once your pot is clean, get some acrylic paint, which dries quickly and is water-resistant, to paint on your design. Feel free to use spray paint or liquid paint as long as it’s acrylic! Using a large foam brush, apply the first coat of paint and then let it dry. If you’d like you can then add a second layer of paint to make the color more vivid or you can use other tools like stencils and brushes to paint a design on top of the base coat. Once you’ve finished painting, apply at least 2 layers of a clear, water-based acrylic sealer to help prevent fading and chipping. For more help, including how to decorate your flower pot with a mosaic, read on!