This article was co-authored by wikiHow staff writer, Janice Tieperman. Janice is a professional and creative writer who has worked at wikiHow since 2019. With both a B.A. and M.A. in English from East Stroudsburg University, she has a passion for writing a wide variety of content for anyone and everyone. In her free time, you can find her working on a new crochet pattern, listening to true crime podcasts, or tackling a new creative writing project.
There are 13 references cited in this article, which can be found at the bottom of the page.
The wikiHow Video Team also followed the article's instructions and verified that they work.
This article has been viewed 12,343 times.
Learn more...
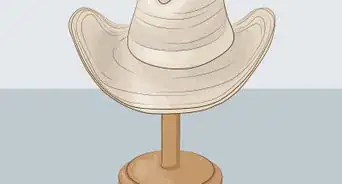
Floral hats are an elegant way to spruce up an outfit, or just a fun way to feel extra fancy. You don’t need a lot of craft knowledge to make a hat of your very own—all you need is a basic bonnet or lightweight straw hat without any decorations on it. While you can use fresh flowers for this kind of project, it’s best to use fake flowers so your accessory can last for many outings and parties to come.
Steps
Choosing Colorful Combinations
-
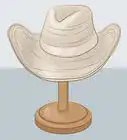
1Create a traditional hat with pink and red flowers. Choose a sturdy, neutral-toned hat for your project, like a straw hat. Pick out pink and red flowers to include, like roses. Tie a band or ribbon around the hat for a classic look, and then arrange the flowers around part of the hat to give the accessory some elegant flair.[1]
- For instance, you can pair pink and red roses on a straw hat.
- You can look into fresh and fake flowers for your hat—just keep in mind that fresh flowers won’t last very long. If you use fresh flowers, you’ll have to replace them pretty frequently.[2]
-
2Pair purple flowers with a dark hat to make a cool contrast. Choose a dark, neutral-toned hat as the base for your design. You can spruce it up with a purple ribbon or headband, along with a large purple flower as a decoration.[3]
- For reference, some popular purple flowers are petunias, purple flash peppers, verbena, pansies, and heliotropes are all great options to consider.
Advertisement -
3Offset white hats with a splash of color. Take a basic white hat and tie a neutral-toned ribbon or bow around the base. Add a bright patch of flowers along the front or side of the hat to really give it a touch of elegance.[4]
- For example, you can offset a white or cream-colored hat with a white bow and blue mums.
-
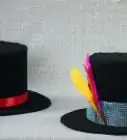
4Contrast warmly-colored flowers with a dark hat. Pick out a bunch of fake blossoms that sit on the warm side of the color spectrum, otherwise known as the reds, yellows, and oranges. Place these places along a dark hat, along with warm-colored ribbon.[5]


Attaching Ribbons and Flowers
-
1Cut and glue on a ribbon to serve as the base of your design. Wrap a large section of ribbon around the base of your hat until you’ve formed a complete loop. Cut off this section of ribbon and start gluing it in place with a hot glue gun. For a seamless look, secure the ribbon to your hat with dots of glue every 2 in (5.1 cm) around the base. On opposite ends of the hat, pinch and glue the ribbon down so there’s plenty of space to display your flowers.[8]
- Pinching and gluing parts of the ribbon down can make it easier to glue your flowers in place.
- Ribbons are a great option if you’d like to feature flowers along 1 part of your hat instead of the entire brim.
- You don’t have to use ribbon in your hats if you don’t want to! It’s just a common decorative used on really fancy hats, like Derby-style hats.
-
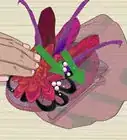
2Pull the blossoms off of several fake flowers. Assemble all of your fake flowers in 1 area. Twist and pull the blossoms off the ends of the fake stems and set them aside. Continue removing as many flowers as you’d like, depending on how you’d like your final hat design to look.[9]
- For instance, if you’re only decorating a portion of your hat with flowers, you’ll only need a small handful of blooms.
- If you’re decorating the entire base of the hat, you’ll need enough fake flower blossoms to go around.
- You can always leave the stems on, if you’d like! Floral hats with stems can still look really striking.[10]
-
3Cut off any remaining stems. Flip over each individual blossom and look for a section of “stem” sticking out. Many fake flowers have an extra piece of plastic that helps connect the blossoms to the rest of the stem. Snip off this plastic with a pair of scissors, so it’s easier to glue your flowers in place.[11]
-
4Remove any fake leaves from your fake flowers. Pull off any fake leaves from your bundle of fake flowers. Trim away any leftover stems, so you can glue them to the hat really easily.[12]
- Fake leaves may seem boring, but they can add a lot of variation to your finished hat.
-
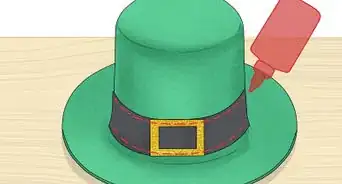
5Hot-glue your flowers and leaves along the base of the hat. Center your first blossom along the side of the hat. Squeeze a dot of hot glue along the bottom, then press the flower into place. Repeat the process with all the fake flowers and leaves you’ve trimmed and prepared for your hat.[13]
- For instance, you might alternate 1 fake leaf for every 2 fake blossoms.
- Alternating the sizes of your flowers can be fun! Consider gluing a large flower along the side of your hat, and then gluing smaller flowers around it.

Adding Fun Decorations
-
1Add scrunched sections of tulle to make your hat extra fancy. Cut off at least 4 to 5 in (10 to 13 cm) of tulle fabric, which looks like decorative netting. Pinch the bottom of the material accordion-style, as though you’re creating one half of a bow. Pinch and glue along the bottom of the fabric to create a fun, decorative addition to your hat. Once the glue dries, cut off any excess material from the bottom, pinched portion of tulle material. Depending on the current layout of your hat, you can slide the material onto your hat, or you can glue it in place for extra support.[14]
- As the glue dries, loop the hot glue string along the pinched, bottom portion of the tulle fabric.
-
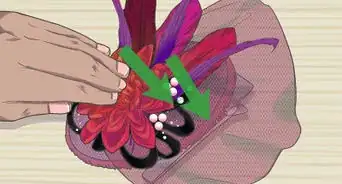
2
-
3Glue a feather boa around the brim of your hat to make it extra fancy. Pick up a feather boa from your local craft store. It doesn’t have to be anything fancy—just something that matches the general color scheme of your hat. Hot glue the boa around the edge of your hat, which adds a lot of texture and dimension![17]
- Neutral-toned boas can work well for this, like white.


Warnings
- If you’re making a hat with a child, supervise them if they use any hot glue.⧼thumbs_response⧽
Things You’ll Need
Attaching Ribbons and Flowers
- Hat
- Ribbon
- Scissors
- Fake flowers
- Fake leaves
Adding Fun Decorations
- Tulle (optional)
- Feathers (optional)
- Beads (optional)
- Feather boa (optional)


References
- ↑ http://blog.susanevans.org/how-to-decorate-a-hat-2/
- ↑ https://collectivegen.com/2015/07/diy-fresh-flower-hat/
- ↑ https://www.gardenpartyteas.com/hat-decorating
- ↑ https://www.gardenpartyteas.com/hat-decorating
- ↑ https://www.gardenpartyteas.com/hat-decorating
- ↑ https://www.gardenpartyteas.com/hat-decorating
- ↑ https://www.countryliving.com/gardening/garden-ideas/g25716277/yellow-flowers/
- ↑ https://m.youtube.com/watch?v=TsxjVtk46uI&t=0m35s
- ↑ https://m.youtube.com/watch?v=76Z-OliiRlY&t=0m24s
- ↑ https://www.teenvogue.com/gallery/floral-sun-hat
- ↑ https://m.youtube.com/watch?v=76Z-OliiRlY&t=0m49s
- ↑ https://m.youtube.com/watch?v=76Z-OliiRlY&t=1m15s
- ↑ https://m.youtube.com/watch?v=76Z-OliiRlY&t=2m
- ↑ https://m.youtube.com/watch?v=TsxjVtk46uI&t=3m23s
- ↑ https://m.youtube.com/watch?v=TsxjVtk46uI&t=5m15s
- ↑ http://blog.susanevans.org/how-to-decorate-a-hat-2/
- ↑ https://www.gardenpartyteas.com/hat-decorating
- ↑ https://www.gardenpartyteas.com/hat-decorating
- ↑ https://m.youtube.com/watch?v=zpq8CINmMnw&t=1m20s