This article was co-authored by Emma Oberlander. Emma Oberlander is an Interior Designer and the Owner of Otis Street Design in Boston, Massachusetts. She specializes in residential remodels, boutique hospitality design, project management, and budget design. Emma holds a BA in Communication and Media Studies from Northeastern University and an MA in Interior Architecture from The New England School of Art and Design. She has a combined ten years of project management experience in the design, marketing, and non-profit industries, both nationally and internationally.
There are 11 references cited in this article, which can be found at the bottom of the page.
This article has been viewed 11,729 times.
Paper is cheap and it comes in so many colors, sizes, and shapes that it's great for creating decorations. You can use book pages or scrapbook paper to wallpaper a room, for instance. Alternatively, cut out garlands or make fun shapes and designs in paper to create a collection of art on your wall. You can also cut paper for framed art or other types of hung pieces.
Steps
Applying Book Pages or Decorative Paper as Wallpaper
-
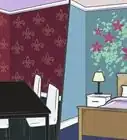
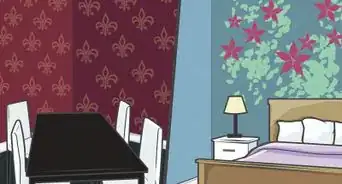
1Choose paper that matches the look you want. When decorating with wallpaper, try a favorite novel for cozy and nostalgic aesthetic or opt for a dictionary for something fun and more traditional.[1] You could also choose a combination of solids and prints with one color drawing them together, such as red plaid, red chevron, and solid red paper.
- Alternatively, try mixing and matching floral paper for an atrium feel or cutting green paper into large leaf shapes to make the room seem like a jungle.
- Thinner paper will likely work better, as it will be easier to get it to stick to the wall.
-
2Add double-sided tape to the back of pages for a quick, removable adhesive. Rip the pages out of the books you want to use. On each page, add a piece of double-sided tape to each corner. Put the pages up, starting in a corner and working your way out. You can line up the pages perfectly or you can place them at odd angles covering each other all over the wall.[2]
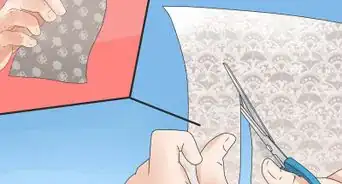
- At the edges, use a craft knife or scissors to cut the pages so they line up with the wall corners.
Advertisement -
3Use a cornstarch paste to apply and remove pages easily. Apply a thin layer of the paste to the wall with a roller, paintbrush, or lint-free rag. Work only on one small area at a time. Put a page over the area where you applied the paste and smooth it out with your fingers or the roller. Add another thin layer on top to keep it in place. Keep going across the whole wall, applying pages in a random pattern or straight across the wall.
- To make the paste, boil 2 cups (470 mL) of water in a pan. Add 2-3 tablespoons (15-21 grams) of cornstarch to 0.25 cups (59 mL) of cold water and stir until it dissolves. When the water in the pan is boiling, take it off the heat and add the cornstarch solution to it, stirring until it's completely mixed in. Let it cool completely before using it.
- When you need to take these pages off, you can simply peel them away. It won't harm the paint. For stubborn pages, use a rag to wet them; they'll peel off in a few minutes.
-
4Apply wallpaper paste and paper for a more permanent look. Use a roller or paintbrush to add the paste in a thin layer. Work in one small area at a time. Place the page on top of the paste and smooth it out with a credit card or another flat edge. Use the same technique across the whole wall, applying the paste as you go.
- Don't be afraid to think beyond book pages. Try scrapbook paper, music pages, or even yellow pages.[3]


Creating Garlands and Decorative Paper Pieces
-
1Make a floral garland to string across the wall. Cut flower and leave shapes out of colorful paper. If you want, you can use a pencil to curl the petals and leaves. Simply roll them around the pencil and then unroll them. Thread the flowers and leaves on a thin thread, alternating flowers and different colored leaves until you have a length you like.[4]
- String the garland up on the wall between 2 bookcases or use it to make a square around a picture or canvas.
- When choosing paper, opt for solid colors or patterns that are predominantly one color to make the garland seem more cohesive. Thicker papers work better for this project.
-
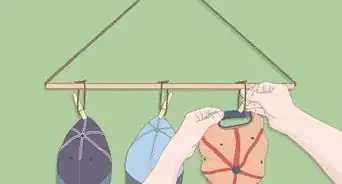
2Create a paper chain wall hanging. This starts with a simple paper chain, like one you made in kindergarten. Hang multiple chains across a wooden dowel to create a simple, colorful curtain-like wall hanging. You can choose 1 color, pick random colors, or create a rainbow like effect by changing colors across the chains. Opt for a thicker paper for this project.[5]
- Cut out strips of paper that are about 0.5 inches (1.3 cm) wide and 3.5 inches (8.9 cm) long. Make a loop with one piece, gluing or stapling the ends together. Insert the next piece of paper through the loop and make a new loop. Keep going until you have 1 chain that's as long as you'd like it to be, maybe 3 to 4 feet (0.91 to 1.22 m) long.
- When you've made 25-30 chains, loop the top of each chain onto a 3 to 4 feet (0.91 to 1.22 m) wooden dowel. Space them apart evenly and glue them into place.
-
3Cut out hearts in different colors or patterns to create a garland. Make a set of large hearts that are all the same size. Cut out another set of smaller hearts that are all the same size. Glue the smaller hearts on top of the big ones and then punch holes on each side of the heart. String them together to make a garland.[6]
- Choose a thicker paper for this project.
-
4Cut out and glue giant paper flowers to hang on your wall. Cut petal shapes out of paper. Move from slightly smaller to slightly bigger petals. Overlap the big petals to form a circle and glue them to each other. Roll the petals around a pencil to curl them. Keep gluing petals in a circle, moving inward each time. Curl after each layer to see how many more petals you want to add.[7]
- For petal shapes, try a teardrop, flattened heart shape, or a rounded end.
- You can also move from inside the flower to outside by rolling a strip of paper together to form the center and then adding petals to the outside edges.
- You can use printer paper, construction paper, crepe paper, or even scrapbook paper. Thin or thick papers will work, but thinner papers will likely be more malleable.
- The bigger the petals are, the bigger the flower will be.
-
5Create decorative pinwheels from square scrapbook paper. Fold the edge of the paper in 1 inch (2.5 cm). Turn it over and fold it in that way 1 inch (2.5 cm). Keep folding it back and forth like an accordion until you reach the other side. Fold the fan in half lengthwise and glue those 2 edges together. Put it under a book to dry. for 20-30 minutes. Make a second fan with the same kind of scrapbook paper and glue it the same way.
- Once they're dry, pull them out. Fan them out. Glue the 2 fans together on the long edge. Use paperclips or clothespins to hold the newly glued edges together for an hour, then nail them into place on the wall.
- Mix and match patterns, colors, and sizes for a fun effect. Card stock or thick paper will work best for making pinwheels.
-
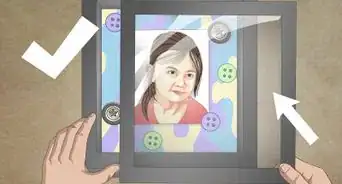
6Use wood plaques to make paper wall hangings. Find unfinished wood plaques at a craft store and paint them any color you'd like. Cut out paper in the same shape but smaller than the plaque. Glue the paper into the center of the plaque, and the paint will frame the paper. Hang it on the wall.[8]
- Try hanging a collection of different sizes and shapes. Opt for different patterns drawn together by 1 or 2 colors.


Making Wall Hangings
-
1Make an abstract piece of art with a frame, chicken wire, and rolls of paper. Pick up a cheap, large wood frame. Cut chicken wire to fit the back of the frame and staple it into place with a staple gun. Be sure to bend the edges of the wire and staple them into the frame so they don't scratch anyone. Hang up the frame on the wall and insert rolls of paper in the chicken wire to make an interesting art piece.[9]
- To make rolls of paper, cut strips of paper that are about 1.5 inches (3.8 cm) wide and 4 inches (10 cm) long. Roll the paper around your finger, making it small enough to fit into a hole in the chicken wire. Stick it in the wire and let the tension hold it in place.
- You can pick random colors and fill in all the holes. Alternatively, you can start with one color at the bottom and switch colors as you move up. You don't have to fill in every hole, either.
-
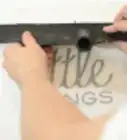
2Create a craft paper scroll with a quote. Grab a roll of craft paper, some string, a wooden dowel, and a permanent marker. The wooden dowel should be just a bit longer than the craft paper roll on both sides. If it's too long, use a hand saw to cut through it. Cut 7 to 8 feet (2.1 to 2.4 m) of craft paper off the roll. Roll up each end, leaving about 1.5 feet (0.46 m) of space between the 2 ends. Glue the ends to the paper so they don't unroll, then hand letter a fun quote in between. Stick the dowel in the top roll and tie a rope to either end. Use the rope to hang the scroll.[10]
- If you want a scroll you can change, put a paper clip over the back edge of the rolls on the ends. That way, you can just take the paper clips off, move fresh paper into the middle, and write something new.
-
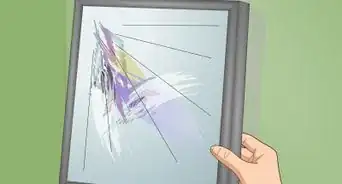
3Frame layered letter art for a fun shadow effect. Use a stencil to cut out a big letter in a white piece of printer paper or scrapbook paper. The page with the letter cut out of the middle is what you want to save. Cut a small spacer, about 0.25 inches (6.4 mm) or even smaller. Place the stencil over a colorful piece of paper. Place the spacer on the inside of the letter to help guide you and trace it out on the back side of the sheet to create a slightly smaller letter. Cut it out, throwing away the inner part. Use this letter as a stencil for the next letter, adding the spacer to make it just a bit smaller. Keep going until you have as many letters as you'd like.[11]
- Glue the layers together, moving from the page with the widest letter in front all the way down to the smallest letter. You should have layers of paper getting smaller and smaller in the middle, creating a colorful effect. Put the glued pieces in the frame.
- You can also do it the opposite way; use the letter you cut out from the pages and move from the smallest letter in front to the biggest letter in back.
-
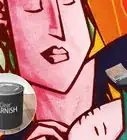
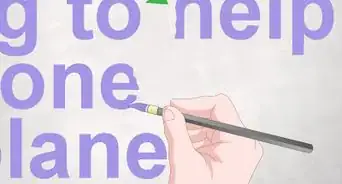
4Make an artsy quote with a foam board and paper. Glue paper onto the foam board, covering the whole board in one color or pattern. Try creating a fun pattern with torn pieces of paper overlapping one another. Once that's dry, cut letters out of a contrasting color for a quote you like. Glue the letters in place, and your paper art is done.[12]
- You could also create a border on the board with another color.


Expert Q&A
-
QuestionCan you put wallpaper on ceiling?
 Emma OberlanderEmma Oberlander is an Interior Designer and the Owner of Otis Street Design in Boston, Massachusetts. She specializes in residential remodels, boutique hospitality design, project management, and budget design. Emma holds a BA in Communication and Media Studies from Northeastern University and an MA in Interior Architecture from The New England School of Art and Design. She has a combined ten years of project management experience in the design, marketing, and non-profit industries, both nationally and internationally.
Interior DesignerYes! It can be really cool to wallpaper your ceiling. For example, if you put wallpaper on your attic ceiling, it plays a trick on your eyes by making the attic look less busy. -
QuestionHow much does hand-painted wallpaper cost?Emma OberlanderEmma Oberlander is an Interior Designer and the Owner of Otis Street Design in Boston, Massachusetts. She specializes in residential remodels, boutique hospitality design, project management, and budget design. Emma holds a BA in Communication and Media Studies from Northeastern University and an MA in Interior Architecture from The New England School of Art and Design. She has a combined ten years of project management experience in the design, marketing, and non-profit industries, both nationally and internationally.
Interior DesignerThe price point can vary, but a really nice wallpaper can be quite expensive. For a similar look, you could get someone to create a hand-painted pattern in an entire room or along an accent wall. Or, you could hire someone to make hand-painted wallpaper.

References
- ↑ Emma Oberlander. Interior Designer. Expert Interview. 7 April 2021.
- ↑ https://www.youtube.com/watch?v=8KxdRz6oZ5k&feature=youtu.be&t=8
- ↑ Emma Oberlander. Interior Designer. Expert Interview. 7 April 2021.
- ↑ https://www.thriftyfun.com/Paper-Floral-Garland.html
- ↑ https://thehousethatlarsbuilt.com/2017/08/paper-chain-wall-hanging.html/
- ↑ https://www.bhg.com/decorating/do-it-yourself/fabric-paper-projects/clever-art-with-paper-scraps/?slide=slide_58910#slide_58910
- ↑ https://www.maisondepax.com/paper-flowers/
- ↑ https://www.bhg.com/decorating/do-it-yourself/fabric-paper-projects/clever-art-with-paper-scraps/?slide=slide_58868#slide_58868
- ↑ https://sugarandcloth.com/diy-paper-wall-art/
About This Article