This article was co-authored by wikiHow Staff. Our trained team of editors and researchers validate articles for accuracy and comprehensiveness. wikiHow's Content Management Team carefully monitors the work from our editorial staff to ensure that each article is backed by trusted research and meets our high quality standards.
There are 7 references cited in this article, which can be found at the bottom of the page.
This article has been viewed 22,453 times.
Learn more...
Hanging your hats on a wall is a great way to store them until you need them. They can also add a bit of decor to your wall, and it’s really easy to do! Attach adhesive hooks or install nails into your wall so you can hang your hats from them. You can also attach a line to your wall that you can clip your hats onto, or build a hanger with a length of brass tubing that you can attach your hats to.
Steps
Using Adhesive Hooks or Nails
-
1Get some adhesive hooks or nails. Adhesive hooks stick to your wall without using any nails or screws and can be removed without damaging your wall. You can also hang your hats on your wall by placing them onto the end of a nail.[1]
- Adhesive hooks are lightweight and strong and will be able to support the weight of any hats you plan to hang on them.
- Nails will leave behind a small hole in your wall.
-
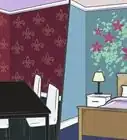
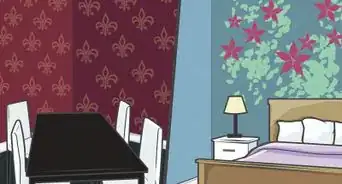
2Choose a wall out of direct sunlight where the hats won’t be damaged. Pick a spot on your wall to hang your hats where they won’t be damaged by a door or somebody walking past them so they won’t be crushed or knocked down. Look for a wall that isn’t exposed to more than 4 hours of direct sunlight so the hats won’t be damaged or discolored by the light.[2]
- Choose a wall away from large windows that let in a lot of sunlight.
- A location like a hallway near an exit will be out of direct sunlight and a convenient location to take off or put on a hat as you enter or exit the building.
- If you plan to hang your hats in your closet, make sure they won’t have any clothes or other items pressing against them.
Advertisement -
3Consider how you’d like to arrange your hats on the wall. You can create a diamond pattern, a ring, or use a stair-stepped or staggered arrangement to display your hats and also add a decorative accent to your wall. Decide on what pattern or arrangement you want to use to hang your hats before you start installing hooks or nails.[3]
- Choose a pattern that suits the style of your hats. For example, if you have a lot of wide-brimmed hats, a circular or staggered pattern will give enough space between them and make the display aesthetically pleasing.
-
4Measure and mark where you plan to hang the hats. Use a ruler or tape measure to measure your pattern on the wall so it’s even and consistent. Take a pencil and lightly mark the locations of where you plan to install the hooks or nails on the wall.[4]
- Leave about 1 foot (0.30 m) of space between the hats if you don’t want them to overlap.
- If you have larger hats, such as wide-brimmed sunhats, you may need more space between them. Measure the brim of your hats and add an additional 4–6 inches (10–15 cm) so they have enough room.
-
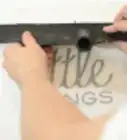
5Hammer 2 in (5.1 cm) nails or install your adhesive hooks. Take a hammer and carefully strike the head of the nail to drive it about halfway into your wall at the locations you measured and marked. Install the adhesive hooks by removing the adhesive strip on the back of the hook, press the hook onto the wall, and hold it in place for 30 seconds.[5]
- Give the nail a gentle wiggle to make sure it’s secure in the wall.
- You can find adhesive hooks at home improvement stores, at department stores, and online.
- Popular brands of adhesive hooks include Command and Dewang.
-
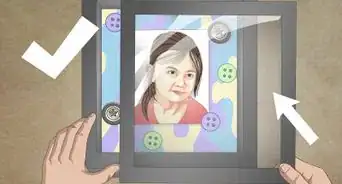
6Place your hats onto the hooks or nails. Carefully balance the brim of your hat onto the adhesive hook or nail on the wall. Add all of the hats until they’re all hung up on your wall. Take a few steps back to inspect the arrangement and make any adjustments so it’s even and visually appealing.[6]
- Consider hanging them by alternating colors. For example, you could hang a blue hat, then a white one, then another blue one to create a pattern with the color scheme as well.


Clipping Your Hats to a Line
-
1Pick a wall away from direct sunlight. Choose a wall that isn’t exposed to lots of direct sunlight so your hats won’t be faded or discolored by the light. Make sure there’s enough space on the wall to hang your hats up.[7]
- A hallway or a wall away from a large window won’t be exposed to too much sunlight.
-
2Choose a spot about 5–6 feet (1.5–1.8 m) from the floor. Find a stretch of wall that you want to use to hang your hats. Measure a spot location at about your head height so you can reach the hats. Use a pencil to lightly mark where you want to install a nail to hang your line from. Then, use a ruler or tape measure to identify another point that’s even and level with the first point, and mark it with a pencil. Measure the distance between the 2 points.[8]
- Make sure the points are level so the hats will hang evenly.
-
3Hammer 1 in (2.5 cm) nails at the spots that you marked. Take a nail and place the end onto the mark that you made on the wall. Then, use a hammer to carefully strike the head of the nail until it’s about halfway into the wall.[9]
- You can use longer nails if necessary.
- You don’t need to install the nails into wall studs because they’ll be able to support the weight of your hats.
-
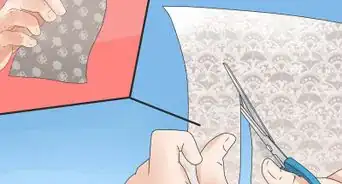
4Cut a length of string long enough to reach both nails. Use the measurements of the space between the 2 points to measure a length of string that matches. Then, take a pair of scissors or a sharp knife and cut the string.[10]
- Try to use 1 clean motion so the line isn’t frayed.
- You can find string at home improvement stores, department stores, and online.
Tip: Use twine to add a vintage-style aesthetic to your wall! You can find twine at craft supply stores and online.
-
5Tie the ends of the line to the nails. Wrap the very end of the line around the nail and tie a tight knot. Then wrap the other end of the line around the other nail and tie a knot. The string should hang securely between the 2 nails.[11]
- You can add some slack by using a longer line if you want the hats to hang slightly lower.
-
6Clip clothespins to your hats and then clip them to the line to hang them on the wall. Take a clothespin and use it to connect a hat to the line on the wall. Space the hats out so they’re not overlapping and use as many clothespins as it takes to connect all of your hats to the line.[12]
- Stand back from a distance to check the spacing and make sure the hats look even on the line.


Making a Hanging Hat Rack
-
1Cut a length of rope about 4 feet (1.2 m) long. Use a knife or pair of scissors to cut a thin rope. Try to use a clean cut so the end of the rope isn’t frayed too much.[13]
- Use a rope that is thin enough to slide through the brass tube.
- You can find rope at hardware stores, craft supply stores, and online.
-
2Slide the rope through a 1⁄2 inch (1.3 cm) diameter brass tube. Use a 2 ft (0.61 m) length of brass tubing and insert the rope through 1 end of the tube. Slide it through until it comes out of the other end.[14]
- You can get a brass tube from hardware stores, home improvement stores, plumbing supply stores, and online.
-
3Install a nail about 9 feet (2.7 m) from the ground. Take a 2 in (5.1 cm) nail and the tip in place against the wall with your non-dominant hand. Then, take a hammer and carefully strike the head of the nail to drive it into the wall about halfway. Try to wiggle the nail a bit with your fingers to make sure it’s secure in the wall.[15]
- The nail needs to be held securely in your wall in order to support the weight of the rack.
- Install the nail high enough so the rack hangs to about your head level so you can easily access the hats.
-
4Tie the ends of the rope together and hang the frame on your wall. Take the 2 ends of the rope that’s been threaded through the brass tube and connect them together with a tight knot. Then, hang the frame on the hook at the knot.[16]
- Make sure the frame is resting securely on the nail.
- Center the brass tube so the knot is on the hook or nail.
-
5Tie lengths of rope to the tube for each hat you want to hang. Cut lengths of rope and wrap them around the brass tube. Tie a tight knot so the rope hangs down from the tube. Add 1 rope for each of the hats.[17]
- Give the ropes a light tug to make sure they’re securely fastened to the tube.
Tip: Cut the ropes in varying lengths to make the hanger more aesthetically pleasing.
-
6Clip the hats to the rope with a clothespin. Take a clothespin and connect the rope to the brim of the hat you want to hang on it. Continue adding hats to the ropes until they’re all hung up on the hanger.[18]
- Give enough space between the hats so they don’t overlap and you can see them all.


Things You’ll Need
Using Adhesive Hooks or Nails
- Adhesive hooks or 2 in (5.1 cm) nails and hammer
- Tape measure or ruler
- Pencil
Clipping Your Hats to a Line
- String or twine
- 1 in (2.5 cm) nails
- Hammer
- Tape measure or ruler
- Pencil
Making a Hanging Copper Hat Rack
- A 1⁄2 inch (1.3 cm) diameter brass tube
- Rope
- Knife or scissors
- Clothespins
- A 2 in (5.1 cm) nail


References
- ↑ https://todayshomeowner.com/how-to-hang-anything-on-anything/
- ↑ https://www.sparefoot.com/self-storage/blog/12804-how-to-store-hats/
- ↑ https://www.apartmenttherapy.com/hat-galleries-wall-art-trend-diys-249724
- ↑ https://www.apartmenttherapy.com/wardrobe-organization-hat-stor-142604
- ↑ https://www.apartmenttherapy.com/wardrobe-organization-hat-stor-142604
- ↑ https://simplyspaced.com/2016/06/18-hat-organizing-ideas-for-summer/
- ↑ https://www.sparefoot.com/self-storage/blog/12804-how-to-store-hats/
- ↑ https://donpedrobrooklyn.com/diy-hat-rack-ideas/
- ↑ https://www.apartmenttherapy.com/hat-galleries-wall-art-trend-diys-249724
- ↑ https://donpedrobrooklyn.com/diy-hat-rack-ideas/
- ↑ https://donpedrobrooklyn.com/diy-hat-rack-ideas/
- ↑ https://donpedrobrooklyn.com/diy-hat-rack-ideas/
- ↑ https://collectivegen.com/2015/01/diy-hanging-hat-rack/
- ↑ https://collectivegen.com/2015/01/diy-hanging-hat-rack/
- ↑ https://collectivegen.com/2015/01/diy-hanging-hat-rack/
- ↑ https://www.apartmenttherapy.com/hat-galleries-wall-art-trend-diys-249724
- ↑ https://www.apartmenttherapy.com/hat-galleries-wall-art-trend-diys-249724
- ↑ https://www.apartmenttherapy.com/hat-galleries-wall-art-trend-diys-249724
About This Article