wikiHow is a “wiki,” similar to Wikipedia, which means that many of our articles are co-written by multiple authors. To create this article, volunteer authors worked to edit and improve it over time.
wikiHow marks an article as reader-approved once it receives enough positive feedback. In this case, 93% of readers who voted found the article helpful, earning it our reader-approved status.
This article has been viewed 127,042 times.
Learn more...
If your fern no longer produces leaves, its leaves begin growing smaller than they usually do, or the center of the fern is dead, it’s time to divide the fern. Even if your fern is not displaying any of these telltale signs, you should still divide it to encourage the new growth. Whether you are growing ferns indoors in a container or outdoors in your garden, you should divide them every three to five years. However, dividing the ferns properly based on their root structure and at the right time of year are essential steps to getting your new divisions to grow.
Steps
Determining Your Fern’s Root Structure
-
1Water the fern generously two days before digging it up. Make sure your fern is well-hydrated as the plant’s ability to absorb moisture will be diminished for a week or two after it is divided because its root system will be compromised.
-
2Dig up an outdoor fern with a shovel. Push the shovel straight down into the soil about 6 inches away from the fern stems, all the way around the fern. Then, push the shovel in again and lift the fern up out of the soil on the tip of the shovel.Advertisement
-
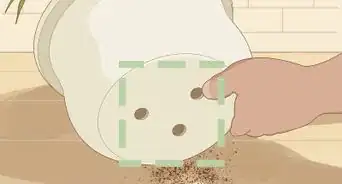
3Use your fingers to get an indoor fern out of its pot. As an indoor fern may be difficult to get out of its pot, you can grasp the fern’s leaves at the base gently between your fingers and tip the container upside down. The fern should drop out of the pot.[1]
- If the fern does not slide out easily, tap the container against the edge of a counter or table to work it loose.
-
4Rinse the soil off the roots gently with a hose or under a faucet. You want to avoid ripping or tearing the roots so also wash them off carefully and on a gentle or low stream of water.
-
5Examine the roots to determine if they are rhizomatous, clumping, or spreading. There are different methods for properly dividing your fern depending on your fern’s root structure.
- Rhizomatous roots are thick, underground stems from which smaller fibrous roots grow. Your fern may have sections of thick, fleshy roots with fine roots growing from them. Ostrich ferns (Matteuccia struthiopteris) are commonly grown ferns with rhizomatous roots.[2]
- Once the soil is washed off, the fern’s roots may appear as a mass of fine, fibrous roots growing from the center of the fern. These are clump-forming roots. Royal fern (Osmunda regalis) is one of the fern species that has a clump-forming root system.
- A spreading root system is somewhat similar to a clumping root system but the roots originate from all over the entire underside of the fern rather than just the center. Sword fern (Polystichum munitum) is a commonly grown species that has a spreading root system.


Dividing the Fern
-
1Divide a fern with rhizomatous roots by cutting the rhizomes apart. Each division must have at least one rhizome with healthy fibrous roots and several leaves.
-
2Divide a fern with a clumping root system by cutting them into sections with a sharp knife. Position the knife between the leaves over the thick, fleshy crown and push the knife down through the crown. Each division must have a section of the crown where the roots originate and several healthy leaves.
-
3Divide a fern with a spreading root system by working it apart with your fingers. Each new division needs to have a few leaves with a healthy mass of roots attached. If a few roots remain attached between two sections, snip the connecting roots with scissors.
-
4Repot or plant the new divisions right away. Be sure to only repot or plant healthy divisions.
- Discard the dead centers from clumping ferns and damaged or diseased rhizomes with dark, mushy, unhealthy-looking sections.
- Water the newly-planted or potted divisions generously right after planting them. Pour the water evenly over the potting soil until it drains freely from the bottom. Be sure to water them again when the top of the potting mix begins to dry.[3]
-
5Mist the new divisions every morning for one month to ensure they get enough moisture. It takes time for the fern’s roots to recover and begin absorbing enough moisture so misting them each morning will help your plant get through the repotting phase.
- If your fern starts to drop their leaves, this is a sign they are not getting enough water. So if this occurs, increase how often you water them.
-
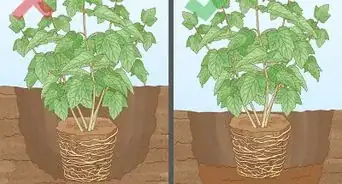
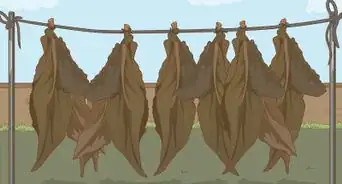
6Always divide outdoor ferns in the fall or in early spring. The best times to divide outdoor ferns are in the fall when they lose their leaves after the first hard frost or very early in the spring when they begin to send up new shoots.
-
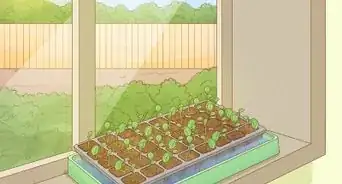
7Always divide an indoor fern in the spring once its container is full of roots. This indicates that your fern has become pot-bound or has outgrown its container. Dividing the fern will allow you to cultivate new ferns to replace the pot bound one.
- Be very careful and gentle if you do any spring divisions of your fern as you don't want to damage any of the fern’s tender leaves.
-
8Keep in mind that the type of fern you have will determine it's hardiness. While ferns are generally hardy in USDA Hardiness Zones 3 to 12, their level of hardiness varies greatly from species to species.


Community Q&A
-
QuestionI plan to divide some outdoor ferns from a partially sunny location and replant them. Will these ferns grow well on a north facing side of the house?
 Community AnswerIf the ferns are now growing in partial sun they should be replanted in an area with similar sun exposure.
 -
QuestionCan an outdoor fern be planted in an area where there is very limited sunlight and moss grows?
 Community AnswerDepending on the type of fern, yes. Most ferns grow best in shade, and the moss is an indicator that the soil will be moist enough for a fern.
 -
QuestionI purchased outdoor ferns but they're overcrowded. Can I separate them?Community AnswerYes. You can do this even if it's a single fern, you just clip it and separate the shoots.
Things You'll Need
- Access to a garden hose or a faucet
- A sharp knife
- A garden shovel
- A spray bottle for misting


References
- ↑ http://extension.uga.edu/publications/detail.cfm?number=B737#Potting
- ↑ http://www.missouribotanicalgarden.org/PlantFinder/PlantFinderDetails.aspx?taxonid=272444&isprofile=0&
- ↑ http://extension.uga.edu/publications/detail.cfm?number=B737#Dividing
- ↑ http://www.missouribotanicalgarden.org/PlantFinder/PlantFinderDetails.aspx?kempercode=a710
- ↑ http://planthardiness.ars.usda.gov/PHZMWeb/#
- ↑ http://www.missouribotanicalgarden.org/PlantFinder/PlantFinderDetails.aspx?kempercode=c548
About This Article
To divide your fern, first dig it out of the ground or pull it out of its pot. If your fern is kept indoors, divide it in the spring when its container is full of roots. Or if your fern is kept outdoors, divide it in the fall or early spring when they lose their leaves or grow new shoots. After you’ve removed the fern, gently rinse the soil from its roots under a hose or faucet. Once you’ve exposed its roots, pull or cut them apart to make 2 sections. Repot or plant the new divisions right away and water them generously so they have the nutrients they need to grow. Mist them every morning for a month to ensure they get enough water. For more tips, including how to divide a fern with rhizomatous roots, read on!