X
wikiHow is a “wiki,” similar to Wikipedia, which means that many of our articles are co-written by multiple authors. To create this article, 30 people, some anonymous, worked to edit and improve it over time.
This article has been viewed 813,266 times.
Learn more...
Body wraps have become a popular therapy in spas. The process is simple and by doing one at home you can enjoy the benefits and save lots of money. Keep reading for tips to create a home body wrap spa experience.
Steps
Part 1
Part 1 of 4:
Learning About Different Wraps
-
1Decide what kind of wrap you want to make. Body wraps can be made to accomplish different goals. Customization is always an option, but there are a few main types of wraps that are commonly used.
- Healing wraps.
- Detox wraps.
- Slimming wraps.
-
2Make a basic detox wrap. After you have decided which kind of wrap you want, its time to gather the ingredients for your wrap. You can purchase a pre-made mixture or collect the following ingredients to create your own basic detoxifying body wrap:[1]
- 1 cup of salts (Mineral, Epsom or Sea)
- 3 cups of water (Spring or purified)
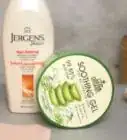
- 1/2 cup Aloe Vera
- 3 tablespoons of oil (Shea, Olive, Sunflower or other oil) or 1/4-1/2 cup of glycerin.
- Add 1-2 teaspoons of essential oil or aromatherapy oil
- A chamomile or another herbal tea bag to the water while you are heating it.
Advertisement -
3Make a basic healing wrap. If you have any sore muscles, stress, or just generally feeling unwell, you may want to make a healing wrap. The ingredients help to remove the effects of stress and restore a sense of well being. Pick up the following ingredients:
- Herbal tea bags (chamomile is best).
- Olive Oil (2 tablespoons)
- Lavender Essential Oil.
- Peppermint Essential Oil.
- Geranium Essential Oil.
-
4Make a slimming wrap. If you want to slim down some areas of your body, try making a slimming wrap. These wraps can compress areas of the body, resulting in a slimmer look. They may also remove water weight. Gather the following ingredients.
- 3oz (85g) of dried, seaweed powder
- 30z (85g) of Fullers earth powder
- 8 tablespoons (120ml) of lime juice
- 1tablespoon (15ml) of Sweet Almond Oil
- 1/2 teaspoon (2.5) of clear honey
- 4 drops of Sandalwood essential oil
- 2 drops of Rosemary essential oil
- 2 drops of Lavender essential oil


Advertisement
Part 2
Part 2 of 4:
Getting Ready
-
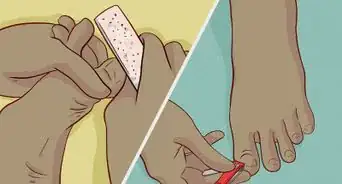
1Purchase large rolls of elastic (Ace) bandages. The bandages will soak up the wrap mixture and hold it to your skin.
- The wider and longer the roll the more skin area you will be able to cover.
- These can be found in drug stores but may be cheaper online.
- Purchase the average of 15 rolls of bandage. Try a dry wrap first to make sure you have enough.
-
2Purchase large safety pins. These pins will be used to secure the bandages. The bandages typically come with clips but safety pins make for faster work and a more secure wrap.
-
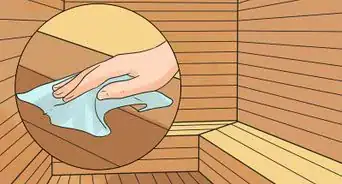
3Prepare your space. You will want to make your space clean, protected, and relaxing. Make sure you have plenty of space to move and relax in. Bring in any decorations that help make your space a relaxing one.
- Try using candles or relaxing music in your space.
- Turn up the heat to keep the space warm and comfortable.
- Realize that you will likely drip on the floor or other surfaces, so have plenty of towels.
-
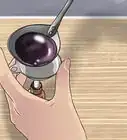
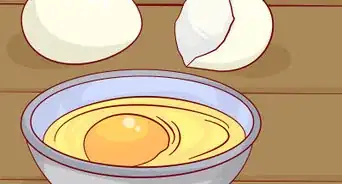
4Prepare your wrap. To make a wrap, you will need to soak your bandages in your solution. Mix and heat your ingredients and then soak your bandages in them.[2]
- Heat a pot of water on a stove-top, using medium heat.
- When hot, add in your ingredients. Stir to mix ingredients.
- Stop before a boil. Remove from heat.
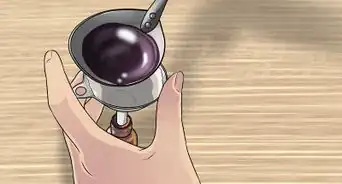
- Add about 2-3 cups of the mixture to another, cooler, container.
- Add bandages and let the mixture become warm. Add cool water to speed the process up.
- Place your container with the wraps on a surface that is at hip level for easy use.


Advertisement
Part 3
Part 3 of 4:
Wrapping Things Up
-
1Take a shower before you apply the wraps. Clean and scrub your skin before applying the wrap to make sure the wrap works best.
-
2Disrobe. You will need to let the wrap come in direct contact with your skin. Any clothes you wear will prevent the wrap from working as intended.
- You may wish to wear a bikini or colorfast underclothes if you are shy and have a helper.
-
3Stand on a large towel. Remove one roll of wet wrap from the solution. Begin wrapping at your ankles and wrap around the leg working your way up.
- Standing on the towel will prevent the floor from becoming wet and slippery.
-
4Wrap tightly. Wrapping tightly will ensure the best contact between the wrap and your skin. Having a tight wrap will also help it to adhere to your body better and keep it from falling off.
- Do not wrap too tightly as this can cut off circulation.
-
5Work up one leg and stop at the knee. After your first leg is wrapped halfway, start wrapping the other lower leg.
- Wrapping up to the knee, one leg at a time, makes bending easier.
-
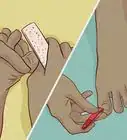
6Use the safety pins to secure the bandage onto itself. You may also wish to use any fasteners that the bandage came with. Either way, fastening the bandage will prevent it from falling away during your wrap.
- Be careful when using pins as they can easily pierce the skin.
-
7Avoid leaving any skin exposed. Start your next roll where the previous roll stopped. Wrap as high up your legs and as close to your groin as possible.
- Cover all areas possible, even your knees.
-
8Start wrapping your hip. Begin as close to the top of your leg as possible, start wrapping around your torso. Work your way up to your armpits.
- Work at your own pace.
- Keep your wraps tight and make sure they are covering all skin.
-
9Move to your lower arms. Wrap those areas completely before moving to the upper arms. End the wrap at shoulder level.
- Wrap your elbows as well, if possible.
- Always pin together bandages when you add a new one.
- Put on a sauna suit at this point if you wish.


Advertisement
Part 4
Part 4 of 4:
Relaxing and Enjoying
-
1Get comfortable. Find the best place to sit and relax while you are wrapped up. Ideally, you should be able to enjoy your space for around an hour.
- If your solution is extremely messy you can climb into the tub.
- If you decide to walk around you should use caution.
-
2Relax. Once you have found a comfortable space to sit in for the wrap, Give yourself an amazing spa day experience. Enjoy the ambiance you have created for your home and let your stress go.[3]
- Read a book and listen to soothing music.
-
3Drink water. Sip water and allow yourself to stay hydrated. Body wraps help your body to remove toxins but they may dehydrate you.
- Remember to drink water before, during and after your wrap.
-
4Remove the wraps. Starting at the top and working your way down, carefully undo your wraps and remove all of them. Towel dry yourself and lower your body temperature with a cool rinse shower.[4]
- Mud wraps may take more scrubbing.
- Continue to drink water to rehydrate.
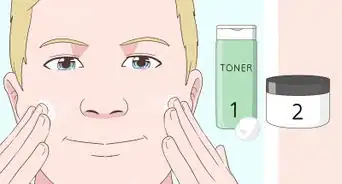
- Apply any lotions you might wish to.


Advertisement
Expert Q&A
-
QuestionHow often can you do a body wrap?
 Zora Degrandpre, NDDr. Zora Degrandpre is a Natural Health Doctor and Licensed Naturopathic Physician in Vancouver, Washington. She is a grant reviewer for the National Institutes of Health and the National Center for Complementary and Alternative Medicine. She received her ND from the National College of Natural Medicine in 2007.
Natural Health DoctorYou should not do a body wrap more than once a month. Check with your doctor to make sure there are no heart or blood circulation problems that might make a body wrap a bad idea for you. -
QuestionI was wondering if I can purchase a pre-mixed mineral solution. Do you know of any company that has that?Zora Degrandpre, NDDr. Zora Degrandpre is a Natural Health Doctor and Licensed Naturopathic Physician in Vancouver, Washington. She is a grant reviewer for the National Institutes of Health and the National Center for Complementary and Alternative Medicine. She received her ND from the National College of Natural Medicine in 2007.
Natural Health DoctorNo, not that specific mixture. Try searching online for pre-mixed solutions or get in touch with a bulk mineral company to see if they can custom-make a mixture for you. -
QuestionWhere can you purchase these ingredients?Zora Degrandpre, NDDr. Zora Degrandpre is a Natural Health Doctor and Licensed Naturopathic Physician in Vancouver, Washington. She is a grant reviewer for the National Institutes of Health and the National Center for Complementary and Alternative Medicine. She received her ND from the National College of Natural Medicine in 2007.
Natural Health DoctorYou can get all or most of the ingredients for the basic detox wrap at most large stores. Look for ingredients for the healing and slimming wraps at herbal stores or online stores. Ace Bandages or other cloth can be obtained at pharmacies or fabric shops.
Advertisement
Warnings
- Don't use a body wrap at home if you have medical problems, circulation problems or if you're pregnant.⧼thumbs_response⧽
- Essential oils are powerful and should be used with caution.⧼thumbs_response⧽
- If you've never had a body wrap and don't know how you'll react you should make sure you're not alone.⧼thumbs_response⧽
- Don't spend more than one hour completely wrapped.⧼thumbs_response⧽
Advertisement
Things You'll Need
- Ace bandages.
- Safety pins.
- Towels to stand on.
- Container to hold solution and bandages.
- Body wrap solution either purchased or homemade.
- 1-2 hours of undisturbed time.


References
About This Article
Advertisement