This article was co-authored by Michiko Takatani and by wikiHow staff writer, Hunter Rising. Michiko Takatani is a Sexual Health, Yoga & Tantra Specialist and the Founder of Solar Tantra School. With nearly 20 years of experience, she specializes in a combination of Kundalini yoga and Tantra. She holds a Kundalini Yoga Certification from the Kundalini Research Institute. Additionally, her Solar Tantra School in New York has a 5-star rating.
There are 12 references cited in this article, which can be found at the bottom of the page.
This article has been viewed 45,965 times.
Are you looking to add a fun stretch to add to your yoga routine that strengthens your lungs, throat, and voice? If you want one that also relieves a lot of tension, the lion pose makes a great addition, as it works well on the jaw and the neck. By forcefully breathing out, the “roar” of your breath carries all the stress out of your body and helps open up your throat. We’ll walk you through how to do the pose first before giving you a few variations to try so you can find what works best for you!
Steps
Standard Pose
-
1Kneel down so you’re sitting on your heels. Lay out your yoga mat in a quiet and comfortable place where you can focus on your poses. Kneel on your mat and press your shins flat against the floor. Point your toes straight behind you and rest your bum on your heels. Try to relax any tension in your hips so you’re not tensed up.[1]
- Try to touch your big toes together to ensure you’re in the right position.
-
2Spread your fingers on your knees. Sit up straight and set your palms on your thighs. Relax your shoulders as you slide your hands forward so you open up your chest. As you reach your knees, spread your fingers apart as wide as you can and lightly press down.[2]
- Keep your spine straight, but avoid getting tense or rigid while you’re doing this stretch. To make sure your spine is straight, draw your pelvic bone back, open the upper chest and place your attention on the top of the head.
Advertisement -
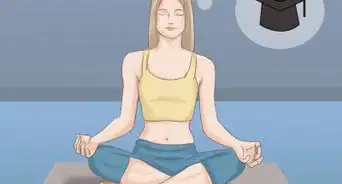
3Roll your eyes up and focus between your eyebrows. You can do this with your eyes open or keep them closed. Pretend that there’s something right between your eyebrows and do your best to try looking at it. Keep your focus there throughout the entire pose.[3]
- The space between your eyebrows is your “third eye” and will help you feel more balanced and open.[4]
-
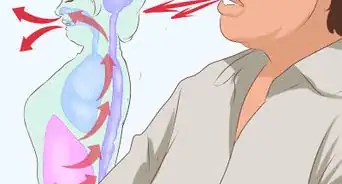
4Take a deep breath in through your nose. When you’re ready to get into the pose, slowly breathe in through your nose. Focus on the feeling of the fresh air coming into your lungs and expanding your stomach. Tilt the crown of your head back slightly as you breathe.[5]
- Try to fill up your lungs completely with your breath so you feel the most relaxed.
-
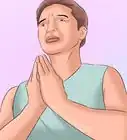
5Exhale quickly with your mouth wide open and tongue sticking out. Lean your body forward and lift your bum off your knees. Then, open your mouth as wide as you can. Stick your tongue straight out toward your chin. As you exhale, try to make a fast “haa” sound with your breath to force all the air out of your lungs. Keep exhaling until you run out of breath.[6]
- Don’t vocalize or hum as you exhale. The only sound you should hear is your breath.
- This part of the exercise helps clear your throat so you have a fuller and more expressive voice.
-
6Relax into the starting position when you run out of breath. When you run out of energy, release any tension you feel in your body and ease back onto your heels. Slowly inhale again through your nose to catch your breath again.[7]
- Repeat the exercise 2 more times to round out your routine.


Variations
-
1Put a blanket under your knees for extra support. If you have weak knees or mobility issues, roll up a blanket and place it on the ground right under your knees. As you get into the lion pose, you’ll press your weight into the soft blanket instead of your mat or the floor.[8]
- This also helps give your hips additional support during the exercise.
-
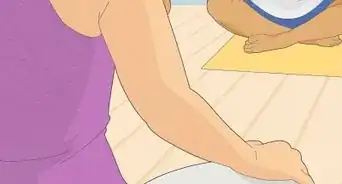
2Spread your knees and put your palms on the floor for a deeper stretch. Kneel down with your knees and feet together as you normally would for the lion pose. Then, spread your knees apart and sink your hips closer to the floor. Place your palms flat on the ground between your thighs so your fingers point back at your body. When you exhale, press your hands into the ground.[9]
- Try to tilt your hips forward more in this position so you get the most out of the stretch.
-
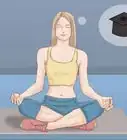
3Sit in lotus position instead of kneeling to open up your hips. Instead of kneeling, cross your legs so your feet are in your lap to get into lotus position. From there, you can put your hands on your knees or on the floor in front of you to perform the lion pose like normal.[10]
- The lotus position works great for stretching your hips, ankles, and knees.[11]
-
4Transition from cow pose into lion pose to improve spine flexibility. Start on your hands and knees to get into the cow pose. Keep your arms straight directly below your shoulders and your knees under your hips.[12] When you exhale, look up and arch your back so your tailbone points up too.[13]
- Cow pose helps with lower back pain and increases your flexibility.


Warnings
- Talk to your doctor before doing yoga if you have severe osteoporosis, risk of blood clots, or balance problems to make sure it’s safe for you to do.[14]⧼thumbs_response⧽
Things You’ll Need
- Yoga mat


-Step-16.webp)

Expert Interview
Thanks for reading our article! If you'd like to learn more about exercising, check out our in-depth interview with Michiko Takatani.
References
- ↑ https://youtu.be/xdUyHPa66A4?t=103
- ↑ https://youtu.be/xdUyHPa66A4?t=140
- ↑ https://yogainternational.com/article/view/simhasana-lion-pose
- ↑ https://www.yogabasics.com/asana/lion/
- ↑ https://www.masterclass.com/articles/lion-pose-guide#how-to-do-lion-pose
- ↑ https://yogainternational.com/article/view/simhasana-lion-pose
- ↑ https://yogainternational.com/article/view/simhasana-lion-pose
- ↑ https://www.masterclass.com/articles/lion-pose-guide#4-lion-pose-modifications-and-variations
- ↑ https://youtu.be/xdUyHPa66A4?t=417
- ↑ https://www.yogitimes.com/article/simhasana-lion-pose-yoga-asana-breath
- ↑ https://www.truerelaxations.com/benefits-lotus-position/
- ↑ https://youtu.be/W5KVx0ZbB_4?t=4
- ↑ https://www.masterclass.com/articles/lion-pose-guide#4-lion-pose-modifications-and-variations
- ↑ https://www.mayoclinic.org/healthy-lifestyle/stress-management/in-depth/yoga/art-20044733
About This Article