This article was co-authored by wikiHow Staff. Our trained team of editors and researchers validate articles for accuracy and comprehensiveness. wikiHow's Content Management Team carefully monitors the work from our editorial staff to ensure that each article is backed by trusted research and meets our high quality standards.
This article has been viewed 571,105 times.
Learn more...
When downgrading from Windows 8 to Windows 7, there are essentially two different, but similar, paths. If you have a Windows 8 Professional key, you can download to Windows 7 Professional for free if you meet a few other requirements. Otherwise, you'll need an unused Windows 7 key to downgrade. Regardless of whether you need to get an unused key or not, the general process is the same.
Steps
Preparing to Downgrade
-
1Check your version of Windows 8 to see if you qualify for downgrade rights. "Downgrade rights" are designed for businesses and allow you to revert to Windows 7 for free. In order to use the downgrade rights, you'll need to meet a few requirements. The first of these is that you're running Windows 8 Professional. The computer has to have come with Windows 8 Professional installed out of the box.[1]
- Press ⊞ Win and type winver to see the version of Windows you are running. If you are using any version of Windows 8 besides Professional, you don't qualify for downgrade rights. You'll need an unused Windows 7 retail key to downgrade.
- If you upgraded from Windows 8 to Windows 8 Professional, you do not qualify for downgrade rights. You'll need an unused Windows 7 retail key to downgrade.
- There are no downgrade rights for retail versions of Windows 8. If you installed Windows 8 on a computer that used to have Windows 7 (or other older version), you do not have downgrade rights. You'll need an unused Windows 7 retail key to downgrade.
-
2Obtain a valid Windows 7 Professional product key. Whether or not the key you obtain needs to be unused depends on if you have downgrade rights:
- If you don't have downgrade rights, you'll need a valid Windows 7 product key that is not currently being used by any other computer. If you upgraded from Windows 7 and are downgrading back to it, you can use your original Windows 7 key. If you bought a computer with Windows 8, you can purchase Windows 7 keys for fairly cheap from various resellers online.
- If you have downgrade rights, you'll need a real Windows 7 Professional product key, but it doesn't have to be a new key. The key can be currently in use by another machine. It doesn't have to be your own key either. You'll just be using it to get past the activation screen.
Advertisement -
3Ensure that your computer has Windows 7 drivers available. If you bought the computer with Windows 8 installed, it may not be fully compatible with Windows 7. You'll need to check the drivers for all of your hardware to ensure that it will all work when you downgrade, since Windows 7 drivers may not be available:[2]
- If you have a prebuilt computer (HP, Dell, Acer, etc.), visit the manufacturer's support site and look up your computer's model. You can usually find the model printed on laptop keyboards, or on a sticker affixed to the bottom or back of the computer. In the "Drivers" or "Downloads" section of the support site, check for Windows 7 compatible drivers. If there are no Windows 7 drivers available, your hardware may not work correctly after downgrading.
- If you built your own computer, or have a custom-built computer, you'll need to check each piece of hardware manually. Press ⊞ Win and type devmgmt.msc to open the Device Manager. Go through your list of hardware and visit each one's support site. Check for Windows 7 drivers for the piece of hardware you have from that manufacturer. If Windows 7 drivers aren't available, that piece of hardware may not work when you downgrade.
-
4Make a driver disk (optional). If you want to save yourself some time after the downgrade, you can put all of the Windows 7 drivers you'll need on a USB drive and then set it aside until you're finished. This will allow you to quickly install all of your necessary drivers. The most important driver to include is your network adapter, as this will ensure that you can get online and download any other drivers.
-
5Find or make a Windows 7 Professional installation disc. You'll need this disc to downgrade to Windows 7. It doesn't have to be your disc, as any Windows 7 Professional installation disc will work. If you don't have a disc, you can make one using software available for free from Microsoft:
- Visit the Microsoft Windows 7 download page and enter the key from the previous step to download the ISO file.
- After downloading the ISO file, insert a blank DVD or 4GB+ USB drive.
- Download and install the Windows USB/DVD Download Tool.
- Run the tool and select your Windows 7 Professional ISO as the "Source." Choose either your blank DVD or USB drive as the "Destination." The tool will then copy or burn the ISO, creating an installation disc or drive you can use.
-
6Back up all of your important files. Downgrading to Windows 7 is essentially like installing a fresh operating system, which will delete all of the data on your drive. Make sure all of your important files are safely backed up to a USB drive or the cloud before you start the downgrade process. See Back up a Computer for more detailed instructions on backing up your data efficiently.


Downgrading to Windows 7
-
1Enable the legacy boot function in the UEFI settings menu. This is required for computers that came with Windows 8 installed, but not for computers that were upgraded to 8 later. The UEFI is the interface that controls your computer, and is the modern version of a BIOS. Windows 7 doesn't support UEFI, so you'll need to set your UEFI settings to support the older BIOS method. The process is a different depending on your computer, but generally you can do this:
- Press the ⊞ Win+C or swipe in from the right side of the screen to open the Charms bar.
- Select "Settings" and then "Change PC Settings."
- Click "Update and recovery," then select "Recovery." Click "Restart Now" underneath the "Advanced Startup" header.
- Select "Troubleshoot" when your computer reboots, then "Advanced options."
- Click "UEFI Firmware Settings" and then click "Restart."
- Find the "Legacy boot" or "BIOS mode" in the UEFI settings and enable it. Its location will vary by manufacturer.
-
2Insert the Windows 7 installation disc or USB drive and reboot. You'll see the traditional BIOS startup screen after rebooting, since you enabled it in the UEFI settings.
-
3Boot from the disc or drive. The process for this will vary depending on your computer. Many computers will display a "BOOT" key during startup that will allow you to select a drive to boot from. If you don't see this, you'll need to press the BIOS or SETUP key. This will open your BIOS/UEFI menu. From here you can select the "Boot" menu and then choose your installation disc or drive.
-
4Start the Windows 7 installation process. Press a key on your keyboard when prompted to begin the Windows 7 installation process. It will take a little while to load the initial setup.
-
5Proceed through the Windows 7 installation. Choose your language and region settings in the first few Windows that appear.
-
6Select the drive that has Windows 8 installed when prompted. During the installation process, you'll be prompted to select a drive to install Windows 7 on. Choose the drive that currently has Windows 8 installed on it. Remember, this will delete everything that is currently stored on the drive.[3]
-
7Enter the Windows 7 Professional key you found when prompted. Towards the end of the installation process, you'll be prompted to enter your Windows 7 product key. Enter the key you obtained in the first section. If you have downgrade rights, this key does not have to be an unused key.
-
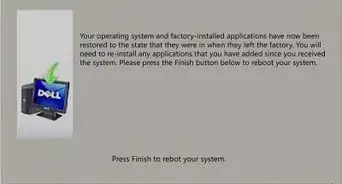
8Complete the installation and load the desktop. After entering the key, Windows 7 will finish installing and you'll eventually be taken to the desktop. If you are using your downgrade rights, there's a good chance that you'll receive an "Activation Failed" message after Windows loads.


Activating Your Installation
-
1Open the Activation window if it doesn't open automatically. Windows 7 will attempt to automatically activate when you load the desktop for the first time and you're connected to the internet. If you used an unused Windows 7 key during installation, activation should happen automatically without issue. If you are using your downgrade rights, your automatic activation likely failed.
- If the Activation window doesn't appear, click the Start menu, type "Activate," and then click "Activate Windows."
-
2Call the phone number that appears if activation fails. When you're using your downgrade rights, you'll need to call the Microsoft activation hotline and provide your Windows 8 Pro key to prove that you are allowed to downgrade for free.[4]
-
3Enter the code provided by Microsoft to activate Windows. if Microsoft is able to verify that you are entitles to downgrade privileges, you'll be given a special code to enter into the Activation window that will activate your copy of Windows 7.
- If you're downgrading multiple computers, you can use the same key during the installation of each, but you'll have to call Microsoft to activate each one individually.
-
4Install your drivers. Once you're activated, you can focus on installing your drivers. If you made a driver disk earlier, plug it in and start installing the drivers on it. If you didn't make a disk, run Windows Update and allow it to check for and download any available updates. Once this is finished, you can go back to the Device Manager and manually update any lingering hardware by right-clicking it and select "Update Driver Software."


Community Q&A
-
QuestionCan you use the upgrade option instead of the custom option to install Windows 7?
 Community AnswerYou cannot use the upgrade option to downgrade to Windows 7 from Windows 8/10.
Warnings
- Just because you want to downgrade to Windows 7 doesn't mean you should. Certain hardware features may rely on Windows 8 drivers to function.⧼thumbs_response⧽


-Step-55-Version-2.webp)


References
- ↑ https://support.microsoft.com/en-us/kb/2832566
- ↑ http://www.pcworld.com/article/2015107/downgrading-from-windows-8-to-7-what-you-need-to-know.html
- ↑ http://www.makeuseof.com/tag/its-not-easy-but-you-can-uninstall-windows-8-and-revert-to-your-old-os/
- ↑ http://www.howtogeek.com/133168/how-to-downgrade-windows-8-pro-to-windows-7/
About This Article