This article was co-authored by wikiHow Staff. Our trained team of editors and researchers validate articles for accuracy and comprehensiveness. wikiHow's Content Management Team carefully monitors the work from our editorial staff to ensure that each article is backed by trusted research and meets our high quality standards.
This article has been viewed 36,231 times.
Learn more...
This wikiHow teaches how to download and install new fonts on your Windows or Mac computer, which can be used in your word processor or any other program that uses system fonts.
Steps
Installing Fonts on a Windows PC
-
1Open your web browser. The quickest way to find fonts is to visit a website that hosts font files for free.
-
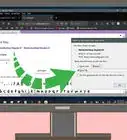
2Visit a font hosting website. There are a variety of websites that host fonts that you can download for free or purchase to use. Below are a few of the more popular and safe options:
- 1001freefonts.com
- dafont.com
- fontsquirrel.com
- fontspace.com
Advertisement -
3Find a font you want to download. Font sites will have thousands of fonts available that are free for personal use. If you intend to use these fonts commercially, you'll need to purchase a license from the font creator.
- Commercial use includes websites and YouTube videos that generate you ad revenue, as well as any traditional business publications.
-
4Click the Download button. The wording and placement of the button will vary depending on the site you're using.
-
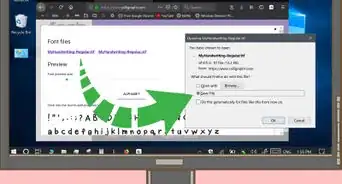
5Click the ZIP file after downloading to open it. You'll see this at the bottom of your browser window. You can also find the file in your Downloads folder.
-
6Double-click the TTF or OTF file. The type of file will vary depending on the font, but both TTF and OTF are supported by Windows.
- Other less common but still viable extensions include TTC and PFB.
- There may be more than one font file if the font included multiple styles. Each one will need to be installed individually.
-
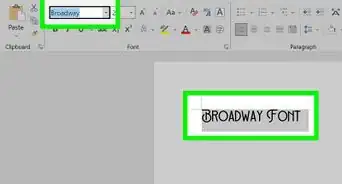
7Look over the font preview. You'll see a preview of the font at various sizes. Give it a glance to make sure the font will look good at the sizes you'll be using.
-
8Click Print if you want to see the font printed. If you're planning on printing documents with your font, you may want to see what it looks like on paper before installing it. Click Print to print a page with the text from the preview window.
-
9Click Install. You'll see this button at the top of the font preview window.
-
10Enter the administrator password if prompted. If you're logged in with an Administrator account, installation will proceed automatically. If you aren't an administrator, you'll need to enter the administrator account's password.
-
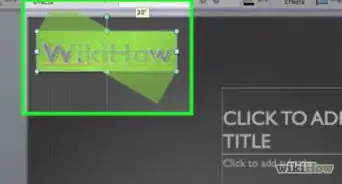
11Open a program that uses system fonts. You can find your new font in any program that uses fonts installed in Windows, such as Word or Photoshop.
-
12Select your new font. Your newly-installed font will appear alphabetically in the list of fonts when you open the Fonts menu.


Downloading Fonts on a Mac
-
1Open your web browser. You'll be downloading your new fonts from websites that are dedicated to hosting free font files.
-
2Visit a site that hosts font files. There are several sites that host font files uploaded by users. It is recommended to download from these popular sites to avoid potential viruses:
- 1001freefonts.com
- dafont.com
- fontsquirrel.com
- fontspace.com
-
3Find the font you want to use. You can browse through various categories and search for styles to find the font that you want.
- Most fonts you find will be free for personal use, but will require payment for a commercial license if you intend to use the font for something that earns you money.
-
4Click the Download button. You'll find a "Download," "Free Download," or "Download Font" button for each font on the website.
-
5Click your Downloads list. You'll find this next to the Trash in your Dock.
-
6Click the folder for the font you just downloaded. It should be at the bottom of the list if it was the last thing you downloaded.
-
7Double-click the font file. You'll see several files inside of the folder, including one or more font files. Font files have a TTF, OTF, or DFONT extension.
- Some fonts may come with more than one font file for different styles. Each one will need to be installed individually.
-
8Look at the font preview. A window will open displaying what the font will look like. You can click the menu at the top of the window to view different styles.
-
9Click Install Font. This will add the font to your system.
-
10Review any reported problems. If a font file is not properly constructed, you may receive a warning and have to confirm installation. Generally, any problems found will not prevent the font from working. Check the box for the problem font and click Install Checked.
-
11Open a program that uses your fonts. Now that the font is installed, you can use it in any program that supports system fonts, such as Pages or TextEdit.
-
12Select your new font from the Fonts menu. You'll find your new font listed alphabetically in the Fonts menu in whichever program you're using. Select it to start using it.


Community Q&A
-
QuestionHow can I add fonts to a Google Docs page with Chrome OS?
 Community AnswerUnfortunately, you cannot. If you want to use custom fonts, I would recommend Microsoft Word.


About This Article

1. Visit a font hosting website.
2. Browse for a font.
3. Click the DOWNLOAD link.
4. Double-click the ZIP file.
5. Double-click the TTF or OTF file inside.
6. Click Install.