This article was co-authored by wikiHow staff writer, Hannah Madden. Hannah Madden is a writer, editor, and artist currently living in Portland, Oregon. In 2018, she graduated from Portland State University with a B.S. in Environmental Studies. Hannah enjoys writing articles about conservation, sustainability, and eco-friendly products. When she isn’t writing, you can find Hannah working on hand embroidery projects and listening to music.
There are 7 references cited in this article, which can be found at the bottom of the page.
This article has been viewed 41,769 times.
Learn more...
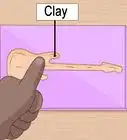
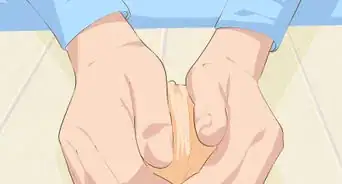
Non-hardening modeling clay won’t dry out when you leave it exposed to the air, which makes it great for reuse. However, if you make something really cool out of clay, you might be wondering how you can preserve it forever. If you are working with polymer clay, you can harden up your sculpture to preserve it for life. Unfortunately, if you are working with plasticine or other oil-based clay, you won’t be able to harden it.
Steps
Preparing Your Sculptures
-
1Check the package for the baking temperature, then preheat your oven. Every brand of polymer clay is slightly different, so double check what yours says before you turn on your oven. Usually, the temperature is between 220 and 300 °F (104 and 149 °C).[1]
- If you don’t have the original packaging for your clay, look up the manufacturer's website to find the right temperature.
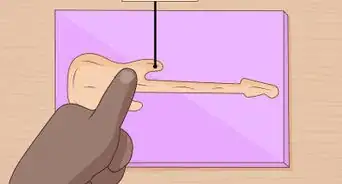
- Unfortunately, polymer clay and plasticine clay look and feel almost identical. If you aren’t sure which one you have, don’t try to bake your clay in the oven. Plasticine clay will melt and could start a fire.[2]
Tip: Different colors of polymer clay can also have different baking times. If you are baking multiple colors at one time, use the average temperature between the 2 by adding the temperatures together and then dividing the sum by 2.
-
2Place your sculpture onto a piece of parchment paper. Polymer clay can stick to baking sheets, so it’s important to put a small layer of protection in between them. Cut out a small square of parchment paper and set it underneath your sculpture.[3]
- If you are baking more than 1 sculpture at a time, give each one their own piece of parchment paper to keep them separated.
- Try not to use aluminum foil to bake your clay with, as the foil can heat up in the oven and scorch your sculptures.[4]
Advertisement -
3Set your sculpture in the center of a baking tray. Polymer clay won’t expand when it’s heated up, so you can put as many sculptures on a baking sheet as you’d like. Make sure they aren’t touching each other, and try to center them as much as possible.[5]
- Centering your sculptures will ensure that each one gets an even amount of heat.


Baking the Clay
-
1Place the baking tray on the center rack of your oven. The center of your oven gets the most even amount of heat to ensure that your clay won’t get burned. Make sure the rack is in the exact middle of your oven and situate your baking tray in the center of it.[6]
- If you have to choose between the top and bottom rack, go for the bottom one. This will keep your clay away from the heating element so it’s less likely to get burned.
-
2Bake your sculpture for the amount of time indicated on the package. Just like the temperature range, each package of polymer clay has its own time frame that you should bake it for. Look on your package and set a timer on your oven or your phone so you don’t forget about it.[7]
- The bake time may also depend on the thickness of your clay. Generally, the baking time is for a sculpture that’s 1⁄4 inch (0.64 cm) thick, so you may need to add on more time if yours is thicker.
- For example, if your sculpture is 1⁄2 inch (1.3 cm) thick and your bake time is 15 minutes, you’d multiply 15 by 2 to get 30 minutes.
-
3Take your sculptures out and wrap them in a kitchen towel. Use an oven mitt to grab your baking tray out of the oven and set it on your stove. Grab your sculptures and immediately wrap them in a kitchen towel to slow down the cooling process so they don’t crack.[8]
- You can also turn off your oven and leave your sculptures in there to cool down instead.
Warning: Use caution, as your sculptures will be super hot.
-
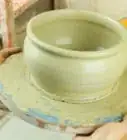
4Wait 10 to 20 minutes for your sculptures to cool completely. Try not to handle your sculptures until they are completely cool to avoid cracking them. Once they’re finished, you can add a glaze, paint on a decoration, or leave them as they are![9]
- Once you bake polymer clay, you won’t be able to rehydrate it again.


References
- ↑ https://www.youtube.com/watch?v=qzMFW4fnjfw&feature=youtu.be&t=179
- ↑ https://thebluebottletree.com/help-my-polymer-clay-melted/
- ↑ https://www.youtube.com/watch?v=DiqCDaR37eU&feature=youtu.be&t=55
- ↑ https://www.jessamatutorials.com/bake-polymer-clay.html#howtobakepolymerclaysummary
- ↑ https://www.youtube.com/watch?v=DiqCDaR37eU&feature=youtu.be&t=63
- ↑ https://www.youtube.com/watch?v=DiqCDaR37eU&feature=youtu.be&t=82
- ↑ https://www.youtube.com/watch?v=qzMFW4fnjfw&feature=youtu.be&t=179
- ↑ https://www.youtube.com/watch?v=DiqCDaR37eU&feature=youtu.be&t=126
- ↑ https://www.jessamatutorials.com/bake-polymer-clay.html#howtobakepolymerclaysummary
Warnings
- Never bake plasticine or oil-based clay in the oven. Unfortunately, it will probably melt into a puddle, and it could even catch your oven on fire.[10]⧼thumbs_response⧽
Things You’ll Need
- Oven
- Parchment paper
- Baking tray
- Kitchen towel
- Oven mitt
- Paint or gloss (optional)


About This Article