This article was co-authored by April Ferri and by wikiHow staff writer, Sophia Latorre. April Ferri is a Professional Hair Stylist and the Co-Owner of Widows Peak Salon, a hair salon based in Los Angeles, California. With over ten years of experience, April specializes in hair coloring and enhancing and transforming natural tones into vibrant shades for beautiful and low maintenance hair. Her work has been featured in Voyage LA Magazine, and she has worked as a stylist for LA Fashion Week.
This article has been viewed 287,457 times.
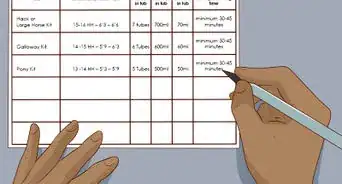
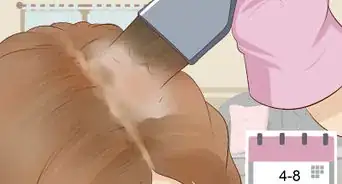
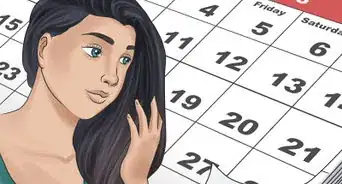
One downside of coloring your hair is that you're bound to develop unsightly roots that don’t match the rest of your tresses. Typically, you should color your roots every 4-8 weeks. Instead of heading to the salon every time and spending tons of money, you can dye your roots at home with a few simple steps.
Steps
Setting Up
-
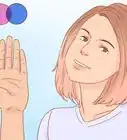
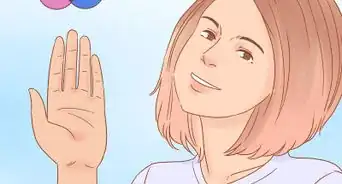
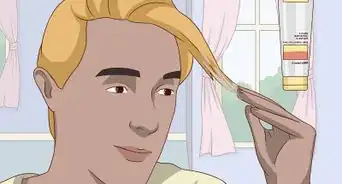
1Choose a dye that matches your hair color exactly. Use a mirror to compare swatches to your roots, as the ends of your hair may be lighter. You may want to bring a friend with you to the beauty supply store to help you choose an exact match.[1]
- Foam and mousse formulas are the easiest to apply, but they’re difficult to apply accurately. Go with a cream or gel formula for a precise application.
-
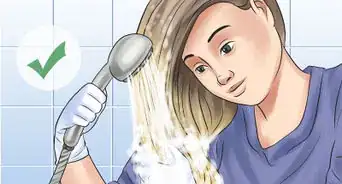
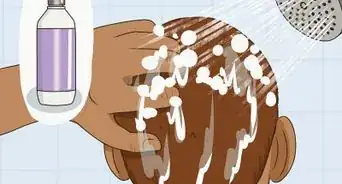
2Wash your hair 12-24 hours before you dye your hair. Greasy or dirty hair will not accept color as well as clean hair, but if your hair is too clean, it may be more susceptible to damage. Shampoo your hair 12-24 hours before coloring your roots in order to remove product as well as dirt and oil. This way, your hair will accept the color and will also contain the natural oils needed to help prevent damage.Advertisement
-
3Wear old clothes or cover yourself with a towel. If you have a smock you could use that instead. Wear a button-up shirt if possible so that it will be easy to remove when you need to get in the shower and rinse out the dye.[2]
- You may want to place newspaper or plastic sheeting over your workspace as well.
-
4Divide your hair into 4 sections. Make the first part down the center of your scalp, from your forehead to the nape of your neck. Make the second part running from ear to ear across the top of your head like a headband. Use clips to secure each section.[3]
- Try to make these parts as neat as you can—you need to be as precise as possible to ensure your roots blend in seamlessly with the rest of your hair.[4]
-
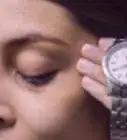
5Put petroleum jelly or conditioner around your hairline. To keep dye from staining your skin, apply petroleum jelly or a thick conditioner around the hairline near your forehead, ears, and neck.[5]
- If you don’t have petroleum jelly or conditioner, try coconut oil or shea butter.
-
6Mix the dye per the instructions. Make sure you are working in a well-ventilated area. Don’t forget to put on gloves before mixing the dye. The gloves, container, stir stick, applicator, and ingredients are provided in the kit. Take care not to spill the dye as it does stain.[6]


Applying the Dye
-
1Brush the dye onto the roots at the edge of one quadrant. Unclip 1 of the front quadrants of your hair. Use the provided brush or tool to paint the dye all the way around the perimeter of the section, including the part and the front hairline. This will help keep hair neat and contained, clearly mark your sectioning, and ensure saturation at the most visible areas.[7]
- Take care not to dye the hair that’s already colored. Overlapping the dye can cause a discolored band to form just beyond your roots. It can also lead to breakage.[8]
-
2Use the end of a tail comb to flip a thin section of hair over. The section should be very thin, between ⅛-¼ inch (0.64-0.32 cm) thick , and should run parallel to your part from the top to the bottom of 1 quadrant. Try to make your part as straight as possible.[9]
- You can also do this with the tail end of a hair dye applicator brush.
-
3Dye the roots of the next section. Use the same method to brush dye onto your roots on both sides of the new section part. Move down the quadrant as you go.[10]
-
4Continue until 1 quadrant is finished. Flip another thin section of hair over each time you finish coloring the roots on either side of the part line. Once you finish a quadrant, use the tail of the brush or comb to lightly fluff your roots, allowing air to circulate. Twist the ends of your hair in that quadrant into a loose bun and secure it to your head with a clip to keep it out of the way. Then, move onto the next quadrant.[11]
- It should only take between 10 and 20 minutes per quadrant, depending on the thickness of your hair.
-
5Repeat the process on the other 3 quadrants. It is super helpful to have a friend help dye the roots on the back of your head to ensure you don’t miss any spots. When you’re finished applying all the dye, position 2 mirrors so that you can see the back of your head. Look carefully to see if there are any areas you missed. If so, add dye to those sections.[12]
- Gently massage the back of your head after applying dye to all your hair. This will help spread the dye to any missed spots you didn’t notice.
-
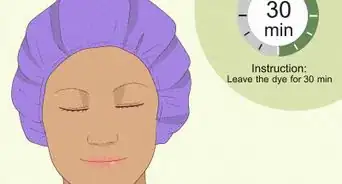
6Let the dye develop for the recommended amount of time. Once you’re finished applying dye, remove and dispose of your gloves. Refer to the instructions to find out how long to let the dye develop for. Use a kitchen timer to ensure you don’t leave the dye on too long.[13]
- You may want to place a shower cap over your head at this point, as a warm environment promotes development.

Finishing Up
-
1Get in the shower or situate yourself near the sink. When doing this yourself, it’s easier to rinse out the dye in the shower. Take care not to transfer the dye to your clothes when you remove them.
- The petroleum jelly around your hairline should rinse away, but you may want to wipe it off with an old cloth or a paper towel at this point.
- Consider rubbing a little bit of shampoo onto your hairline before adding water to help remove any staining on your skin.
-
2Rinse your hair thoroughly and shampoo it twice. Use warm water to rinse out the excess dye. Keep rinsing until the water runs clear. Shampoo your hair twice to restore the normal pH and ensure that all of the product is removed. Refrain from shampooing your hair again for 48 hours so that your hair can fully seal and regain strength.[14]
-
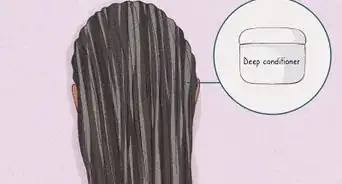
3Condition your hair then rinse it with cool water. Many dye kits come with a conditioner to use after coloring your hair. If this isn’t the case, choose a conditioner formulated for color-treated hair. Let the conditioner soak into your hair for 5-15 minutes. Then, rinse your hair with cool water until the conditioner is removed.[15]
- Cool, rather than warm, water helps to close the hair shaft and lock in the color.
-
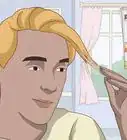
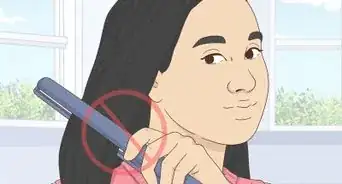
4Style your hair as usual. Be sure to use a heat-protectant product before using heat styling tools, like a blow dryer or flat iron.[16]
-
5Dispose of the excess dye. If you have dye leftover, dispose of it per the instructions on the package. Don’t save it to use for later as the chemicals break down over time and the dye won’t produce the same results.[17]


Expert Q&A
Did you know you can get expert answers for this article?
Unlock expert answers by supporting wikiHow
-
QuestionHow should I dye my roots if they're lighter than my natural hair color?
 Laura MartinLaura Martin is a Licensed Cosmetologist in Georgia. She has been a hair stylist since 2007 and a cosmetology teacher since 2013.
Licensed CosmetologistYou can use the method described above to dye your roots as long as your roots are within 3 levels of your natural shade. Retouch your roots every 4-6 weeks. When selecting a color, chose a cooler color than the desired result to help counteract the warmth that is exposed when you lift your hair color to a lighter shade.
Support wikiHow by unlocking this expert answer.
-
QuestionHow can I touch up my roots at home?
 April FerriApril Ferri is a Professional Hair Stylist and the Co-Owner of Widows Peak Salon, a hair salon based in Los Angeles, California. With over ten years of experience, April specializes in hair coloring and enhancing and transforming natural tones into vibrant shades for beautiful and low maintenance hair. Her work has been featured in Voyage LA Magazine, and she has worked as a stylist for LA Fashion Week.
Professional Hair StylistI recommend sectioning your hair as cleanly as possible and work in small sections to keep it neat. Also, try as much as possible not to overlap your color—that's when you're going to start getting bands in your hair, or you could get breakage.Support wikiHow by unlocking this expert answer.
-
QuestionHow do I apply hair color to roots, especially in the back, by yourself without that wierd looking color comb?
 Community AnswerIt's much easier to do with the comb, but you can wear gloves and just use your hands.
Warnings
- Avoid using metal clips or metal tail combs when dyeing your roots, as they can cause discoloration.⧼thumbs_response⧽
- If you get hair color on your skin, remove it immediately with a damp cloth or a baby wipe.⧼thumbs_response⧽
- Do not dye your eyebrows or eyelashes. The chemicals in hair dye are harsh and could damage your skin or eyes.⧼thumbs_response⧽
Things You'll Need
- Hair dye kit
- Petroleum jelly
- Old clothing or towel/smock
- Tail comb
- Shower cap (optional)
- Kitchen timer
- Clean, old cloth
- Sink or shower
- Conditioner (if not provided)

References
- ↑ http://40plusstyle.com/how-to-dye-your-hair-roots-yourself/
- ↑ https://www.lipsticklettucelycra.co.uk/how-to-dye-your-own-roots-at-home/
- ↑ https://bellatory.com/hair/How-to-touch-up-dark-roots-in-blonde-hair
- ↑ April Ferri. Professional Hair Stylist. Expert Interview. 8 December 2020.
- ↑ https://www.lipsticklettucelycra.co.uk/how-to-dye-your-own-roots-at-home/
- ↑ https://www.lipsticklettucelycra.co.uk/how-to-dye-your-own-roots-at-home/
- ↑ http://40plusstyle.com/how-to-dye-your-hair-roots-yourself/
- ↑ April Ferri. Professional Hair Stylist. Expert Interview. 8 December 2020.
- ↑ https://www.lipsticklettucelycra.co.uk/how-to-dye-your-own-roots-at-home/
- ↑ http://40plusstyle.com/how-to-dye-your-hair-roots-yourself/
- ↑ https://bellatory.com/hair/How-to-touch-up-dark-roots-in-blonde-hair
- ↑ https://www.lipsticklettucelycra.co.uk/how-to-dye-your-own-roots-at-home/
- ↑ http://40plusstyle.com/how-to-dye-your-hair-roots-yourself/
- ↑ http://40plusstyle.com/how-to-dye-your-hair-roots-yourself/
- ↑ http://40plusstyle.com/how-to-dye-your-hair-roots-yourself/
- ↑ http://stylecaster.com/beauty/the-5-rules-of-heat-styling-your-hair/
- ↑ http://www.hairboutique.com/tips/articles.php?f=tip18082.htm
About This Article

The best way to color your roots is to use a hair dye kit that matches your hair color. Mix the dye, then paint the color on ⅛-¼ inch sections all around your head. Let it develop for the recommended amount of time, then rinse out the excess dye. Shampoo your hair twice and then condition it. Rinse your hair with cool water and style as usual. For tips on how to get the most even coverage and how to dye the back of your own head, read the article!