X
wikiHow is a “wiki,” similar to Wikipedia, which means that many of our articles are co-written by multiple authors. To create this article, 18 people, some anonymous, worked to edit and improve it over time.
This article has been viewed 167,834 times.
Learn more...
Ever been frustrated by trying to create a brochure or flier in Microsoft Word? This article offers 4 simple steps to follow along with editing instructions to make your job easier. To create your own great-looking marketing materials using Microsoft Word and Publisher, start with a template to give yourself a head start. Template resources are listed below.
Steps
-
1Ungroup objects - Text and graphics may be grouped.
- To ungroup objects:
- Word:
- Select the object. On the Drawing toolbar*, click Draw, and then click Ungroup.
- Publisher:
- Select the object. On the Arrange menu, click Ungroup or Ctrl+Shft+G.
- Word:
- Group objects:
- Word:
- Select the objects you want to group. Shift-click to select multiple objects. On the Drawing toolbar*, click Draw, and then click Group.
- Publisher:
- Select the object. On the Arrange menu, click Group or Crtl+Shft+G.
- Word:
- To ungroup objects:
-
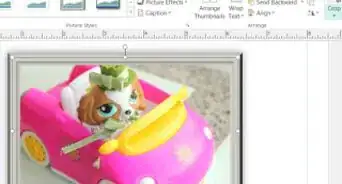
2Resize a picture
- Select the picture you want to resize.
- Position the mouse pointer over one of the sizing handles.
- Drag the sizing handle until the object is the shape and size you want. To maintain the object's proportions, drag one of the corner sizing handles.
Advertisement -
3Crop a picture
- Select the picture you want to crop.
- Click Crop on the Picture toolbar.
- Position the cropping tool over a cropping handle and drag the handle inward until the object is cropped the way you want it.
-
4Format a picture or drawing object. Pictures can be resized, cropped, and color adjusted using brightness and contrast, converting color to black and white or grayscale. To change specific colors, you need to use a photo editing or drawing program. Drawing objects can be resized, rotated, flipped, and colored. Add borders, patterns and other effects. Formatting options vary depending on the type of graphic you are editing.
- Select the picture or drawing object you want to edit.
- Click the editing option you would like to use on the Picture toolbar or the Drawing toolbar .
- Position or size graphics exactly: On the Format menu, click Picture or AutoShape. Then, enter your settings in the dialog box.


Advertisement
Community Q&A
-
QuestionHow do I group edit photos in Word?
 Community AnswerYou need to have two pictures you want in the document, shift-click each image, then go to "Format." Then click "Group" on the right.
 -
QuestionHow do I change fonts on my PC?
 Community AnswerIn Word, go to the Home tab. In the Font section you will see a little field with a number beside it. In the field is normally written 'Calibri'. If you click on it, you'll see all the installed fonts and you can choose one now. To install go to dafont.com, pick your font, download it, then unzip it and put the file in the 'fonts' folder in the Windows library.
 -
QuestionHow do I change text on an original document in MS Office?Community AnswerHighlight the text you want to change, go into "format" and choose the changes you wish to make.
Advertisement


About This Article
Advertisement