This article was co-authored by wikiHow staff writer, Darlene Antonelli, MA. Darlene Antonelli is a Technology Writer and Editor for wikiHow. Darlene has experience teaching college courses, writing technology-related articles, and working hands-on in the technology field. She earned an MA in Writing from Rowan University in 2012 and wrote her thesis on online communities and the personalities curated in such communities.
The wikiHow Tech Team also followed the article's instructions and verified that they work.
This article has been viewed 252,816 times.
Learn more...
Do you need to troubleshoot your computer or change some settings in BIOS? There are many reasons you could want to enter the BIOS on your computer, including there changing your startup process or simply changing your system clock. Since each manufacturer does this a little differently, this wikiHow article teaches you how to access the BIOS on a Lenovo laptop or desktop PC.
Things You Should Know
- Most Ideapad Lenovo computers have a Novo button that you can press to enter BIOS.
- Press "F2" or "FN + F2" as your computer restarts to enter BIOS. You may need to repeat this several times to get it right.
- If you are running Linux, tap "F1" instead.
Steps
Using a Function Key at Reboot (All Windows versions)
-
1Reboot or turn on the computer. As soon as the computer restarts, you’ll see a black screen that says ″lenovo″ in large white letters.[1] The screen only appears for a few seconds, so you’ll need to perform the next step quickly.
- If you’re using Windows 8/8.1, you’ll need to restart the computer from Windows to access the BIOS. From the Windows desktop, press ⊞ Win+i, click Power, and then click Restart.
-
2Repeatedly tap F2 until the BIOS appears. Aim to press the key twice per second. The key you need to use for your model appears at the bottom of the ″lenovo″ screen next to ″to Setup.″
- You may need to press FN + F2.
- Other models and Linux computers use F1 instead of F2.[2]
- This may take a few attempts until you can enter BIOS.


Using the Novo Button on Ideapad
-
1Shut down your laptop or computer. Go to the Start menu and click Power > Shut Down.
-
2


Using Advanced Options in Windows 10
-
1Click the Start menu. It’s usually at the bottom-left corner of the desktop.[5]
-
2
-
3Click Update & security. It’s the option with a curved arrow.
-
4Click Recovery. It’s in the left column.
-
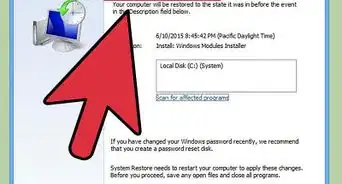
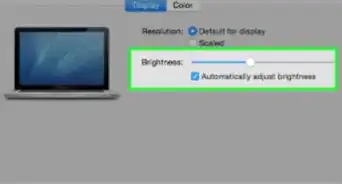
5Click Restart now. It’s under ″Advanced startup″ in the right panel. The PC will reboot to a blue menu.
-
6Click Troubleshoot on the menu. It’s the option with a screwdriver and a wrench.
-
7Click Advanced options. It’s the last option.
-
8Click UEFI Firmware Settings. It’s in the right column.
-
9Click Restart. The PC will restart and boot into the BIOS.


Using the Shift Key in Windows 10/8.1/8
-
1
-
2
-
3Continue holding ⇧ Shift and click Restart. Keep holding the key down as the PC reboots to a blue menu screen.
-
4Click Troubleshoot on the menu. It’s the option with a screwdriver and a wrench.
-
5Click Advanced options. It’s the last option.
-
6Click UEFI Firmware Settings. It’s in the right column.
-
7Click Restart. The PC will restart and boot into the BIOS.


Using Advanced Options in Windows 8.1/8
-
1Move the mouse to the top-right corner of the home screen and then move it downward. A menu will appear.[6]
-
2Click Settings.
-
3Click Change PC Settings. It’s at the bottom of the menu.
-
4Click Update and recovery. It’s at the bottom of the left column.
-
5Click Recovery. It’s in the left column.
-
6Click Restart now. It’s under the ″Advanced startup″ header in the right panel. The PC will reboot to a blue menu.
-
7Click Troubleshoot on the menu. It’s the option with a screwdriver and a wrench.
-
8Click Advanced options. It’s the last option.
-
9Click UEFI Firmware Settings. It’s in the right column.
-
10Click Restart. The PC will restart and boot into the BIOS.


References
- ↑ https://support.lenovo.com/us/en/solutions/HT500216
- ↑ https://download.lenovo.com/pccbbs/mobiles_pdf/thinkpad_p43s_p53s_ubuntu_installation_whitepaper_v1.0.pdf
- ↑ https://support.lenovo.com/us/en/solutions/ht104038
- ↑ https://support.lenovo.com/us/en/solutions/ht062552
- ↑ https://support.lenovo.com/us/en/solutions/HT500216
- ↑ https://support.lenovo.com/us/en/solutions/HT500216
- ↑ https://answers.microsoft.com/en-us/windows/forum/all/lenovo-laptop-windows-10-cannot-access-bios/8936aef6-7d0f-4a91-b5e7-7b3b2b687fdf#:~:text=Hi%20Thomas%0A%0AThis%20is%20a%20well%20known%20issue%20with%20the%20Z570%2C%20since%20Lenovo%20introduced%20UEFI%20on%20that%20model%20.%20.%20.%0A%0AThe%20solution%20posed%20on%20the%20Lenovo%20forum%0A%0ARemove%20the%20hard%20drive%20and%20then%20use%20F2%20to%20Enter%20BIOS%20on%20Boot%0A%0Ahttps%3A//forums.lenovo.com/t5/Lenovo%2DP%2DY%2Dand%2DZ%2Ds…
About This Article