This article was co-authored by wikiHow Staff. Our trained team of editors and researchers validate articles for accuracy and comprehensiveness. wikiHow's Content Management Team carefully monitors the work from our editorial staff to ensure that each article is backed by trusted research and meets our high quality standards.
There are 7 references cited in this article, which can be found at the bottom of the page.
This article has been viewed 142,445 times.
Learn more...
If you’re looking for that classic style, the ease of writing, or just a more intimate writing experience you may have purchased a fountain pen. There are so many types of fountain pens each with their own filling methods, but most pens use either a cartridge or a pneumatic system to draw ink into the barrel, whether it is by a plunger or a pump. If your pen doesn’t perfectly fit into one of the methods you can probably apply the same core principles to refill your pen. If you have an older or rarer pen, or you are in doubt, bring your pen to a store that sells fountain pens and they can help you identify and refill your particular model.
Steps
Opening and Identifying Your Pen
-
1Pull off the cap. The cap is the top of the pen covering the “grip section,” where you hold the pen, and the “nib,” which is the part where the ink comes out.
-
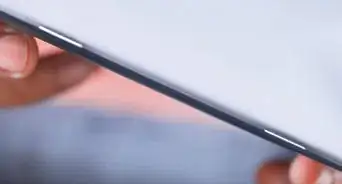
2Screw off the barrel. The barrel is the cover housing the body of the pen, where the ink is held. The most common modern pens will require this step. Older and rarer pens will have self-filling mechanisms that do not require removing the barrel.
- Instead of a barrel cover, built-in piston or button systems may have a “blind cap” over the screw knob or button.
Advertisement -
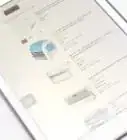
3Determine your filling method. If you aren’t sure what kind of method to follow, examine the inside of your pen. Most likely you will have a plastic cartridge, or a piston converter system with a plunger, or a squeeze filler converter system that has a long button on the side of the pen.


Filling a Cartridge Pen
-
1Find the right cartridge size. Some pens use standard sized cartridges (small or large), but other pens use proprietary brands that will not accept the standardized sizes.
-
2Remove the cartridge, if one is present. To remove the cartridge, simply pull it straight out from the grip section.
-
3Remove a converter, if one is present. If there is a piston or squeeze converter already in the pen, pull it straight out from the grip section the same way you would a cartridge.
-
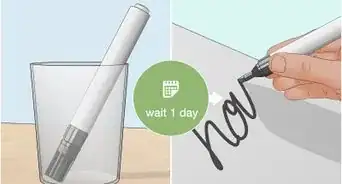
4Insert a new cartridge. Insert the stopper end into the grip section. Push firmly until the stopper is punctured and you hear a click. Ink should begin to flow into the pen. [1]
-
5Replace the barrel. Screw the barrel back on over the body of the pen.
-
6Keep the pen in a vertical position. Hold the pen vertically, nib side down, to let the nib saturate. Place the pen in a small glass or find another means to stand it vertically. It can take up to a couple of hours for the nib to become saturated for the pen to write properly. [2]


Filling a Piston or Squeeze Converter Pen
-
1Remove the cartridge, if one is present. The converter will replace the cartridge. To remove the cartridge, simply pull it straight out from the grip section.
-
2Insert the converter, if one is not present. Slide the converter straight in toward the grip section. Some will have small “lugs” on the side that you have to line up with open slots. [3]
-
3Submerge the nib in ink. Submerge the nib fully, up to the grip section, so that the vent hole is beneath the ink.
-
4Squeeze and release the converter. If you are using a squeeze converter, squeeze the side of the pen until the ink bubbles. Slowly release your grip, then let go of the converter slowly to allow suction to draw ink into the pen.
- Squeeze and release the converter again. Repeat this process until bubbles no longer appear in the bottle of ink and your pen is full.
-
5Twist the converter to raise and lower the piston. If you are using a piston converter, twist the end of the pen counter-clockwise, which will cause an internal plunger to move up or down. Then twist in the other direction to draw the plunger up to draw ink into the tube.
- You may need to raise and lower the piston a number of times to completely fill the pen with ink.
- Remove any air pockets. If the ink converter was totally empty when you started, you might notice that you can’t fill the ink all the way to the top due to a pocket of air. To remove the air pocket, twist the plunger counter-clockwise to empty all of the ink along with the air, then refill. [4]
- Squeeze out a few drops of ink. Remove the nib from the ink, and twist the piston counter-clockwise until a couple of drops of ink come out. This will prime the pen for writing.
-
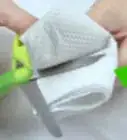
6Clean excess ink from the nib. Use a rag or paper towel to remove any ink still on the nib.
-
7Replace the barrel. Screw the barrel back on over the body of the pen.


Filling an Eyedropper Pen
-
1Unscrew and remove the barrel. Unlike in cartridge or converter pens, the barrel is not a housing for a cartridge or a converter, but is a reservoir for the ink itself.
-
2Clean the barrel. If you have a new pen, or if you are changing colors of ink, clean the barrel using a cotton swab.
-
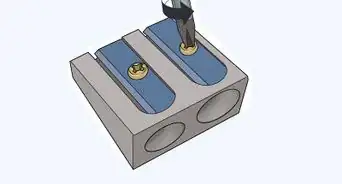
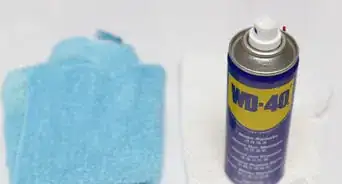
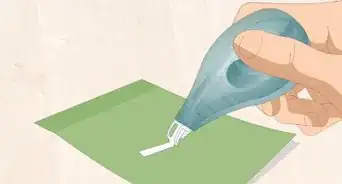
3Grease the threads. To avoid ink from leaking, you’ll want to create a water-tight seal where the barrel screws into the grip section. Apply silicon grease to the threads. Screw the barrel on, and then screw the barrel off to spread the oil in between the threads.
-
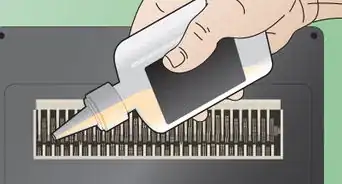
4Fill the pen using an eyedropper. Dip the eyedropper into the ink bottle, drawing ink into it. Place the tip of the eyedropper into the upright barrel, and release the ink, filling the barrel. Fill the barrel to the bottom of the threads.
- You can also use a syringe instead of an eyedropper.
-
5Screw the grip section into the barrel half way. Place the grip-section on the barrel, and begin screwing it in.
-
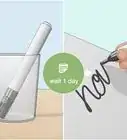
6Turn the pen right-side up (nib down) and finish screwing in. Doing this will cause a couple of drops to come out of the feed, priming the pen for writing.
-
7Clean excess ink from the nib. Use a rag or paper towel to remove any ink still on the nib.


Filling Other Types of Fountain Pens
-
1Fill a vacuum filler pen. In a vacuum filler pen, there is a plunger that remains inside the barrel. Removing the knob will free the plunger to move up and down. Pull up the plunger to create a vacuum inside the pen. Then push the plunger down.
- As the plunger reaches the wider, flared part of the pen, it will break the vacuum and cause ink to be drawn into the barrel.[5]
-
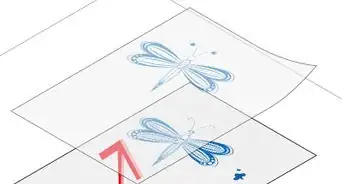
2Fill a lever pen. A lever pen will have a have a lever in the middle of the pen to compress a sac. To fill the pen, first lift the lever, then dip the nib in ink. Push the lever back into place and wait for a few seconds. Then, snap the lever back into place.
- You might need repeat this step a couple times until the pen fills.
-
3Fill a button pen. A button filler pen uses a button to compress a sac, which then creates suction to draw ink into the pen. To fill, take off the blind cap on the end of the pen. Push and hold the button down, compressing the sac. Dip the nib into the ink, then release the button to fill the pen.[6]


Community Q&A
-
QuestionCan I refill my pen even if it isn't meant to be refilled?
 Community AnswerIf it's not meant to be refilled, it might be a good idea to get a new one that you can refill.
 -
QuestionOne of my ink pens doesn't work properly. It is the most expensive pen which I have with me. There is a kind of ball inside that stops the ink from flowing, and the ball can't be removed. How can I get this pen to work?Community AnswerAssuming the ball is made of some metal, this would mean that when you begin to write it falls to the lip of the cartridge and blocks it. If so, then this might help: Curl up a small wire piece into a small ball (small enough to go into the cartridge but with enough gaps between the wires for ink to leak) and insert into the cartridge so the metal ball cannot com to the lip of the cartridge to seal the flow of ink. Be careful when you dispose the cartridge as you can then reuse this wire-ball into the new cartridge. Note that the wire should be of high grade steel so that it does not react with the ink.
Warnings
- Always clean your nib!⧼thumbs_response⧽
- Do not force a stuck piston. If a piston-filler pen has been stored for a while with ink in it, the piston can get stuck. Screwing too hard will break the piston mechanism. [8]⧼thumbs_response⧽
Things You’ll Need
- Fountain pen
- Ink (cartridge or bottle)
- Eyedropper or syringe (eyedropper method)
- Silicon grease (eyedropper method)
- Cleanup cloth or paper towel

-Step-22.webp)
References
- ↑ https://mpmart.ru/PDF/Kaweco-refill.pdf
- ↑ https://mpmart.ru/PDF/Kaweco-refill.pdf
- ↑ https://www.youtube.com/watch?v=QnOvrjKGUEk
- ↑ https://www.youtube.com/watch?v=dNSOyoGlfug
- ↑ https://www.youtube.com/watch?v=dNSOyoGlfug
- ↑ https://www.vintagepens.com/filling_instructions_button-fillers.shtml
- ↑ https://www.youtube.com/watch?v=n03MGcx7CQM
- ↑ https://www.vintagepens.com/filling_instructions_piston-fillers.shtml
About This Article