This article was co-authored by wikiHow staff writer, Nicole Levine, MFA. Nicole Levine is a Technology Writer and Editor for wikiHow. She has more than 20 years of experience creating technical documentation and leading support teams at major web hosting and software companies. Nicole also holds an MFA in Creative Writing from Portland State University and teaches composition, fiction-writing, and zine-making at various institutions.
The wikiHow Tech Team also followed the article's instructions and verified that they work.
This article has been viewed 183,233 times.
Learn more...
This wikiHow teaches you how to forward an email message in the most popular email applications. The exact process is slightly different for every email client, but you should be able to fairly easily find an option to "Forward" a message if you have it open. Read on to learn about the basics and potential dangers of forwarding an email!
Steps
Gmail on a Phone or Tablet
-
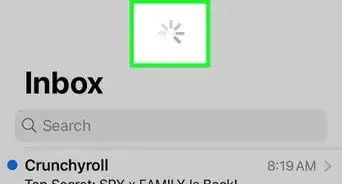
1Open the Gmail app on your phone or tablet. It's the white icon with a multicolored "M" on it.
-
2Tap the message you want to forward. This opens it for viewing.Advertisement
-
3Scroll down and tap Forward. It's at the bottom-right corner of the message.
- If the message contains any attachments, such as PDFs or attached images, you'll be asked if you want to include them in the forwarded message. Tap Include Attachments to include them, or Don't Include Attachments to remove them. If you choose to include them, you can remove individual attachments by scrolling down in the message, selecting the attachment, and then selecting Remove.
-
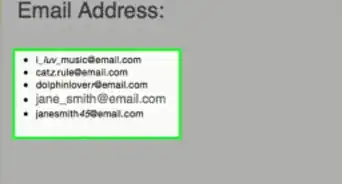
4Enter the recipient's email address into the "To" field. This is the address of the person you want to forward the message to. You can enter multiple addresses by separating them with commas.
- If you want to CC (carbon copy) or BCC (blind carbon copy, which hides the email address from other recipients) someone on the message, tap the down-arrow at the top-right corner of the message to expand the header info, and then enter the address(es) into the "Cc" and "Bcc" fields.
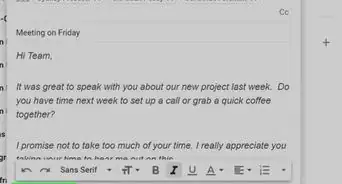
- If you want to include any of your own thoughts, you can click the larger typing area above the message contents and type it now.
-
5


Gmail on a Computer
-
1Go to https://www.gmail.com on a computer. You'll see your inbox if you're already signed in. If you're not signed in, you'll be prompted to do so now.
-
2Click the message you want to forward. This opens the message.
-
3Scroll down and click the Forward button. It's in the bottom-left area of the message, directly to the right of the "Reply" button.
-
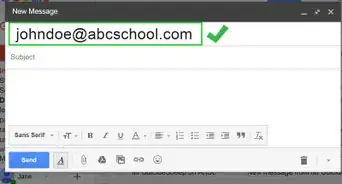
4Enter the recipient's email address into the "To" field. This is the address of the person you want to forward the message to. You can enter multiple addresses by separating them with commas.
- If you want to CC (carbon copy) or BCC (blind carbon copy, which hides the email address from other recipients) someone on the message, click the Cc or Bcc link in the new message's upper-right corner and type the recipient's email address.
- If you want to include any of your own thoughts, you can click the larger typing area above the message contents and type it now.
-
5Remove attachments, if necessary. Gmail automatically attaches any photo or document attachments that were originally attached to the message. If you don't want to include these attachments, scroll down the message text and click the X next to each attachment you want to remove.
-
6Click the Send button. It's below the bottom-left corner of the new message. This forwards the message to the recipient(s).


Outlook Mobile App
-
1Open the Outlook app on your phone or tablet. It's the blue-and-white envelope icon with an "O."
-
2Tap the message you want to forward. This opens it for viewing.
-
3Tap the arrow at the bottom-left corner. It's pointing to the left. This opens a menu.
-
4Tap Forward on the menu. This creates a new message with the message's content inside.
-
5Enter the recipient's email address into the "To" field. This is the address of the person you want to forward the message to. You can enter multiple addresses by separating them with commas.
- If you want to CC (carbon copy) or BCC (blind carbon copy, which hides the email address from other recipients) someone on the message, tap the down-arrow next to the "To" field to expand the Cc and Bcc fields.
-
6Remove attachments, if necessary. Outlook automatically attaches any photo or document attachments that were originally attached to the message. If you don't want to include these attachments, tap the X next to the attachment in the message.
-
7Write a message. If you want to include any of your own thoughts, type them above the forwarded text in the message.
-
8


Outlook.com
-
1Go to https://www.outlook.com. If you're already signed in to your Outlook account, you'll see your inbox. If not, you'll be prompted to sign in now.
-
2Click the message you want to forward. This opens it for viewing.
-
3Click the right-pointing arrow. It's at the top-right corner of the message.
-
4Enter the recipient's email address into the "To" field. This is the address of the person you want to forward the message to. You can enter multiple addresses by separating them with commas.
- If you want to CC (carbon copy) or BCC (blind carbon copy, which hides the email address from other recipients) someone on the message, click Cc or Bcc in the upper-right corner and enter the address(es).
-
5Remove attachments, if necessary. Outlook automatically attaches any photo or document attachments that were originally attached to the message. If you don't want to include these attachments, hover your mouse cursor over an attachment and click the X to delete it.
-
6Write a message. If you want to include any of your own thoughts, type them above the forwarded text in the message.
-
7Click the Send button. It's at the bottom-left corner of the message. This forwards the message to the recipient(s).


iPhone/iPad Mail App
-
1Open the Mail app on your iPhone or iPad. It's the blue icon with a white envelope.
-
2Tap the message you want to forward. This displays the contents of the message.
-
3Tap the Reply icon. It's the curved arrow at the bottom of the screen. A menu will expand.
-
4Tap Forward. It's the button with an arrow pointing right. This opens a new message containing the forwarded content.
- If there are any attachments to the original message, such as documents or videos, you'll be ask to Include or Don't Include the attachment. Choose the desired option to proceed.
-
5Enter the recipient's email address into the "To" field. This is the address of the person you want to forward the message to. You can enter multiple addresses by separating them with commas.
- If you want to CC (carbon copy) or BCC (blind carbon copy, which hides the email address from other recipients) someone on the message, tap CC/BCC and enter the email address(es) into the labeled fields.
-
6Write a message. If you want to include any of your own thoughts, type them above the forwarded text in the message.
-
7Tap the Send button. This is the arrow pointing upward at the top-right corner of the message. This sends the message (and any attachments) to the recipient(s).


Mac Mail App
-
1Open the Mail app on your Mac. It's the blue icon with a white envelope.
-
2Click the message you want to forward. This opens it for viewing.
-
3Hover the mouse cursor over the message header. This is the part of the message that contains the "To" and "From" information. Several buttons will appear.[1]
-
4Click the Forward button. It's the option with a curved arrow at the top of the message. This creates a new message with the forwarded content inside.
-
5Enter the recipient's email address into the "To" field. This is the address of the person you want to forward the message to. You can enter multiple addresses by separating them with commas.
- If you want to CC (carbon copy) or BCC (blind carbon copy, which hides the email address from other recipients) someone on the message, enter the email address(es) into the labeled fields.
- If you want to include any of your own thoughts, you can click the larger typing area above the message contents and type it now.
-
6Choose whether to include attachments. If the message you're forwarding has attached content like PDFs or documents, you can choose to include them.
- To include attachments, click the Edit menu, select Attachments, and choose Include Original Attachments in Reply.
- If you decide to remove the attachments, click the Message menu and select Remove Attachments.
-
7


Microsoft Outlook for Desktop
-
1Open the email that you want to forward. Make sure that it's the right email, and there is no sensitive content that you need to delete before you pass it along. When you forward an email, you automatically include the entire thread of emails that led to the current email.
-
2Click the Forward button. It's at the top of the reading pane, and typically on the right side of the message. There will also be a "Forward" option on the toolbar at the top of Outlook.[2]
-
3Enter the recipient(s). The address(es) you enter into the "To" field will receive the forwarded message once you send it.
- You can use the "Cc" field to add additional recipients if you'd like. All of the To and Cc recipients will be able to see who else was copied on the email.
- If you don't want the other recipients to know that you're also sending the message to someone else, add the secret recipient(s) to the "Bcc" box instead.
-
4Remove attachments, if needed. Any photo, text, or other file attachments will be automatically forwarded along to the new recipients unless you manually delete them from the forwarded message draft. To remove an attachment, select it and click Remove.[3]
-
5Write a message. If you want to include any of your own thoughts, type them above the forwarded text in the message.
-
6Click the Send button. This sends the message (and any attachments) to the recipient(s).


Email-Forwarding Etiquette
-
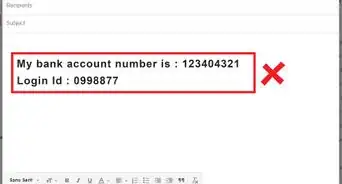
1Consider deleting the prior email addresses. The recipient of the forwarded message will be able to see the names and email addresses of anyone else who was involved in the original email thread. Depending on the situation, it might be most respectful to those people if you remove their addresses from the forward.
-
2Clean up the forwarded email. You don't need to change anything, depending on the context, but you might consider lightly editing the text or structure of the message that you're passing along. Take this opportunity to delete any parts of the forwarded message that you don't want your recipients to see. Once the email has been sent, you can't take it back! Look for the following things:
- Carats (the bulky <<<>>> chains that can build up in a much-forwarded e-mail)
- Mechanical errors, like unnecessary extra lines/spaces and grammatical and spelling errors.
- Banners that companies place at the bottom of your e-mails.
-
3Be aware of the consequences. In a long email thread, there is information left over from the people who got the message before you: specifically, their names and email addresses. As messages get forwarded along, the list of addresses grows and grows. All it takes is for some poor friend to get a virus, and his/her computer can send that virus to every email address that has come across his computer.


Community Q&A
-
QuestionHow do I forward the latest email and not the previous emails in the thread?
 Community AnswerClick the forward button, and when you are in the new box, before you send, just highlight all the emails you do not want to forward and press your delete button.
 -
QuestionHow do I forward an e-mail with pictures?
 Community AnswerYou can just use the same instructions. There is no difference in the process when the email includes pictures.
 -
QuestionWhen I forward an email, the information appears much lower on the page than in the original. How do I correct this?Community AnswerThis is normal, I wouldn't really worry about it but, if it really bothers you, you can delete the lines where there is no information and the text will gradually rise on your page.


References
About This Article

1. Open the message.
2. Click Forward.
3. Enter a recipient the "To" field.
4. Remove attachments if needed.
5. Click Send.