This article was medically reviewed by Luba Lee, FNP-BC, MS. Luba Lee, FNP-BC is a Board-Certified Family Nurse Practitioner (FNP) and educator in Tennessee with over a decade of clinical experience. Luba has certifications in Pediatric Advanced Life Support (PALS), Emergency Medicine, Advanced Cardiac Life Support (ACLS), Team Building, and Critical Care Nursing. She received her Master of Science in Nursing (MSN) from the University of Tennessee in 2006.
There are 7 references cited in this article, which can be found at the bottom of the page.
This article has been viewed 17,573 times.
Nexplanon, a birth control implant, might be an ideal contraceptive choice for you! Nexplanon is inserted under your skin on the inside of your upper arm. It is more than 99% effective, relatively risk-free, and works for up to 3 years. You can get the implant easily through your gynecologist or local family planning center. Though Nexplanon is an effective barrier against pregnancy, you should always take additional steps to protect yourself against sexually transmitted diseases (STDs).[1]
Steps
Seeing If Nexplanon is Right For You
-
1Consult your gynecologist or a doctor at your local family planning centre. To see if the Nexplanon birth control implant is right for you, speak to a doctor who can evaluate your health and current circumstances. Get in touch with your gynecologist or make an appointment at a local family planning centre to discuss the implant. A doctor may advise against Nexplanon if: [2]
- You have an allergic reaction to any of the components of Nexplanon
- You have a history of breast cancer
- You suffer from undiagnosed genital bleeding
- You have liver disease or liver tumors
- There is a possibility that you are pregnant
- You are taking medication for HIV or epilepsy [3]
-
2Take note of the possible disadvantages of Nexplanon. Before deciding on the birth control implant, it is important to give careful thought to the side effects and issues you may experience. Nexplanon will not protect you from sexually transmitted diseases (STDs). You may experience negative reactions such as: [4]
- Complications during the insertion or removal
- Irregular bleeding (especially in the first 6-12 months)
- Weight gain
- Nausea
- Breast pain
- Ovarian cysts
- Ectopic pregnancy
- Pain or infection at the insertion site
- Elevated blood pressure
- Fluid retention
- Depressed mood
Advertisement -
3Work out how you will pay for Nexplanon. Nexplanon can cost up to $1,300 if you do not have insurance to cover it, or $1,600 if you include the cost of removal. See if your health insurance provider or Medicaid will cover the implant. If you can't afford Nexplanon, contact your local Planned Parenthood center to see if they can offer it to you at a lower price based on your income. [5]
- Visit https://www.plannedparenthood.org/health-center to find a Planned Parenthood center near you.


Having the Implant Inserted
-
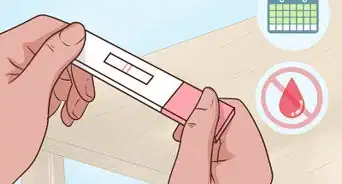
1Schedule an appointment for between the 1st and 5th day of your period. The best time to have Nexplanon inserted is the first week of your menstrual cycle. Make an appointment with your doctor or local family planning center for sometime in this window. If no appointments are available during these 5 days, wait a month until the beginning of your next cycle. [6]
- If you are already using birth control pills or a patch or ring, schedule an appointment during your placebo week.
-
2Sign a consent form. Before the insertion procedure, you will be asked to fill out a consent form. The form will outline the procedure and possible side effects. Read it carefully and sign it if you are ready to proceed.[7]
-
3Lie still on the exam table with your non-dominant arm out. Ideally, the Nexplanon implant should be inserted into the arm you use the least. If you are right-handed, extend your left arm, and vice versa. Try to lie as still as possible to make the procedure quick and simple. [8]
-
4Brace yourself for a numbing shot before the insertion. A local anesthetic will be injected near the insertion site on your arm. Prepare for a small stinging sensation from this needle. After this, the implant will be pushed just under the surface of your skin using a special insertion tool. [9]


Caring for the Insertion Site
-
1Leave the bandage on for 48 hours after the procedure. Once the implant is inserted, a bandage will be placed over the small insertion site on your arm. No stitches will be needed to close the opening. Keep the bandage on for 48 hours to protect the site, then remove it. [10]
- Wash the skin around your bandage carefully during this 48 hours, or wrap it with plastic wrap while showering.
-
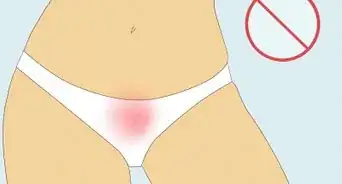
2Avoid injuring the insertion site for 3-4 days after the procedure. While your arm is healing, be careful not to bump it against anything or injure the insertion site. Avoid strenuous chores or tasks during this time. Any activity that puts stress or pressure on your arm, such as carrying heavy objects, should be avoided.
-
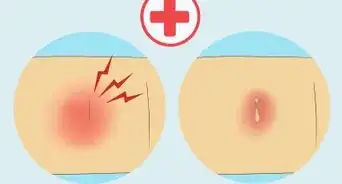
3Expect swelling, bruising, or discoloration for 2 weeks after the procedure. It is perfectly normal for your skin to shows mild signs of injury after the implant is inserted. Bruising, swelling, and discoloration around the insertion site are not a cause for concern during the 2 weeks after the procedure. To alleviate discomfort and reduce swelling, apply a cold compress to the site several times a day.
-
4Contact your doctor if you see signs of infection. If the insertion site is warm, red, or oozing several days after the procedure, it is likely infected. Contact your doctor immediately if you see these signs. They may prescribe antibiotics to treat the infection. [11]


References
- ↑ https://www.nhs.uk/conditions/contraception/contraceptive-implant/?
- ↑ https://dailymed.nlm.nih.gov/dailymed/drugInfo.cfm?setid=b03a3917-9a65-45c2-bbbb-871da858ef34
- ↑ https://www.nhs.uk/conditions/contraception/contraceptive-implant/?
- ↑ https://www.plannedparenthood.org/learn/birth-control/birth-control-implant-implanon/what-are-the-disadvantages-of-birth-control-implants
- ↑ https://www.plannedparenthood.org/learn/birth-control/birth-control-implant-implanon/how-can-i-get-the-birth-control-implant
- ↑ https://health.cornell.edu/sites/health/files/pdf-library/nexaplon.pdf
- ↑ https://health.cornell.edu/sites/health/files/pdf-library/nexaplon.pdf
- ↑ https://health.cornell.edu/sites/health/files/pdf-library/nexaplon.pdf
- ↑ https://www.plannedparenthood.org/learn/birth-control/birth-control-implant-implanon/what-happens-when-the-birth-control-implant-is-inserted


Medical Disclaimer
The content of this article is not intended to be a substitute for professional medical advice, examination, diagnosis, or treatment. You should always contact your doctor or other qualified healthcare professional before starting, changing, or stopping any kind of health treatment.
Read More...