This article was co-authored by Patrick Johns. Patrick Johns is a Home Improvement Specialist and the Owner of CatchAll Handyman Services. With more than 28 years of experience, he has worked on a variety of home improvement projects, such as carpentry, plumbing, and door and window installations in both commercial and residential properties.
This article has been viewed 55,307 times.
Decorating walls with fabric instead of wallpaper or paint is a great option for renters or homeowners who want a temporary covering. All you need for this project is fabric, liquid starch, and a friend to help you! Wash and dry the fabric before you begin and then hang it on the wall using masking tape. Add coats of liquid starch beneath and above the fabric to stick it to the wall. Then use a utility knife to cut away the excess and enjoy your new wall decor!
Steps
Purchasing and Washing the Fabric
-
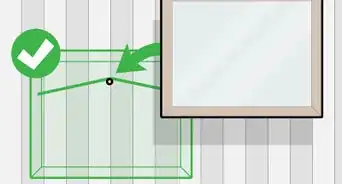
1Measure the size of the wall that you want to hang the fabric on. Get a tape measure and measure the height and the length of the wall. You may need a friend to hold the tape measure in place while you take and note down the measurements. Don't worry about accounting for any outlets or small windows, as you need to purchase excess fabric anyway.[1]
-
2Choose a lightweight, cotton or polyester fabric for the wall. Head to your local fabric store or look around at second-hand stores for patterns and colors that catch your eye. Bright patterns are good for small spaces, such as the inside of a wardrobe, while more minimalist fabrics are best for larger walls.[2]
- Avoid using heavy fabrics like velvet or wool, as these are too heavy to be held up properly using liquid starch.
- If you pick a patterned fabric, you'll need to match the design up along the seam wherever there is a break in the fabric. The effect looks great, but it does take a bit more work to hang and get looking right.
Advertisement -
3Buy enough fabric to cover the wall and at least an extra 3 ft (0.91 m). Purchase the length of fabric that you need and a bit extra to ensure that you have plenty to work with. It's better to have too much fabric to work with rather than not enough.[3]
- Fabric tends to be sold in yards or meters and is 40–50 in (100–130 cm) wide.
-
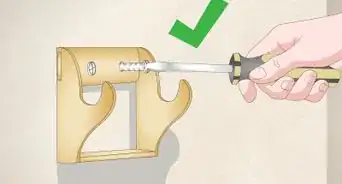
4Wash the fabric in a cold water cycle. Place the fabric into the washing machine and set the water temperature to cool. Then add a mild detergent and start the cycle. Remove the fabric from the machine as soon as the wash cycle is done.[4]
- It’s important to wash the fabric before you begin because it may shrink very slightly.
-
5Wait until the fabric is completely dry before you start working. Once the fabric is clean, it’s important that it’s fully dry before you begin hanging it. Place the fabric in a clothes dryer and use a low heat setting. Alternatively, hang the fabric on a clothesline in a well-ventilated spot and wait for it to dry.[5]
- Don’t worry if the fabric is slightly wrinkled when it's dry, as you will smooth it out later. If there are any large creases, iron the fabric before you continue.


Positioning and Cutting the Fabric
-
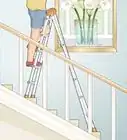
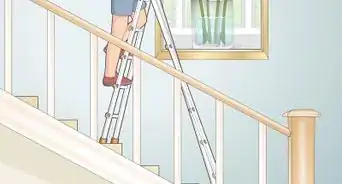
1Position the fabric against the wall. Get a step ladder and hold the fabric up against the corner of the wall so that it runs vertically toward the floor. Try to get the fabric hanging straight along the corner and the wall trim. Let the fabric overlap along the wall trim and down the corner by 1–2 in (2.5–5.1 cm) so that there is excess which you can trim away later.[6]
- It can be helpful to have your friend hold the fabric up while you take a few steps back to check that it is positioned correctly.
-
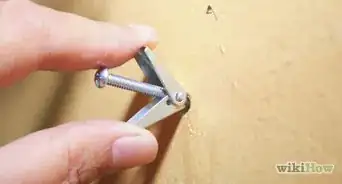
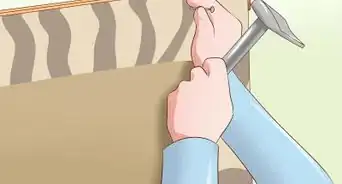
2Use masking tape to attach the fabric to the wall. Fold the top edge of the fabric under so that the cut edge isn't exposed. Then use the masking tape to tape over the top of the fabric and to attach it to the trim. This ensures that there is plenty of fabric to work with.[7]
- Don’t place the masking tape on the cut edge of the fabric without folding it first, as this may cause the fabric to fray.
-
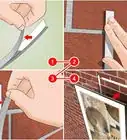
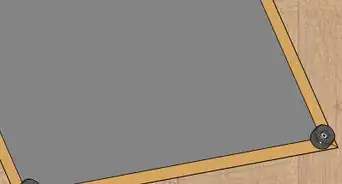
3Cut the fabric roughly to size with 2 in (5.1 cm) of excess on each side. Ensure that there is excess fabric at the trim and by the corner. Then use fabric scissors to cut the fabric, making sure to also leave 2 in (5.1 cm) of overhang at the baseboards. Don’t worry about having too much excess or if it looks messy, as you'll get to tidy it up at the end.[8]
- Use a utility knife to cut the fabric around outlets, windows, or light switches if there are any. Leave approximately 1⁄2 in (1.3 cm) of excess, as you can trim this away later. Make sure to fold under any raw or frayed edges with masking tape.[9]
-
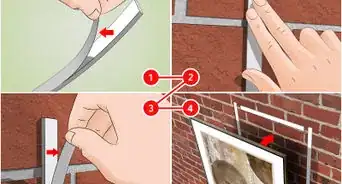
4Hang and cut the fabric to size until the whole wall is covered. Repeat the process of hanging the fabric using masking tape and then cutting it to size with plenty of overlap at the trim, corners, and baseboards. Work your way towards the other corner of the wall. If you are using a patterned fabric, make sure that the pattern matches up along the seam between each piece.[10]
- Make sure that each fabric panel is flush with the edges of the other panels rather than overlapping. If there are any frayed edges, fold these under with masking tape first.


Adhering the Fabric to the Wall
-
1Place a drop cloth over the floor where you will be working. Using liquid starch to hang fabric can get messy! Get a dropcloth and fold it to the size of the space where you’re working. Make sure it rests flat so that it isn’t a tripping hazard.[11]
- Liquid starch can be very damaging to flooring and is a nuisance to remove.
-
2Use a paint roller to cover the wall with liquid starch. Pour the liquid starch into a paint tray and run the roller through to cover it in the liquid starch. Get your friend to lift up the first piece of fabric while you work on applying a thick coating of liquid starch to the wall underneath. Only work on the wall under 1 piece of fabric at a time, as liquid starch dries fast.[12]
- Don’t worry if there are any spots that you can’t reach because of the masking tape, as you can come back to these areas later.
- Alternatively, you can take the fabric down from the wall while you apply the liquid starch. However, it may be difficult to reposition again.
-
3Smooth the fabric down to help it stick to the liquid starch. Begin at the top of the wall and work your way towards the ground. Run your hand firmly down the fabric to get it to stick to the wall and to remove any wrinkles. Don’t worry if parts of the fabric at the top and edges have trouble sticking down, as you can work on these later.[13]
- Simply add more liquid starch if it dries before you get a chance to stick the fabric down.
-
4Cover the top of the fabric with liquid starch and then apply the other panels. Use the paint roller and the paint tray to coat the fabric with liquid starch. Use plenty of liquid starch and try to saturate the surface. This ensures that the fabric will stay in place. Then move onto applying the liquid starch both underneath and over each subsequent panel.[14]
- Aim to use enough liquid starch so that it soaks through the fabric and onto the wall.
-
5Let the fabric dry for approximately 24 hours. You need to wait until all of the liquid starch has dried before you continue working on the wall. Run your hand over the fabric to check if it’s dry. Keep the windows open if possible or turn on a fan to help speed up the process.[15]
- The length of time that it takes for the fabric to dry depends on the temperature and humidity.


Finishing the Edges and the Corners
-
1Remove the masking tape when the fabric is completely dry. Get a step ladder and begin at the top corner of the fabric. Gently peel off the masking tape and unfold the edges of the fabric. Work your way over the whole wall until all of the masking tape is gone.[16]
-
2Add liquid starch to any loose areas with a paintbrush. Some areas around the trim, corners, and baseboards of the wall may have loose fabric. Apply the liquid starch in the same way to make the fabric stick down fully. Remember to smooth it out in between each coat of liquid starch to prevent wrinkles.[17]
-
3Trim the excess fabric away with a utility knife when it’s dry. Wait for all of the additional liquid starch to dry again before you begin trimming the fabric. Run the utility knife along each straight edge of the wall, such as the trim, the corner, and the baseboards, to cut away the excess fabric.[18]
- It’s important to wait until the fabric is fully dry before cutting it, as sometimes it can shrink slightly when the liquid starch is added.
-
4Soak the fabric with warm water when you want to remove it. Fill up a bucket with warm water and get a clean sponge. Saturate the sponge in the water and then wring it out slightly. Begin at the top of the wall and use the sponge to wipe the fabric. It will easily peel away.[19]
- The pre-existing finish underneath the fabric won’t be harmed at all.
- You can use the fabric again by simply washing it with laundry detergent in the washing machine and then letting it dry on a clothesline.


Warnings
Things You’ll Need
- Measuring tape
- Fabric
- Laundry detergent
- Masking tape
- Step ladder
- Fabric scissors
- Drop cloth
- Paint roller
- Paint tray
- Liquid starch
- Fan
- Paintbrush
- Utility knife
- Bucket
- Sponge


References
- ↑ https://www.apartmenttherapy.com/how-to-make-removable-fabric-w-74483
- ↑ https://www.bobvila.com/articles/fabric-wallpaper/
- ↑ https://www.apartmenttherapy.com/how-to-make-removable-fabric-w-74483
- ↑ https://www.apartmenttherapy.com/how-to-make-removable-fabric-w-74483
- ↑ https://www.apartmenttherapy.com/how-to-make-removable-fabric-w-74483
- ↑ https://www.apartmenttherapy.com/how-to-make-removable-fabric-w-74483
- ↑ https://www.apartmenttherapy.com/how-to-make-removable-fabric-w-74483
- ↑ https://www.apartmenttherapy.com/how-to-make-removable-fabric-w-74483
- ↑ http://mattandshari.com/decorating/decorating-ideas/starching-fabric-to-walls-creates-fantastic-looks/
- ↑ https://www.apartmenttherapy.com/how-to-make-removable-fabric-w-74483
- ↑ https://www.apartmenttherapy.com/how-to-make-removable-fabric-w-74483
- ↑ https://www.apartmenttherapy.com/how-to-make-removable-fabric-w-74483
- ↑ https://www.apartmenttherapy.com/how-to-make-removable-fabric-w-74483
- ↑ https://www.bobvila.com/articles/fabric-wallpaper/
- ↑ https://www.apartmenttherapy.com/how-to-make-removable-fabric-w-74483
- ↑ https://www.apartmenttherapy.com/how-to-make-removable-fabric-w-74483
- ↑ https://www.architecturaldigest.com/story/wall-fabric-this-secret-ingredient-wallpaper-magic
- ↑ https://www.bobvila.com/articles/fabric-wallpaper/
- ↑ https://www.bobvila.com/articles/fabric-wallpaper/
- ↑ https://www.bobvila.com/articles/fabric-wallpaper/
- ↑ Patrick Johns. Home Improvement Specialist. Expert Interview. 26 October 2021.
- ↑ https://www.addicted2decorating.com/diy-fail-how-to-not-wallpaper-your-walls-with-fabric.html
- ↑ Patrick Johns. Home Improvement Specialist. Expert Interview. 26 October 2021.
About This Article