This article was co-authored by wikiHow staff writer, Kai Hynes. Kai Hynes is a Writing Fellow from San Jose, California, currently residing in Portland, Oregon. In addition to writing for wikiHow, Kai works as a theatre actor and performance artist. Kai holds a BA in English and Theatre from The University of Portland.
This article has been viewed 4,641 times.
Learn more...
Nutritious, delicious, and beautiful to behold, beetroots are an easy, year-round addition to any garden. The “beetroot” refers to the root of the beet plant, which is the part most people think of when they hear “beet,” though it’s not the only part of the vegetable you can eat! If you’ve been growing beets and aren’t sure how to properly harvest and store them, read on.
Steps
Harvesting Beetroots
-
1Harvest your beets 7-8 weeks after planting them. Beets can technically be harvested and eaten at any point in their growth cycle, though waiting 7-8 weeks after planting them is standard.[1] Take into account that they’re considered cold-season vegetables, so they’ll grow steadily into late fall and early winter, and very rapidly in the heat of summer.[2]
- They’re also known to get sweeter in cold temperatures in a process called “chill sweetening!”
-
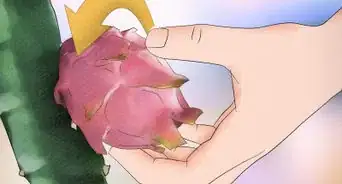
2Check to see that they’re between a golf ball and baseball in size. Generally speaking, when the head of the beetroot is visible above the soil line, it’s ready to be harvested.[3] For the best-tasting beets, choose ones that are 1–3 inches (2.5–7.6 cm) in diameter.[4]
- If it gets any larger than 3 inches (7.6 cm) in diameter, it won’t be inedible, but it’ll be tough and woody in texture.
- That being said, beets also tend to get sweeter as they grow in size.[5] If you like them sweet, try harvesting them when they’re 2–3 inches (5.1–7.6 cm) in diameter.
Advertisement -
3Pull the beet out with a twisting motion. If the soil is loose, grab the exposed head of the beetroot and give it a firm tug. A gentle twist may help loosen it, too. If the soil is compact, you’ll need to dig it out with a shovel or garden fork. Get into the dirt beside it with the tool and push down on the handle with one hand to lift it from its bottom, using your other hand to tug and twist its head.[6]
- Try not to pierce the root! It’ll “bleed” and spoil sooner.
-
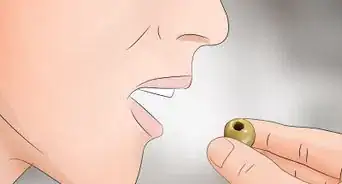
4Use freshly harvested beets within 2-3 days. Beets should be eaten soon after they’re picked.[7] Before using them, consider that their size is usually a good indicator of their flavor and texture, and thus how to best prepare them for eating.[8] Here are some ideas on how to best utilize them based on their size:
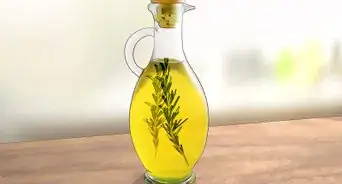
- Beets that are closer to a golf ball in size are considered “baby beets” and are best for cooking in a pan, since their skin is tender and doesn’t need to be peeled off. You could even cook them with their edible and nutritious leaves still attached![9]
- Beets that are closer to a baseball in size are better for roasting, as they may be too large to cook in a pan. Their skins will be tougher and need to be peeled beforehand. Again, these ones also tend to be sweeter.[10]
- If you're not using them immediately, larger beets that have developed thick skins will keep best in long-term storage. Check out the next section of this article for ideas on how to go about storing them.
-
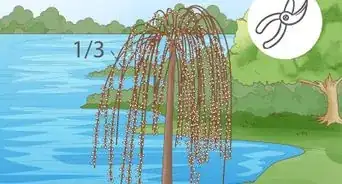
5Harvest up to ⅓ of its leaves periodically. Beet leaves are edible and nutritious on their own. Trim a few leaves off, at least 1 inch (2.5 cm) from the root to prevent bleeding, at any point during its growth cycle.[11] Be careful to not pull them all off at once, since the beet needs them to photosynthesize and grow its tasty root. Only take ⅓ of its leaves at a time to allow for regrowth.[12]
- Leaves that are 2–3 inches (5.1–7.6 cm) long can be eaten raw. Anything longer than that should be cooked to soften their texture, as they will get tougher as they grow.
- The leaves are actually very similar to a cousin of the beet, Swiss chard, in flavor and texture.[13]


Storing Beetroots
-
1Prepare your beetroots for long-term storage. Regardless of how you choose to store them, you’ll want to properly prepare your beets in the same way to reduce loss of hydration and the possibility of rot. Snip leaves off at least 1 inch (2.5 cm) from their base to prevent the beetroot from losing water to keeping its leaves alive. Wipe away excess dirt, rather than rinsing it under water, so as to not speed up the rotting process.[14]
- If you feel you must rinse them, just be sure they’re extra dry before putting them in storage.
- Don’t snip off the taproot dangling at the bottom of the beet! This will cause bleeding.
- Damaged beets, such as bruised ones or ones that show signs of bleeding, will not keep well and should be used as soon as possible.
-
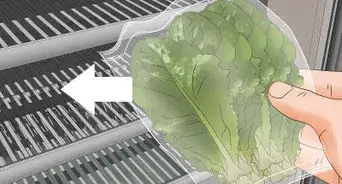
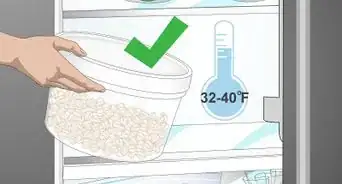
2Keep them in the refrigerator for 7-10 days. Like most vegetables, keeping beets in the fridge will slightly extend their lives. After going through the regular storage preparation process, place them in a perforated plastic bag in your fridge at or below 41 °F (5 °C).[15]
- Remember to always keep vegetables above and away from meats to prevent cross contamination.
-
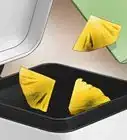
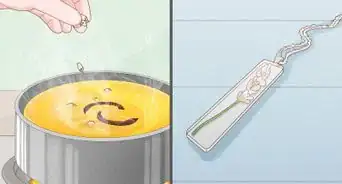
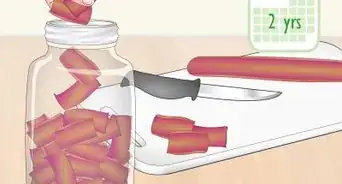
3Boil them and keep them in the freezer for up to 10 months. Raw beetroots become grainy in the freezer, so it’s a good idea to boil them first. After they’re tender enough to pierce, place them in ice water to stop the cooking process. Once cooled, remove any remaining stems, peel their skins off, and chop them into cubes. Put them in a freezer bag, squeeze out excess air, and keep them in the freezer.[16]
- Smaller beets may need to be boiled for 25-30 minutes, and larger beets for 45-50 minutes.
- Consider flash-freezing the individual cubes before putting them in a freezer bag to prevent them from sticking together. Place the cubes on a cooking tray and place it in the freezer. After they’re all frozen, compile them into the same freezer bag.
-
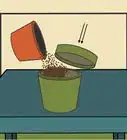
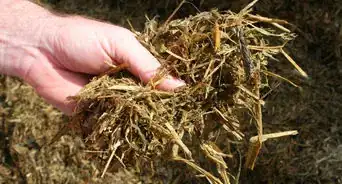
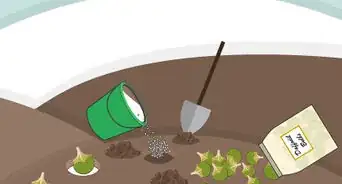
4Pack them in a makeshift root cellar for up to 5 months. Place them 2 inches (5.1 cm) apart from each other in a plastic container full of dampish sand or sawdust, with the lid lightly on to allow for air circulation. Keep the container in a cold place, like a garage or basement.[17] This method mimics the mechanics of actual root cellars, which have been used since ancient times to store and keep root vegetables fresh without the assistance of technology.
- Placing them apart from each other is to prevent rot from spreading. Check on them often to see if any are showing signs of deterioration. Remove these.
- If you have an actual root cellar, store them in there as you would with any other root vegetable!


References
- ↑ https://agrilifeextension.tamu.edu/library/gardening/beets/
- ↑ https://www.gardeningchores.com/harvest-store-beets/
- ↑ https://savvygardening.com/when-to-harvest-beets/
- ↑ https://harvesttotable.com/harvest-store-beets/
- ↑ https://www.canr.msu.edu/resources/how_to_grow_beets
- ↑ https://www.gardeningchores.com/harvest-store-beets/
- ↑ https://harvesttotable.com/harvest-store-beets/
- ↑ https://savvygardening.com/when-to-harvest-beets/
- ↑ https://agrilifeextension.tamu.edu/library/gardening/beets/
- ↑ https://www.canr.msu.edu/resources/how_to_grow_beets
- ↑ https://harvesttotable.com/harvest-store-beets/
- ↑ https://savvygardening.com/when-to-harvest-beets/
- ↑ https://www.canr.msu.edu/resources/how_to_grow_beets
- ↑ https://harvesttotable.com/harvest-store-beets/
- ↑ https://www.canr.msu.edu/resources/michigan_fresh_beets
- ↑ https://www.canr.msu.edu/resources/michigan_fresh_beets
- ↑ https://harvesttotable.com/harvest-store-beets/
About This Article