This article was co-authored by wikiHow staff writer, Hunter Rising. Hunter Rising is a wikiHow Staff Writer based in Los Angeles. He has more than three years of experience writing for and working with wikiHow. Hunter holds a BFA in Entertainment Design from the University of Wisconsin - Stout and a Minor in English Writing.
There are 14 references cited in this article, which can be found at the bottom of the page.
This article has been viewed 11,297 times.
Learn more...
If you've been growing some catnip, you and your feline friends are probably really eager to harvest it. It can be a little tricky knowing exactly when homegrown catnip is ready, don't worry because we're here to help! We'll walk you through how to harvest and dry catnip so it has the best flavors!
Steps
Harvesting Catnip
-
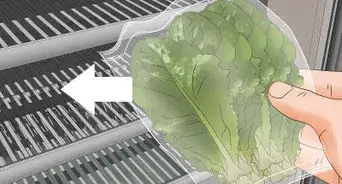
1Pinch off individual leaves anytime to enjoy fresh catnip. You can start picking leaves as soon as your catnip stems are 8 inches (20 cm) tall.[1] Simply pinch where the leaf connects to the stem and pull it off of the plant. Catnip has a less aromatic flavor before it flowers, so it works perfect for mixing with salad greens.[2]
- Individual leaves take a long time to grow back on your plant. If you’re planning on harvesting your catnip again later in the season, you may want to cut the entire stem instead.
-
2Harvest after the plant flowers for the most intense flavor. After the flowers bloom, the minty, grassy flavor of catnip gets more intense.[3] The flowers start blooming at any point during the late spring through the fall, but you’ll usually see the most in the middle of the growing season.[4]
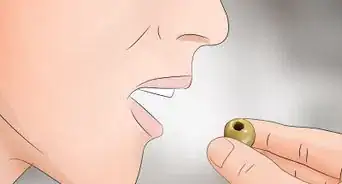
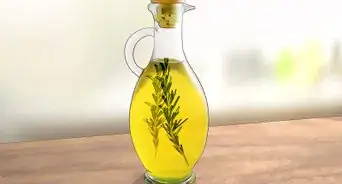
- Your kitties will love the stronger scent and flavor of catnip after it blooms. You can also make catnip tea from the aromatic leaves.
Advertisement -
3Harvest stems after the morning dew dries if you plan to dry the leaves. Any moisture on your catnip makes it tougher to dry out, which could lead to mold. Give your plants a chance to sit in the sun as the dew evaporates so the leaves are completely dry.[5]
-
4Cut stems from the plant with a pair of garden snips. Choose the stems that are the thickest and strongest since they’re the most mature. Find a leaf node along the stem about 4–5 in (10–13 cm) up from the base of the plant. Make your cut just above the leaf node to harvest the entire stem.[6]
- Leave the weaker stems on the plant so they have a chance to fill out and continue growing.[7]
- You can cut all of the stems off of your plant if you want to dry them in bulk and don’t want to harvest them a second time later in the season.
-
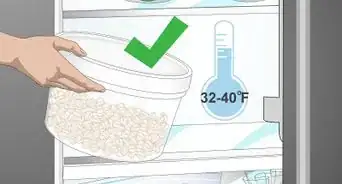
5Harvest again in the fall when stems are 8 in (20 cm) tall. After you cut your catnip back, the stems will regrow so you can harvest them again later in the fall. Once the stems reach at least 8 inches (20 cm), snip them again right above a leaf node. At the end of the season, you can cut the entire plant back down to the ground.[8]
- Since the catnip could attract outside cats, protect your plants with chicken wire while they’re regrowing.[9]


Drying and Storing Catnip
-
1Hang the stems in a dark room to air-dry for the best quality. Take 4 or 5 stems and bundle them together with a rubber band or string. Find a spot in a basement or garage that’s dark and well-ventilated, and hang the stems upside-down. Leave your catnip alone for about 1–2 weeks so the leaves dry out.[10]
- Since it takes longer to dry, your catnip will be more aromatic and have a stronger flavor.
- Avoid bundling more than 5 stems together since it blocks air flow and prevents your catnip from drying out properly.
-
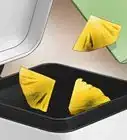
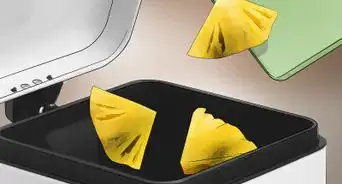
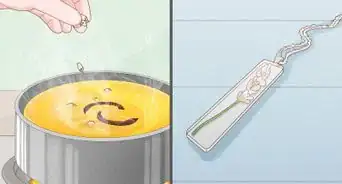
2Dry your catnip in the oven at 150 °F (66 °C) for a faster solution. Set your oven to 150 °F (66 °C) and let it preheat completely. Lay your catnip stems in a single layer on a rimmed baking tray and put them into your oven. Leave the oven door cracked open as the leaves dry for 10 minutes. Try crumbling a leaf in your hand, and take the tray out if it flakes apart easily. Otherwise, put the tray back in the oven for a few more minutes before checking again.[11]
- Use a spatula or tongs to move the catnip around on the tray to ensure it doesn’t stick to the bottom.
-
3Let the stems dry in the sun for up to 3 days to reduce odors. Catnip has a slightly skunky odor, so it could stink up your home while it dries out. If you have dry sunny weather, set the stems on a baking tray and set them outside in the sun. At night, bring the stems back inside. Put the catnip back out for the next 1–3 days until the leaves are completely dried out.[12]
- If there’s strong wind or outdoor cats in your area, put an old window screen on top of the tray and weigh it down with stones to protect your catnip.
-
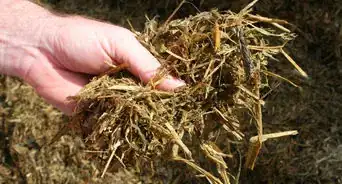
4Pull the leaves off of the dried stems. After the stems dry out, the leaves will easily separate from them. Slide your fingers down the length of the stem to break all of the leaves off. Since the stems are woodier and won’t break down very well, just throw them away.[13]
- Leave the flowers on the stem and throw them away.
-
5Crush the leaves into a flaky powder. You can either crush the leaves by hand or use a mortar and pestle to make it a little easier. Break the leaves down into consistently sized flakes so you can easily use them in cat toys or to make herbal tea.[14]
-
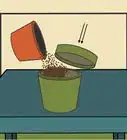
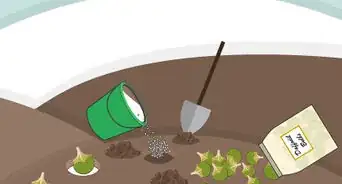
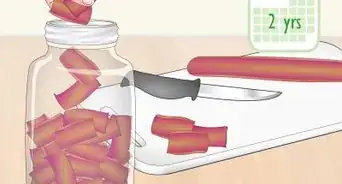
6Store the dried catnip flakes in an airtight container in your fridge. Choose a plastic container, glass jar, or resealable storage bag for the catnip. Make sure you completely seal the container so your catnip doesn’t lose any potency while you’re storing it.[15] Keep the container in your fridge, and just scoop out as much catnip as you need whenever you want to use it.
- The catnip will stay safe to use as long as it stays dry, but it starts to lose potency the longer it sits around.[16]


Warnings
- Catnip can grow out of control in your garden since it self-seeds. If you want to prevent it from reseeding, be sure to prune your plant down to the ground after it flowers.[18]⧼thumbs_response⧽
- Catnip has a pungent odor that may smell a little skunky, so keep it sealed in an airtight container.[19]⧼thumbs_response⧽


References
- ↑ https://www.uky.edu/ccd/sites/www.uky.edu.ccd/files/catnip.pdf
- ↑ https://cals.arizona.edu/yavapai/anr/hort/byg/archive/catnipandcatmint.html
- ↑ https://web.extension.illinois.edu/herbs/catnip.cfm
- ↑ https://hort.extension.wisc.edu/articles/catnip-nepeta-cataria/
- ↑ https://advicefromtheherblady.com/plant-profiles/perennials/catnip/
- ↑ https://extension.umn.edu/vegetables/growing-herbs#air-drying-930960
- ↑ https://hort.purdue.edu/newcrop/proceedings1990/V1-527.html
- ↑ https://www.uky.edu/ccd/sites/www.uky.edu.ccd/files/catnip.pdf
- ↑ https://hgic.clemson.edu/factsheet/herbs/
- ↑ https://extension.umn.edu/vegetables/growing-herbs#air-drying-930960
- ↑ https://homegardenjoy.com/site/2015/06/growing-catnip.html
- ↑ https://homegardenjoy.com/site/2015/06/growing-catnip.html
- ↑ https://web.extension.illinois.edu/herbs/catnip.cfm
- ↑ https://cals.arizona.edu/yavapai/anr/hort/byg/archive/catnipandcatmint.html
- ↑ https://cals.arizona.edu/yavapai/anr/hort/byg/archive/catnipandcatmint.html
- ↑ https://www.aspcapetinsurance.com/resources/what-does-catnip-do-to-cats/
- ↑ https://www.aspcapetinsurance.com/resources/what-does-catnip-do-to-cats/
- ↑ https://hort.extension.wisc.edu/articles/catnip-nepeta-cataria/
- ↑ https://hort.extension.wisc.edu/articles/catnip-nepeta-cataria/
About This Article