This article was co-authored by wikiHow staff writer, Hunter Rising. Hunter Rising is a wikiHow Staff Writer based in Los Angeles. He has more than three years of experience writing for and working with wikiHow. Hunter holds a BFA in Entertainment Design from the University of Wisconsin - Stout and a Minor in English Writing.
There are 12 references cited in this article, which can be found at the bottom of the page.
This article has been viewed 3,908 times.
Learn more...
If you've been watching your turnips grow all season, you're probably pretty eager to get them out of the ground and onto your plate. These versatile veggies have delicious greens for salads and mild, sweet roots, but it might be a little tricky knowing when they're ready. Keep reading for a full guide on picking and storing your turnips whether you want the greens or roots!
Steps
Harvesting Turnip Greens
-
1Wait to harvest until the greens are 4–6 in (10–15 cm) tall. It usually takes around 40 days after planting your turnips for the greens to reach the right size. Throughout the growing season, check the height of the greens above the soil so you can pick them as soon as they’re tender and have the mildest flavors.[1]
- Since turnips are cold-weather plants, you can plant and harvest them in the spring or the fall.
- If you leave turnip greens through hot weather, their flavor gets stronger but they have a tougher texture.
-
2Pull the entire plant from the ground if you only want the greens. Pinch the base of the greens right where they meet the soil. Gently pull your turnip completely out from the ground. The root won’t be big enough to eat yet, so trim it off with a pair of garden scissors and get rid of it.[2]
- If you don’t want to get too messy, just use your garden scissors to trim all the greens just above the soil.
Advertisement -
3Snip off 2–3 leaves if you want to keep growing the root. If you cut off all the turnip greens, the root will stop growing. If you want to harvest your turnip roots later in the season, use your garden scissors to only cut off the outer leaves about 1 inch (2.5 cm) above the soil. Keep most of the inner leaves on the turnip so it still gets nutrients from the sun.[3]
- Your turnips will grow new greens after you harvest them, but avoid harvesting from the same plant multiple times. Otherwise, the root won’t grow properly and it may be undersized.


Storing Fresh Turnip Greens
-
1Rinse and dry the greens to remove soil residue. Rinse the greens under cool running water to get rid of any dirt or dust. Shake any excess water off of the greens and pat them dry with a paper towel so they’re less likely to develop mold or go bad.[4]
- Throw away any leaves you find that have blemishes on them.
-
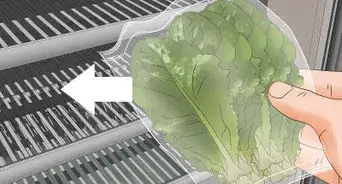
2Store turnip greens in a plastic bag inside your fridge for 1–2 weeks. Put all of your turnip greens in a resealable plastic bag and push out as much air as you can before you seal it. The greens will have the best flavor within the first week. After that, they’ll start to wilt or develop a foul odor and should be thrown away.[5]
-
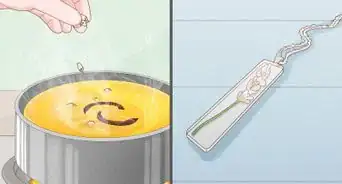
3Blanch your greens if you want to freeze them. Cut or tear the turnip greens down to whatever size you want. Boil a pot of water and add your chopped greens for 2 minutes. After that, immediately transfer the greens to ice water for another 2 minutes. Drain the excess water out of the bowl so you only have the greens leftover.[6]
- If you don’t blanch your turnip greens, they’ll quickly lose flavor once you freeze them.
-
4Freeze blanched greens for up to 1 year. Pack your turnip greens in freezer containers with ice water so they have about 1⁄2 inch (1.3 cm) of headspace. Label the container with what’s inside and the date you’re freezing the greens. Whenever you want to use the turnip greens, just toss the frozen leaves into your recipe.[7]
- Frozen leaves work best in cooked meals since they won’t have the same texture.
- While the leaves won’t go bad after 1 year, they’ll start to lose their flavor the longer you keep them.


Pulling Turnip Roots
-
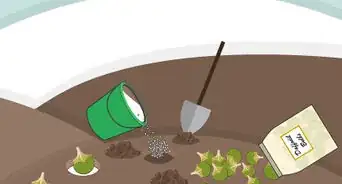
1Harvest turnips when they’re 2–3 in (5.1–7.6 cm) in diameter. It’ll be pretty easy judging the size of your turnips since the top of the root will stick out of the soil. It usually takes around 50–75 days for turnips to reach their full size, so check your plants frequently later in the season to see when they’re ready.[8]
- Avoid letting your turnips get any larger since they could develop a woody texture or lose their flavor.
-
2Loosen the soil around the turnip with a spade. Push a shovel or spade into the ground a few inches away from your turnip. Push the handle down to gently loosen the soil by your turnip so it’s easier to pull out. Work the spade or shovel around the turnip in a circle.[9]
-
3Pull the turnip root straight out from the soil by hand. Pinch the base of the greens right above the turnip root. Gently wiggle the turnip and pull it up and out of the soil. Since the turnip has one large root, it will come up pretty easily.[10]
- Be careful not to break the turnip root, or else it may lose moisture and go bad more quickly.
-
4Mulch over planted turnips during a mild winter to keep them from freezing. Turnips can survive through light frosts, but they’ll die during a hard freeze. If you planted turnips in the fall but don’t need to harvest them all, cover any plants left in the ground with a few inches of mulch so they don’t freeze over. As long as the turnips don’t get below 32 °F (0 °C), you can harvest them through the winter and into spring.[11]
- Turnips planted in spring will lose their flavor if you leave them in the ground during hot summer months.[12]


Storing Turnip Roots
-
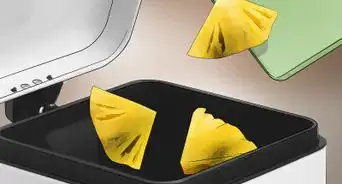
1Cut the turnip greens off the root with a pair of scissors. The greens will wilt and go bad faster than the root, so use a sharp knife or scissors to cut them off. You can either save the greens in a plastic bag and put them in your fridge, or throw them away if you don’t plan on using them.[13]
-
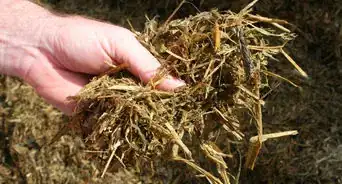
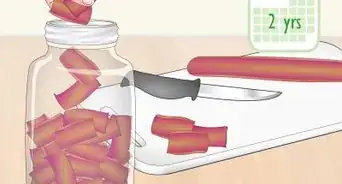
2Put unwashed turnips in a root cellar for up to 3 months. Keep your root cellar as close to 32 °F (0 °C) as you can. Place your turnips in a well-ventilated container with sphagnum moss to help preserve moisture and prevent them from shriveling.[14] After 3 months, your turnips will start to go bad, so throw them away.[15]
- Toss out any turnips that have bruises or look shriveled since they won’t be as nutritious.
-
3Rinse soil off turnips and dry them if you plan on using them within 1 month. Clean any soil or debris left on the turnips under cold running water. Use a scrub brush for any stubborn dirt that’s stuck on the root. Afterward, pat the root completely dry with a piece of paper towel.[16]
-
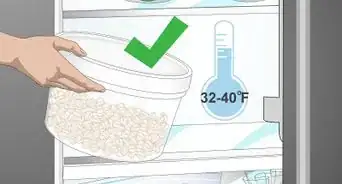
4Store turnips in your fridge’s crisper drawer for up to 3 weeks. Put the roots in a resealable plastic bag and try to remove as much air as you can. Put the bag in your fridge since the cold temperatures keep the turnips stay firm. After 2–3 weeks, toss the turnips out since they won’t be as nutritious.[17]
- Write the date you put the turnips in your fridge on the bag so you can easily track when to get rid of them.


Expert Q&A
-
QuestionHow do you prepare turnip roots?
 JoAnna MinneciJoAnna Minneci is a Professional Chef based in the Nashville, Tennessee area. With more than 18 years of experience, Chef JoAnna specializes in teaching others how to cook through private cooking lessons, team-building events, and wellness and nutrition classes. She has also appeared in numerous television shows on networks such as Bravo and Food Network. Chef JoAnna received Culinary Arts training from the Art Institute of California at Los Angeles. She is also certified in sanitation, nutrition, kitchen management, and cost control.
Professional ChefThere are many ways to cook turnips. You can roast them in a pan. You can add them in the last 20 minutes or so when you are doing a pot roast. You can pickle them with some beet juice. Or, you can just mash them, like you would mash a potato—but compared to potatoes, it would be a way lower carb option.
Warnings
- Turnip roots will lose their flavor and develop a woody texture if they’re left in the ground through hot summer weather.[18]⧼thumbs_response⧽
- Get rid of any turnips that have signs of rot or disease, such as deformed roots, white or yellow spots on leaves, and holes left by pests.[19]⧼thumbs_response⧽


References
- ↑ https://agrilifeextension.tamu.edu/browse/featured-solutions/gardening-landscaping/turnip-and-mustard-greens/
- ↑ https://cdn-ext.agnet.tamu.edu/wp-content/uploads/2014/09/how-to-grow-turnip-greens-and-mustard-greens.pdf
- ↑ https://plantvillage.psu.edu/topics/turnip/infos
- ↑ https://extension.umn.edu/vegetables/growing-turnips-and-rutabagas#storage-794815
- ↑ https://sonomamg.ucanr.edu/Food_Gardening/Feature_Vegetables/Turnips/
- ↑ https://extension.umn.edu/preserving-and-preparing/freezing-leafy-greens-later-use
- ↑ https://extension.umn.edu/preserving-and-preparing/freezing-leafy-greens-later-use
- ↑ https://sonomamg.ucanr.edu/Food_Gardening/Feature_Vegetables/Turnips/
- ↑ https://extension.umn.edu/vegetables/growing-turnips-and-rutabagas#storage-794815
- ↑ https://plantvillage.psu.edu/topics/turnip/infos
- ↑ https://extension.oregonstate.edu/gardening/techniques/grow-your-own-root-vegetables
- ↑ https://www.canr.msu.edu/resources/how_to_grow_turnips_and_rutabagas
- ↑ https://extension.umn.edu/vegetables/growing-turnips-and-rutabagas#storage-794815
- ↑ https://nchfp.uga.edu/how/store/wisc_vegetables.pdf
- ↑ https://sonomamg.ucanr.edu/Food_Gardening/Feature_Vegetables/Turnips/
- ↑ https://extension.umn.edu/vegetables/growing-turnips-and-rutabagas#storage-794815
- ↑ https://cdn-ext.agnet.tamu.edu/wp-content/uploads/2014/09/how-to-grow-turnip-greens-and-mustard-greens.pdf
- ↑ https://www.canr.msu.edu/resources/how_to_grow_turnips_and_rutabagas
- ↑ https://plantvillage.psu.edu/topics/turnip/infos
About This Article