This article was co-authored by wikiHow staff writer, Nicole Levine, MFA. Nicole Levine is a Technology Writer and Editor for wikiHow. She has more than 20 years of experience creating technical documentation and leading support teams at major web hosting and software companies. Nicole also holds an MFA in Creative Writing from Portland State University and teaches composition, fiction-writing, and zine-making at various institutions.
This article has been viewed 76,939 times.
Learn more...
When a new version of Android is released for your phone or tablet, you can install it over Wi-Fi. But what if you want to use Android apps on your Windows or macOS computer? This wikiHow teaches you how to install the Android-x86 Emulator on your PC or Mac, as well as how to get the latest official version of Android on your phone or tablet. If you want to install a custom ROM from on your rooted Android, see this wikiHow instead.
Steps
Installing Android-x86 on a PC or Mac
-
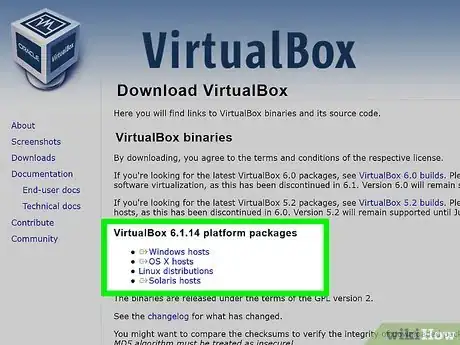
1Install VirtualBox by Oracle. VirtualBox allows you to run another operating system like Android in a window on your PC or Mac. Once you set up VirtualBox, you can install an Android emulator called Android-x86, which emulates Android Pie. To install:
- Go to https://www.virtualbox.org/wiki/Downloads.
- Click Windows hosts to download the Windows installer, or OS X Hosts to install the Mac installer.
- Double-click the downloaded file.
- Follow the on-screen instructions to install. Accept any privacy warnings and default settings as they come up.
-
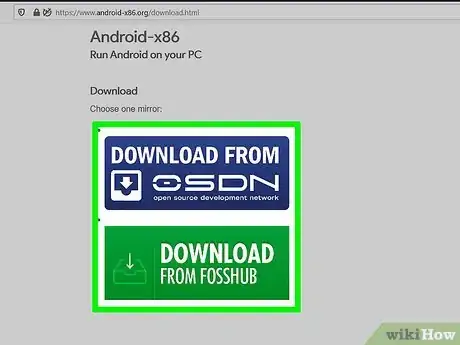
2Download the Android-x86 image file. To do this:
- Go to https://www.android-x86.org/download.html.
- Click the green Download from Fosshub button.
- Click Android-x86 64-bit ISO file. If you need the 32-bit version for some reason, you can choose that instead.
- Click Save if prompted to start the download.
Advertisement -
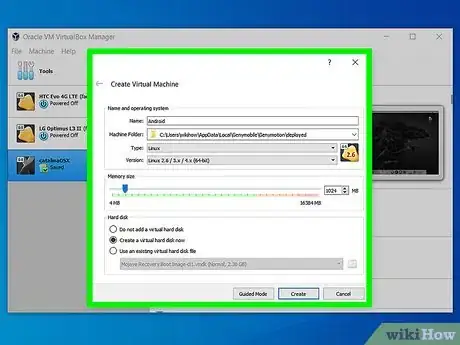
3Create a new virtual machine in Virtual Box. Before you can install Android, you'll need to create a virtual location to install to. Here's how:
- Open Virtual Box from the Start menu or Applications folder and click New.
- Type Android as the name, select Linux from the "Type" menu, and choose Linux 2.6 / 3.x / 4.x (64-bit) from the "Version" menu.[1] If you downloaded the 32-bit version of Android-x86, choose the (32-bit) option instead.
- Click Next.
- Assign 1024 MB of RAM (or at least 512 MB if you don't have much) and click Next.
- Select "Create a virtual hard disk now" and click Create.
- Use the default hard disk file type and click Next.
- Choose "Dynamically allocated" and click Next.
- Chose the default amount of space (you can increase or decrease it if you need to) and click Create. This creates the virtual machine and adds it to the list in the left panel.
-
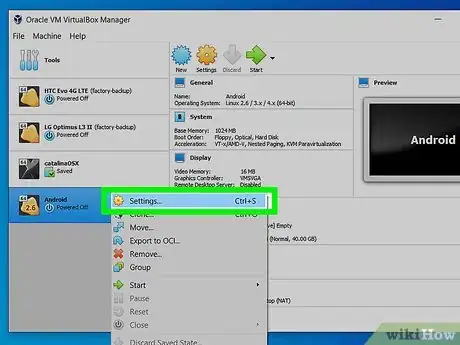
4Right-click the virtual machine and click Settings. It's in the left panel.
-
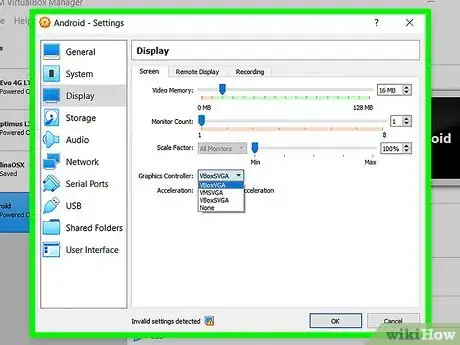
5Adjust your settings. Before you can install Android, you'll need to make the following changes:
- On the System tab, increase the Processor count to something above 1 if you have more than 1 virtual processor.
- In the Display tab, select VBoxVGA from the "Graphics Controller" menu. This is crucial.
- Click the Storage tab to add your Android image. Once you're there, perform these actions:
- Click the first Empty option (it should have a CD icon) in the center column to select it.
- In the "Attributes" column on the right side, click the CD icon with a tiny black downward-pointing arrow.
- Select Choose Optical Virtual Disk File.
- Click Add, select the Android-86 file you downloaded (it should be called something like android-x86_64-9.0-r2.iso) and click Open.
- Click the ISO file you added once to select it, and then click the Choose button.
- Click OK to save your changes and return to the list of virtual machines.
-
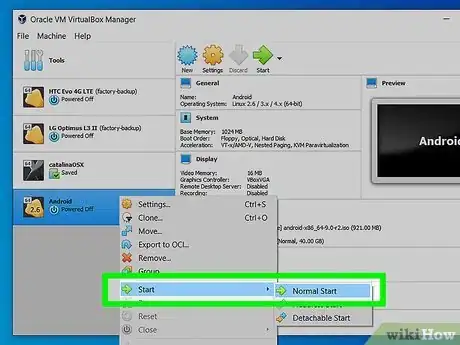
6Right-click the Android virtual machine and click Start. This boots the virtual machine from the Android ISO like it's a CD.
-
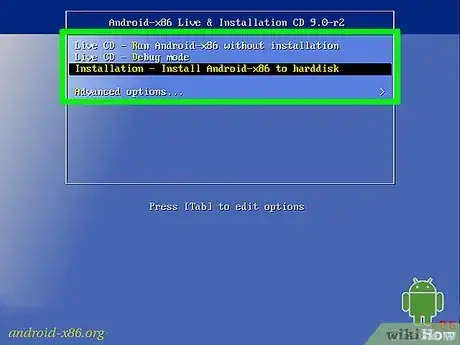
7Scroll down to "Installation – Install Android X86 to Hard Disk" and press ↵ Enter or ⏎ Return. This starts the install process and asks you if you'd like to set up partitions.
-
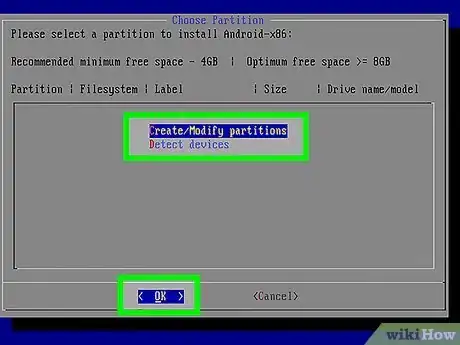
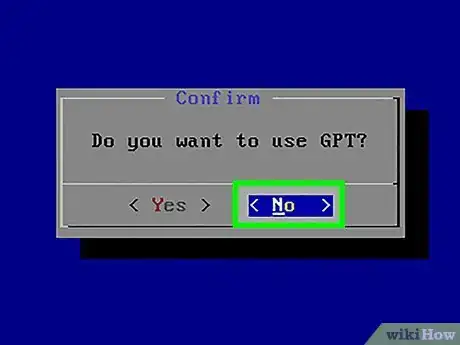
8Press the C key and press ↵ Enter or ⏎ Return. This is how you'll create a partition. A pop-up window will appear asking if you want to use GPT.
-
9Select NO and press ↵ Enter or ⏎ Return. No is selected by default so you should be good to go.
-
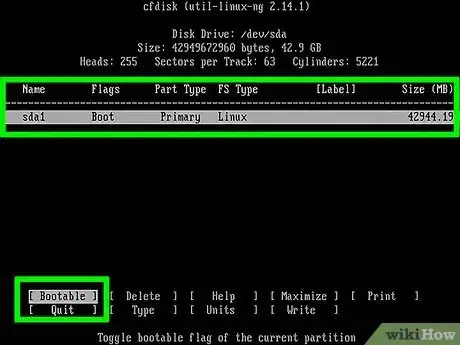
10Create the bootable partition and install Android. Follow these steps to make sure Android installs correctly:
- Press the N key and press the Enter or Return key to choose "Primary."
- Press the Enter or Return key again to choose the default partition size.
- Select Bootable (if it's not selected by default) and press Enter or Return to select it. You should see "Boot" under "Flags" now. If you don't, select Bootable again and press Enter or Return to toggle it on.
- Use the arrow key to move to the "Write" option and press the Enter or Return key.
- Type yes and press Enter or Return.
- Press Q to quit.
- Use the arrow keys to select "OK" and press Enter or Return.
- Select EXT4 and press Enter or Return.
- Select Yes and press 'Enter or Return to format. When the format is complete, you'll be asked if you want to install Grub.
- Press the Y key to install Grub when prompted.
- Press the Y key again to install as read/write and begin the installation.
-
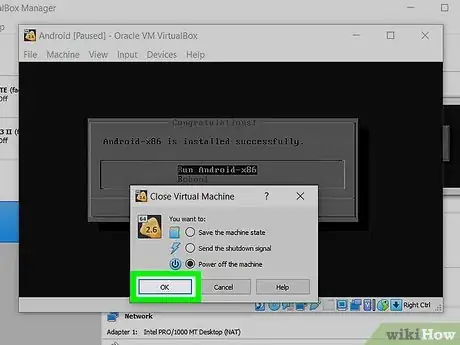
11Power down your virtual machine once Android is installed. Once you see the blue success screen, click the X at the top-right corner, and select the option to turn off the machine.
-
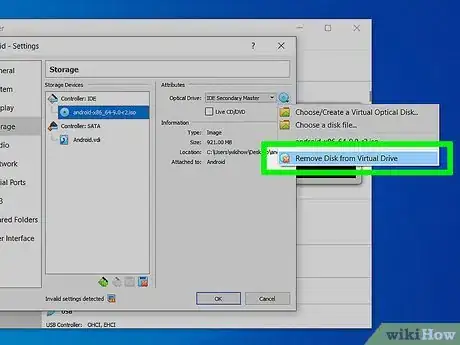
12Remove the ISO image from the virtual CD drive. Now that Android is installed, you'll need to remove the virtual install disk so you can boot right into the operating system.[2] To do this:
- Right click the Android machine and select Settings.
- Click the Storage tab.
- In the Attributes panel on the right, click the small black arrow below the tiny CD button.
- Click Remove Disk from Virtual Drive and click OK.
-
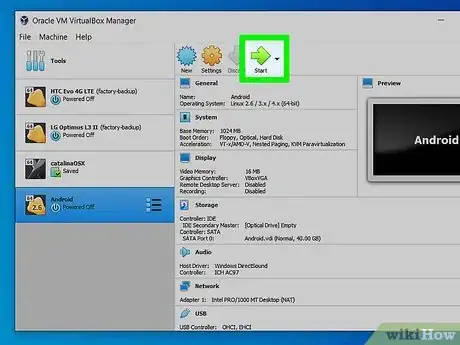
13Start your Android virtual machine. Now that you've installed Android, you can start it by double-clicking it in the left column, or by clicking the green Start arrow at the top. When it boots up, select the first option (not the debug options) in the list to launch Android.
- If Android opens to the console prompt, wait a few moments for Android to start. There's nothing you need to do make this happen.
- Once Android launches, you can sign in with your Google account and personalize your settings.
Updating an Android Phone or Tablet
-
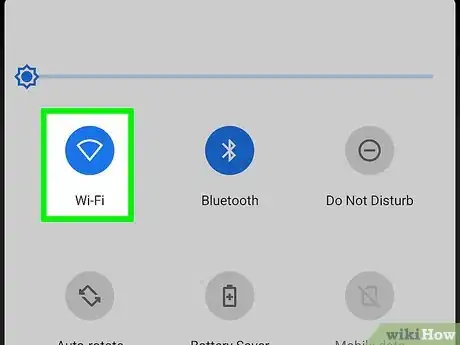
1Connect your Android phone or tablet to Wi-Fi. If there is a more recent version of the Android operating system that is compatible with your phone or tablet, you can install it over your Wi-Fi connection.
- Although Android is always being updated, different phone manufacturers and providers have their own update schedules. It may take longer for some models to get the latest updates.
- If your Android does not have a full charge, plug it into a power source before you continue.
-
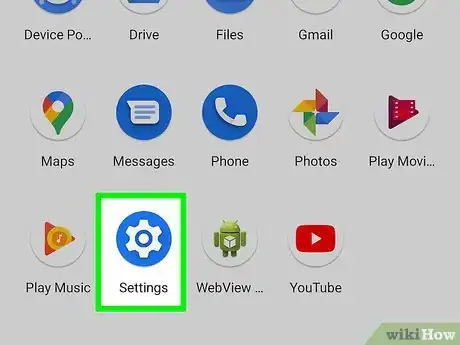
2
-
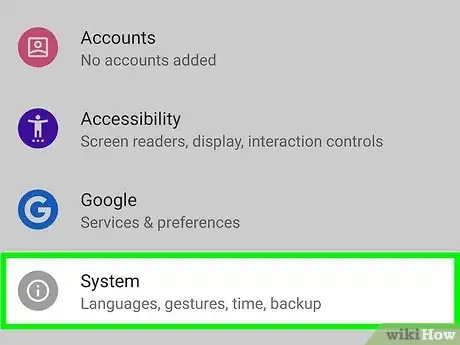
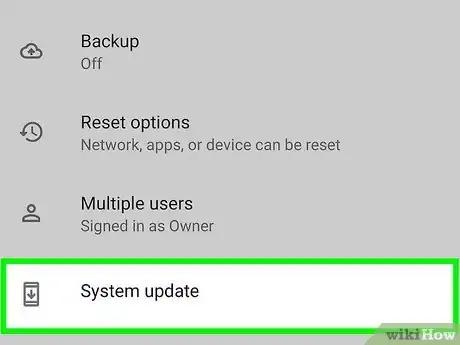
3Tap System or System updates. The option varies by model. If you don't see one of these options, try About phone or About tablet instead.[3]
-
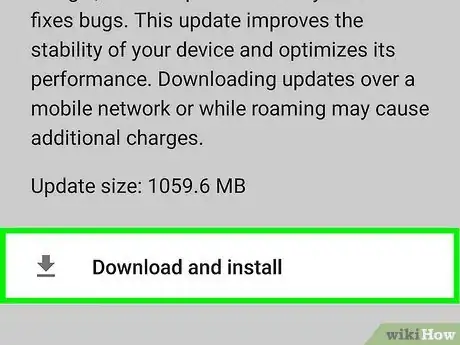
4Tap Check for updates or System update. If a more recent version of Android is ready to be installed, you'll be prompted to install it. If not, you'll see a message that says the software is up to date.[4]
- You may have to tap Advanced to find one of the Update options.
-
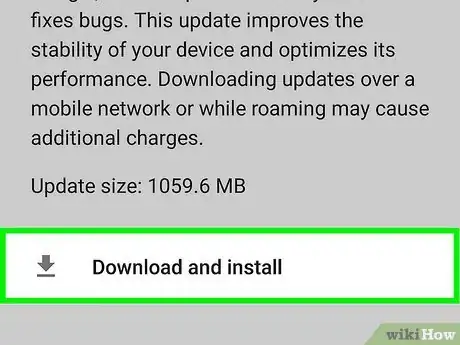
5Follow the on-screen instructions to install the update. If an update is available, you'll be asked if you want to install it now. Follow the on-screen instructions to do so. When the installation is complete, your Android will reboot and the new version will be ready to use.
Installing the Latest Android Beta for Pixel
-
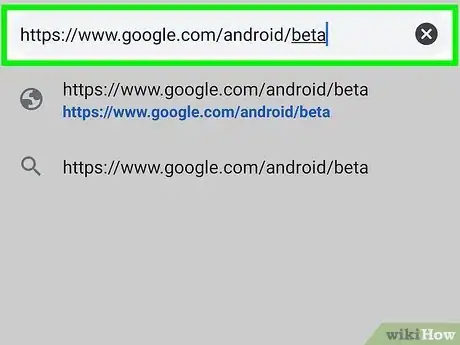
1Go to https://www.google.com/android/beta in a web browser. This is the official website of Android's beta testing program for Pixel owners. If your Pixel is compatible with the latest Beta version of Android, you'll be able to install it on this site.
- If you're not already signed in to the Google account associated with your Pixel, click Sign in at the top-right corner to do so now.
- You can use your computer, phone, or tablet to access this site as long as you're signed in with your Google account.
-
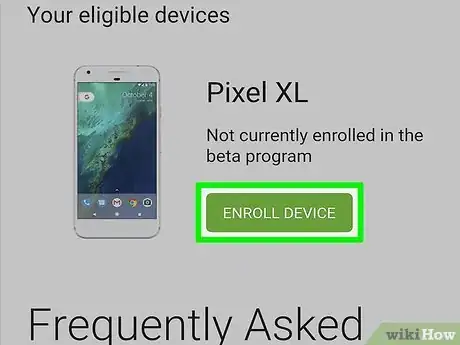
2Scroll down and click Enroll under your phone. If your Pixel is eligible for the latest beta version of Android, it'll appear here (although you may have to click View your eligible devices first.[5]
-
3Tap the software installation notification on your Pixel. When the installation is ready, you'll receive a notification on your Pixel to install the latest Android beta.
- If your phone isn't already plugged in to a power source and connected to a Wi-Fi network, do those things now.
- If it's been more than a day since you've enrolled and you haven't received a notification, open your Settings app, select System, and then choose System update to check for the update manually.
-
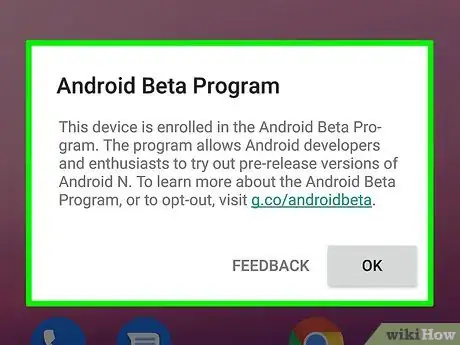
4Follow the on-screen instructions to install. Once the software is installed, your Android will reboot into the latest beta version of the product.
References
Community Q&A
-
QuestionDo I need to root the phone first?
 Community AnswerYes, you need to root the phone if you desire to install a custom android OS.
 -
QuestionWill this work for every phone or just for Samsung phones?
 Community AnswerIt will work with any Android phone that can be rooted. Make sure to root it properly.
 -
QuestionDoes this work for every phone? Or just with Samsung phones?
 Community AnswerIt will work for any Android phone (not iPhone) and you need to root it to do the second method.
About This Article
To install Android on your PC or Mac, start by installing the free VirtualBox application by Oracle. Then, head to https://www.android-x86.org/download.html and download the 64-bit ISO file. In VirtualBox, create a new virtual machine for Android, and mount the ISO image in the virtual CD ROM drive. Boot from the ISO image, create a partition, and install Android.
To upgrade Android on your phone or tablet, open the Settings app, tap System or System updates, and then choose the option to check for updates. If an update is available, follow the on-screen instructions to install it.
