This article was co-authored by wikiHow staff writer, Nicole Levine, MFA. Nicole Levine is a Technology Writer and Editor for wikiHow. She has more than 20 years of experience creating technical documentation and leading support teams at major web hosting and software companies. Nicole also holds an MFA in Creative Writing from Portland State University and teaches composition, fiction-writing, and zine-making at various institutions.
This article has been viewed 279,677 times.
Learn more...
This wikiHow teaches you how to install Windows 10 on a PC that's already running Ubuntu Linux. Before you get started, make sure you've already purchased a Windows license and product key. Don't worry if you don't have Windows install media, as you can create a bootable USB drive from a downloadable ISO image. Once you've installed Windows, you can install a tool called EasyBCD that allows you to switch between operating systems at reboot time.
Steps
Creating a Primary NTFS Partition for Windows
-
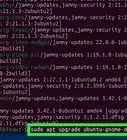
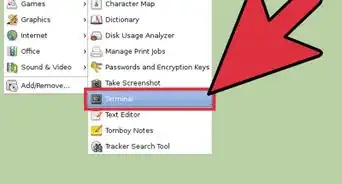
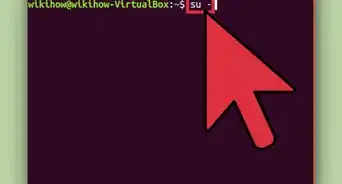
1Install Gparted if you haven't already. Gparted is a free partition tool with a graphical user interface that's pretty easy to use. You can download it from the Software Center or by running sudo apt-get install gparted from the command line.
- If you've already created a partition for Windows but it's not a Primary Partition, you'll have to create a new one.[1]
-
2Open Gparted. You'll see a list of all drives and partitions.Advertisement
-
3Right-click the partition or drive you want to edit and select Resize/Move. This allows you to create a new partition from an existing one.
-
4Enter the new partition size (in MB) into the "Free space following" blank. You should allocate at least 20 GB (20000 MB) for Windows 10. If you plan to install apps and use Windows regularly, you'll probably want to increase that amount.[2]
-
5Select Primary Partition from the "Create as" menu. It's on the right side of the window.
-
6Select ntfs from the "File System" menu. It's on the right side of the window.
-
7Type Windows10 into the "Label" field. This is just so you can easily identify the partition.
-
8Click Add. It's at the bottom-right corner of the window.
-
9Click the green check mark button. It's in the toolbar at the top of Gparted. This creates the partition, which may take a little while. When the partition is ready, click Close at the bottom-right corner of the window.


Creating a Windows 10 Install Drive in Ubuntu
-
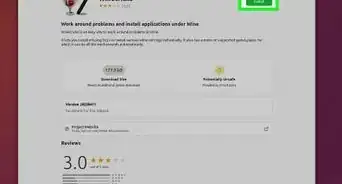
1Install UNetbootin from the Software Center. This is a free application that lets you create a bootable USB drive in Ubuntu. To learn more about UNetbootin, see https://unetbootin.github.io.
- You'll need either a blank USB drive with at least 8 GB of space to create install media. Any data on the USB drive will be erased during this process.[3]
- For help installing software on Ubuntu, see How to Install Software in Ubuntu.
-
2Go to https://www.microsoft.com/en-us/software-download/windows10 in a web browser. If you don't already have a bootable Windows DVD or USB drive, you can create a one from a downloadable ISO.
- You must have a license to install Windows 10. This means you should have already purchased Windows 10 and have a valid product key.
-
3Select the latest version of Windows 10 and click Confirm. Additional options will expand at the bottom of the page.
-
4Select a language and click Confirm. You'll choose the language from the drop-down menu below "Select the product language."
-
5Click 32-bit Download or 64-bit Download. This downloads the ISO to your default download location.
-
6Open UNetbootin and insert your USB drive. Opening UNetbootin displays the welcome screen where you can choose your bootable drive parameters.
-
7Select the "DiskImage" radio button. It's toward the bottom-left corner of the window.
-
8Select ISO from the "DiskImage" menu. It's to the right of the radio button.
-
9Click the three-dot … button. This opens your file browser.
-
10Select the file you just downloaded from Microsoft. It's the one that ends with .iso.
-
11Select USB Drive from the "Type" menu. It's at the bottom-left corner of the window.
-
12Select your USB drive from the "Drive" menu. This is the device label for your USB drive.
- If you can't select your USB drive, it likely needs to be formatted to the FAT32 file system. You can do this in the file manager by right-clicking the USB drive and selecting Format.[4]
-
13Click OK. This creates a bootable Windows 10 USB drive from the downloaded ISO image. Once the drive is ready, you'll see "Installation Complete."
-
14Click Exit to close UNetbootin.


Running the Windows Installer
-
1Restart your computer into the BIOS/UEFI. The steps to enter the BIOS/UEFI depend on your PC manufacturer and model. You'll usually have to press a certain key (often F2, F10, F1, or Del) right after the computer starts boot up.
- Insert the USB drive into a free USB port if you haven't already.
-
2Set the USB drive to come first in the boot order. You'll usually do this in a menu called "Boot" or "Boot Order." The steps to do this vary by PC, but you'll usually have to select USB Drive and mark it as 1st Boot Device. Check your PC manufacturer's website for more specific instructions about your BIOS/UEFI.
-
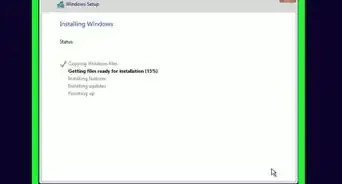
3Save your changes and exit the BIOS/UEFI. Most BIOS/UEFI make the "Save" and "Exit" keys very clear somewhere on the screen. Once you exit the BIOS/UEFI, your computer will boot from your USB drive and display the "Windows Setup" window.
-
4Click Custom: Install Windows only (advanced). It's the second option on the window. A list of partitions will appear.
-
5Select the Windows10 partition and click Next. This is the partition you just created. Windows will now install on the selected partition.
-
6Follow the on-screen instructions to install Windows. Once you finish the setup, you'll boot to the Windows desktop.
-
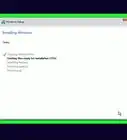
7Connect to the internet in Windows. Now that Windows is installed, you'll need to install a tool that allows you to dual-boot it with your existing Ubuntu installation.
- To learn how to connect to Wi-Fi, see How to Connect to WiFi in Windows 10 or How to Connect to the Internet.


Setting Up Dual Boot
-
1Open the Microsoft Edge web browser. You'll find it in Start menu, which is at the bottom-left corner of the screen. The final part of the process is setting up your computer to let you boot from either Windows 10 or Ubuntu at start up.
-
2Navigate to https://neosmart.net/EasyBCD. EasyBCD is a free tool that lets you set up dual-boot from within Windows.
-
3Scroll down and click Register under "Non-commercial." This brings you to a sign-up page.
-
4Enter your name and email address and click Download. This should start the download immediately, but you might have to click Save or Download to confirm.
-
5Click the file you just downloaded. It's the file that starts with EasyBCD. You should see it near the bottom of the browser. If you don't, press Ctrl+J to open the Downloads list and click it there.
-
6Click Yes to allow the app to run.
-
7Follow the on-screen instructions to install EasyBCD. Once the app is installed, it will be added to the Start menu.
-
8Open EasyBCD. It's on the Start menu, which you can get to by clicking the Windows button at the bottom-left corner of the screen.
-
9Click the Linux/BSD tab. It's near the top of the app.
-
10Select Grub 2 from the "Type" menu. It's near the top of the tab.
-
11Type Ubuntu into the "Name" field. It's right below the "Type" menu. This is how Ubuntu will appear in the boot menu.
-
12Select Automatically locate and load from the "Drive" menu.
-
13Click the Add Entry button. It's right below the "Drive" menu. This adds an option for Ubuntu to the standard Windows boot menu.[5]
-
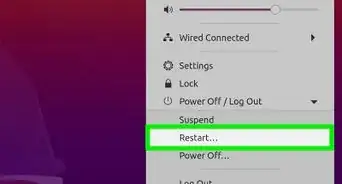
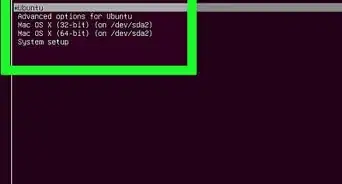
14Remove the USB drive and restart the PC. You can restart the PC by clicking the Start menu, selecting the Power button (it looks like a knob), and choosing Restart. When the PC comes back up, it will boot to a screen that allows you to select either Windows 10 or Ubuntu. Selecting one or the other will boot into that operating system.


References
- ↑ https://silentinfotech.com/blog/steps-to-install-windows-10-on-existing-ubuntu-16-04/
- ↑ https://support.microsoft.com/en-us/help/4028142/windows-10-system-requirements
- ↑ https://www.microsoft.com/en-us/software-download/windows10
- ↑ https://www.groovypost.com/howto/dual-boot-windows-10-linux/
- ↑ https://www.groovypost.com/howto/dual-boot-windows-10-linux/
About This Article

1. Create a primary NTFS partition in Ubuntu.
2. Download the Windows 10 ISO from Microsoft.
3. Install UNetbootin from the Software Center.
4. Use UNetbootin to create a bootable USB Windows 10 drive.
5. Boot from the USB drive.
6. Follow the on-screen instructions to install Windows.
7. Connect to the internet and download EasyBCD.
8. Use EasyBCD to add Ubuntu to the boot menu.