This article was co-authored by David Bitan and by wikiHow staff writer, Hunter Rising. David Bitan is a roofing professional, licensed contractor, and the owner and founder of Bumble Roofing based in Southern California. With over 12 years of construction industry experience, David specializes in restoring, repairing, and maintaining residential, commercial, and industrial roofs. With over 60 years of combined experience, Bumble Roofing provides easy, friendly services to structures including residential, commercial, industrial, multi-family, and government buildings along with hospitals, hotels, and churches.
There are 17 references cited in this article, which can be found at the bottom of the page.
This article has been viewed 277,346 times.
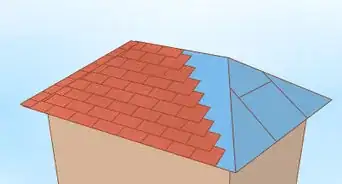
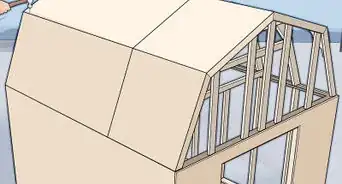
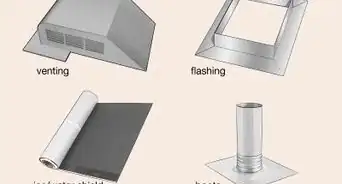
Roof vents are devices that allow moisture in your home to escape and prevent the growth of mold and mildew. The most common types of vents are soffits, static exhaust vents, and ridge vents that span your entire roof, and you can install all of them easily with a few tools from your local hardware store!
Steps
Installing Soffit Intake Vents
-
1Check around the edges of your attic for any wiring. Go into your attic and look at the area where you plan to install your soffits. Move any insulation around the outer edges and make sure the area is clear of any electrical components or wiring so you can work safely outside with your power tools. If there are wires, find a different spot to install your soffits.[1]
- Drill a hole in the center of where you want your vent while you’re in the attic so you know where to saw later.
-
2Outline a 7 in × 15 in (18 cm × 38 cm) rectangle on your overhang outside. Look for nail lines or seams in the paint since these indicate where a rafter would be in your attic. Use a pencil and a straightedge to draw the rectangle directly onto the bottom of your overhang. This will be where you put the soffit vent.[2]
- Use a tall ladder to reach a taller overhang. Have a partner hold the ladder steady so you can work safely.
- Make a template using cardboard that’s the width of your overhang with a hole the size of the vent cut in it. This way, you can easily trace around it and your vents will be straight.
- The size of the rectangle will depend on the size of the vents, but a standard size is 8 in × 16 in (20 cm × 41 cm).
Advertisement -
3Drill holes outside in the corners of the rectangle. Use a drill bit large enough so that you can fit your saw blade loosely inside the holes it makes. Drill the holes in all 4 corners of the rectangle to relieve some of the pressure from your saw.[3]
- Wear safety glasses when drilling the holes to prevent sawdust from getting in your eyes.
-
4Cut out the rectangle using a jigsaw. Put the blade of the saw through one of the holes you just drilled. Turn on your saw to a medium speed and slowly follow the outline you drew on your overhang. Don’t stand directly under the saw or else the wood could fall on you after you make your final cut.[4]
- Stop in the holes you drilled if you need to adjust the direction you’re cutting.
-
5Screw in a 8 in × 16 in (20 cm × 41 cm) vent to cover the hole. Use wood screws to hold the vents in place. Hold the soffit vent over the opening with your non-dominant hand and use a drill with a screwdriver bit to secure it. Start with the corner screws before adding the others.[5]
- Most vents will have 4-6 holes to add screws.
-
6Place soffits every 4 ft (1.2 m) along your overhang if needed. Measure out the distance between from the soffit vent you just installed to add more. You should have 1 square foot (0.093 m2) of ventilation for every 300 square feet (28 m2) in your home. Repeat the process for each vent you want to install.[6]
- Aim to have a 50/50 balance between intake vents and exhaust vents.
- Place a layer of window screen inside your vents to keep out rodents or insects.


Adding Static Exhaust Vents
-
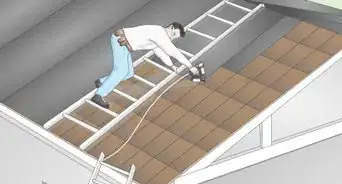
1Drive a nail through your attic to mark where you want your vent. Go into your attic and find a spot at least 2 feet (0.61 m) down from the peak of your roof. Use a hammer to pound a nail through to the roof. The nail will either visibly stick out from the roof or raise shingles so you know where it is.[7]
- Make sure the nail is in between the rafters so you can fit the vent between them.
- If you don’t have the room to swing a hammer, use a drill and a long screw.
-
2Clear the shingles in the area to make room for the vent. Get on your roof using a ladder and locate the nail. Use a claw hammer to loosen and remove the shingles around the nail to clear a space equal to the opening on the bottom of the vent. Otherwise, cut out the shingles using a utility knife. Once you’re finished, draw a square outline the same size as your vent on the roof.[8]
- Only get on your roof if you’re comfortable doing it. Otherwise, hire a professional roofing service to come install the vents for you.
-
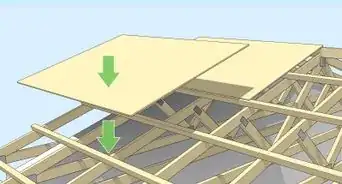
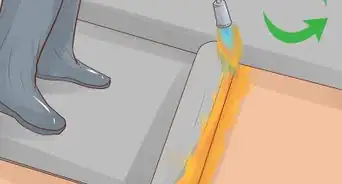
3Use a circular or reciprocating saw to cut through your roof. Set the saw depth so it only cuts through the top of your roof and not any rafters. Turn the saw on and follow along with your outline until the square is completely cut out. Lift the boards out or push them into your attic to throw away later.[9]
- Wear protective eye gear to prevent getting sawdust in your eyes.
- You can saw through your shingles and roofing at the same time if you have a roofing cutting blade for your saw. The flanges on your vent should slide underneath the surrounding shingles easily.
-
4Place a layer of roofing tar or caulk around the hole and press the vent down. Use a caulk gun to squeeze out an even layer of the adhesive around the edges of the hole. Set your vent on top of the hole so it lines up and press it down so it adheres completely.[10]
- Roofing tar and caulk can be purchased in an easy applicator tube at your local hardware or home improvement store.
-
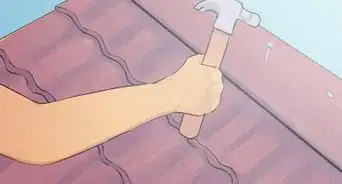
5Secure the vent in place with nails. Nail down the corners of the vent first to keep it in place. Add more nails along the sides every 4–5 in (10–13 cm) so it doesn’t come loose.[11]
- Some vents will have holes where you can place nails, but some will not.
-
6Glue down shingles to cover the bottom of the vent. Place a line of roofing tar or caulk on top of the vent’s flange, or its bottom flap, using a caulk gun. Press new shingles onto the caulk and use nails at the top of each shingle to fully secure them to the roof. Cover the entire flange with shingles to integrate it better into the roof.[12]
- Cut the shingles to fit around the vent with a utility knife if you need to.


Putting in Ridge Vents
-
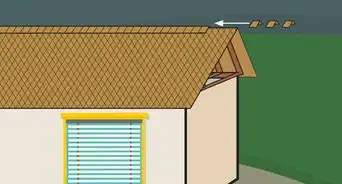
1Remove the cap shingles from the peak of your roof. The cap shingles are shaped like upside-down V’s and found at the peak of your roof. Get onto your roof using a tall ladder and climb to the top. Pry up the shingles along the top of your roof using a claw hammer. Set them aside so you can use them later instead of throwing them away.[13]
- Be careful on your roof if it has a steep slope.
- Hire a professional roofing service if you’re uncomfortable climbing on the top of your roof.
-
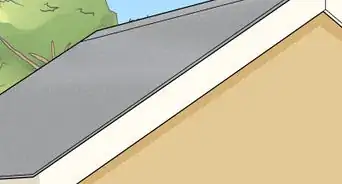
2Cut a slot going 3⁄4 in (1.9 cm) down from both sides of the peak. Set the depth of a circular saw so it doesn’t cut through the rafters in your attic. Push the circular saw in a straight line across the entire peak of your roof to make a slot for your ridge vent. Once you’ve finished sawing, remove the debris from your roof.[14]
- Ridge vents can go across the entire length of your roof or placed in sections the same length as the vent. Cut the slots according to how you want the vent.
-
3Set the ridge vents on top of the slot. Use enough vent pieces to fill the length of the slot you cut. Center the vents on the peak of your roof so the sides of the vent lay flat on the roof. If you need to cut the vent to fit at the end of your roof, use a utility knife to make it flush with your home. Hold the vent piece in place until you can nail it down.[15]
- Check your local hardware or home improvement store to see if they have ridge vents available.
- Use ridge vents meant for the pitch of your roof.
-
4Nail the vents to secure them in place. Use the pre-drilled holes in the vents for your nails. Make sure the nails are long enough to go through the vent and into your roof. Drive them in with a hammer so the vents are tight against the roof.[16]
-
5Replace the cap shingles on top of the ridge vent. Layer the cap shingles on top of the vent and nail them through your vent to keep them in place. Make sure the nails reach down into the roof so they don’t blow away in harsh weather.[17]
- This step is optional only if you want to blend the vent into the rest of your roof.


Expert Q&A
Did you know you can get expert answers for this article?
Unlock expert answers by supporting wikiHow
-
QuestionHow many roof vents do I need?
 David BitanDavid Bitan is a roofing professional, licensed contractor, and the owner and founder of Bumble Roofing based in Southern California. With over 12 years of construction industry experience, David specializes in restoring, repairing, and maintaining residential, commercial, and industrial roofs. With over 60 years of combined experience, Bumble Roofing provides easy, friendly services to structures including residential, commercial, industrial, multi-family, and government buildings along with hospitals, hotels, and churches.
Roofing Contractor & Maintenance ProfessionalYou should have 1 square foot of roof ventilation for every 300 square feet in your home. However, you may need more if your home is prone to getting hot in the summer.
Support wikiHow by unlocking this expert answer.
-
QuestionCan I install roof vents myself?David BitanDavid Bitan is a roofing professional, licensed contractor, and the owner and founder of Bumble Roofing based in Southern California. With over 12 years of construction industry experience, David specializes in restoring, repairing, and maintaining residential, commercial, and industrial roofs. With over 60 years of combined experience, Bumble Roofing provides easy, friendly services to structures including residential, commercial, industrial, multi-family, and government buildings along with hospitals, hotels, and churches.
Roofing Contractor & Maintenance ProfessionalYes! But only go on your roof if you’re comfortable working on it. If not, hire a professional roofing service to install the vents for you.Support wikiHow by unlocking this expert answer.
Warnings
- Don’t work on your roof during inclement or severe weather.⧼thumbs_response⧽
Things You’ll Need
Installing Soffit Vents
- Pencil
- Straightedge
- Drill
- Jigsaw
- Soffit vents
- Wood screws
Adding Static or Turbine Exhaust Vents
- Claw hammer
- Nails
- Ladder
- Utility knife
- Circular or reciprocating saw
- Caulk gun
- Static vent
- Roofing cement
Putting in Ridge Vents
- Ladder
- Claw hammer
- Circular saw
- Ridge vents
- Nails


References
- ↑ https://youtu.be/FIlADBBlTVo?t=1m21s
- ↑ https://youtu.be/FIlADBBlTVo?t=1m50s
- ↑ https://youtu.be/ujlI3xC4Log?t=1m12s
- ↑ https://youtu.be/ujlI3xC4Log?t=1m38s
- ↑ https://youtu.be/ujlI3xC4Log?t=2m15s
- ↑ https://youtu.be/FIlADBBlTVo?t=4m35s
- ↑ https://youtu.be/PqrZWd_CQIE?t=1m42s
- ↑ https://youtu.be/L2nNTfcPmeg?t=3m43s
- ↑ https://youtu.be/L2nNTfcPmeg?t=3m49s
- ↑ https://youtu.be/L2nNTfcPmeg?t=5m42s
- ↑ https://youtu.be/L2nNTfcPmeg?t=6m28s
- ↑ https://youtu.be/L2nNTfcPmeg?t=7m59s
- ↑ https://youtu.be/ZD3IajJ9ii0?t=1m18s
- ↑ https://youtu.be/ZD3IajJ9ii0?t=2m5s
- ↑ https://youtu.be/ZD3IajJ9ii0?t=2m23s
- ↑ https://youtu.be/ZD3IajJ9ii0?t=2m42s
- ↑ https://youtu.be/ZD3IajJ9ii0?t=3m20s
About This Article

To install a roof vent, start by installing air vents along the edges of your attic, which will allow the moisture to escape from your home. Next, find a spot on the roof for your exhaust vent, draw a square outline the same size as your vent, and remove the shingles from that area. Then, use a circular saw to cut into the area you marked, and squeeze out a line of caulk around the edges of the hole to help the vent stick to the roof. Finally, position your exhaust vent on top of the hole, and nail down the corners to ensure that it stays in place. To learn more, like how to blend the vent into the rest of your roof, read on!