This article was co-authored by Eric Shipe. Eric Shipe is a Kitchen and Bath Designer and the Owner of Bath + Kitchen based in Washington DC. Eric and his team specialize in cabinetry, design, and remodels. They serve homeowners, interior designers, architects, and contractors with a refined process, creative ideas, 4K photo-realistic renderings, and 360 Panoramic views. Bath + Kitchen was featured in Best of Houzz 2017-2020. Eric holds a BA in Economics and Business Administration from Ursinus College.
There are 21 references cited in this article, which can be found at the bottom of the page.
This article has been viewed 56,342 times.
Bathtub surrounds not only give color and texture to a bathroom, but they also protect the walls from moisture. Surround paneling costs less than wall tile and is easier to install. The basic installation can be finished in a day after sizing and fitting the panels. If you are installing a new surround instead of replacing an old one, you can attach the panels directly to the walls without having to remove anything. Finish cutting and binding the surround panels to give your bathroom a new look.
Steps
Detaching Installed Accessories and Surrounds
-
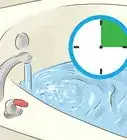
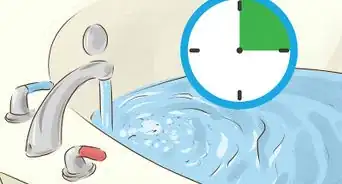
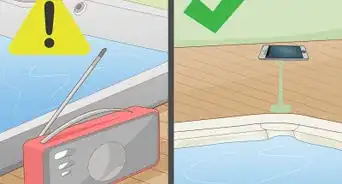
1Turn off the water valve in your home to disable the water flow. Locate the main water supply valve for your home. It is often near where the water utility line enters your home. The valve is usually outside, but some homes have a secondary valve inside you can use to disconnect the water. After turning the valve clockwise, go back to your tub and turn on the faucets to let out any water still in the line.[1]
- If you’re having a hard time finding the valve, look for a large pipe on the lowest floor of your home, such as in the basement or a crawlspace. Follow the pipe to see where it enters your home.
- Some homes have intermediate valves on supply pipes in the basement or a similar area. Use these valves to deactivate water flow to the bathroom.
-
2Cover the tub with a drop cloth if it is already installed. Set the cloth down and smooth it out so it fits over the entire tub. The cloth protects the tub during the installation, so make sure it’s big enough. That way, you won’t need to worry about needing to fix scratches and chip damage when you’re done. To help keep the drop cloth in place, clip it to the tub or weight it down with heavy items like a toolbox.
- Drop cloths are available at most hardware stores. Keep the cloth in place at all times until the installation is done.
Advertisement -
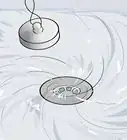
3Remove the spout, handles, and other accessories already on the wall. Have a sharp utility knife and a screwdriver on hand to remove the accessories. Use the utility knife to cut through the adhesive sealing these components to the wall. You may be able to twist off some parts by hand or with a wrench, including the showerhead and water knobs. Then, use the screwdriver as needed to detach the remaining parts.[2]
- Each part connects differently. For example, many faucets attach to the wall through a small screw at the base.
-
4Take old surrounds and tiles out if your bathroom has them. Put on safety goggles and a dust mask to protect yourself from dust and debris. To remove the panels and tiles, use a utility knife, grout saw, or rotary grinder to cut through the caulk and grout holding them in place. Then, tap the blade of a chisel behind the panels or tiles to pry them off the wall.[3]
- Tub surrounds aren’t meant to be installed on tile. Most of the time, water will leak between the surround and tile. To avoid this, install the surround over drywall, wood, or concrete walls rather than on top of existing surrounds or tiles.
-
5Repair damaged spots with wall putty. Always fill in holes in the wall before attempting to install a new surround.[4] If you don’t take care of the damage now, the surround may leak, leading to bigger problems. Gently scrape debris out of holes before putting some putty over it. Use the knife to spread the putty in a thin, flat layer. Finish the repair with a coat of spackle.[5]
- To ensure the repaired portion is level with the wall, sand the putty once it dries. Use sandpaper between 100 and 150 grit.
- For holes larger than 4 in (10 cm), consider cutting out the damaged portion and filling the wall with a patch cut out of new drywall.
-
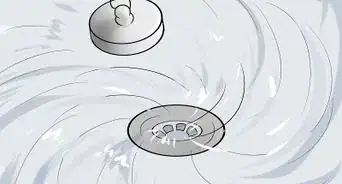
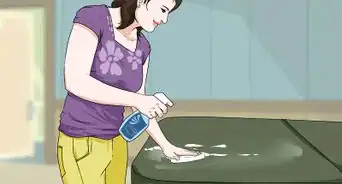
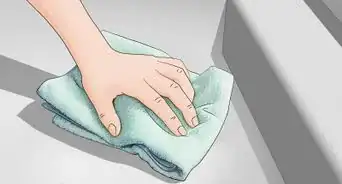
6Clean and dry the walls to eliminate debris. Do this before attempting to fasten a new surround to a wall. Go back over the walls with a metal scraper to remove leftover adhesives. Then, dampen a soft rag and scrub the walls to remove any remaining dust and debris. Dry the walls when you’re finished.[6]


Fitting a New Surround
-
1Match accessories to your pipe and tub if you're buying new ones. Determine where you will put faucets, showerheads, and other accessories before beginning the installation process. Your options are usually limited by the location of the water pipes in the wall. You will need a different faucet for a pipe coming out of the floor than you do for one coming through the wall, for instance.[7]
- Other factors to consider include the number of faucet holes in your tub and the overall style of your bathroom. Tub accessories come in a wide variety of styles, so you have a lot of options to choose from.
- For example, many shower lines emerge from the wall and tub surround, hanging above the tub. If you don’t have a shower line, you could get a freestanding faucet or mount the faucet to the tub. You don’t need to cut holes in the surround to mount these faucets, but you do need to choose a tub with space for them.
-
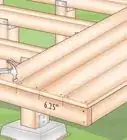
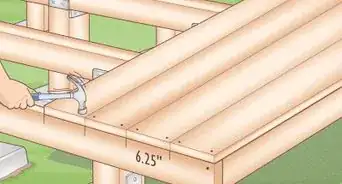
2Fit the tub first if you plan on installing a new one. The bathtub is the most important component, so measure the space you have available for it to ensure it fits well. Set the new tub in place, checking it with a carpenter's level to make sure it's as level as possible. Fasten your tub to the wall studs or mounted brackets if it attaches to the walls.[8]
- Replace an old tub if necessary, such as if it’s cracked or leaking.
- Tubs needs to be fitted first since the most common types of surrounds fit on top of them. If your tub is freestanding, buy a bigger surround that fits down the entire length of the wall.
-
3Measure the wall space you have available for a surround. Tub surrounds come in all different sizes, so take some measurements before you go shopping. Use a tape measure to determine the width and height of the walls around your tub. Write these measurements down on paper.[9]
- Note that you can find tub surrounds no matter what type of tub you have. Although common surrounds fit over tubs, there are also longer surrounds that extend down the entire length of the wall. This type of surround is great for freestanding tubs.
- If you have a tub in place and it’s up against the wall, consider measuring up the wall from the top of the tub. That way, you can get a fitting surround without removing the tub.
- If you’re replacing an old surround, measure it to figure out how big the new one needs to be. This helps if you’re replacing an old surround but not the bathtub.
-
4Select a new tub surround for your bathroom. Tub surrounds come in a variety of styles, so shop around to find the best fit for your bathroom. Some surrounds consist of panels you need to connect together while others come as a whole. Their sizes also vary, so compare your measurements to find the best fit.[10]
- Plastic-acrylic surrounds are the most common and cheapest options available. They’re lightweight and very easy to glue over any type of wall.
- Tile surrounds are similar to plastic and acrylic surrounds. They are durable but prone to chip damage. Individual tiles are bound to the surround through grout, which can leak and is difficult to keep clean long-term.
- Wood, stone, and metal surrounds are high-end. They look nice but are very expensive and often have to be ordered specially from local installers. They are generally durable but heavy and require specialty tools to cut.
- Choose a surround that meets both your decorative and practical needs.[11]
-
5Draw guidelines on the wall for the tub surround. Check the box for the height of your new tub surround. Use a tape measure to measure up the walls, then mark the height of the surround in several spots. Next, hold a carpenter’s level against the wall and connect the marks with a horizontal line.[12]
- Each tub surround has different dimensions. Refer to the owner’s manual to figure out how high to draw the guideline.
- The horizontal guideline needs to be plumb even if the tub is not. Make sure the line is straight so you know where to place the surround.
- Holding the surround against the wall also helps when figuring out where the guidelines go. This is hard to do alone, so have a friend hold the surround while you sketch the guidelines.
-
6Mark spots in the surround for the faucets and other accessories. Lay all of the tub surround panels on the ground, arranging them according to how they fit on the wall. Then, dry fit some of the panels on the wall. Find the spots where you need to make holes to let in the water spout, showerhead, and other features. Outline these parts in pencil on the surround.[13]
- Hold the panels against the wall to get a better idea of how they fit. This will give you a clearer image of where you need to make the holes.
- If dry fitting the panels isn’t an option, measure to find out where to make the accessory holes.
- Another way to fit the surround is by using the box the surround came in. Turn it into a template by spreading it out over the wall and marking all of the guidelines. Use it as a guide while cutting the panels.
-
7Trim the panels to size with a utility knife or jigsaw. After measuring and fitting the panels on the wall, you will have a good idea of how well the panels fit. Some panels might be too big, so you may need to trim them down a little. Sketch a cutting outline using a pencil and straightedge, then carefully slice off the excess material.[14]
- Remember to wear a dust mask, eye goggles, and other protective gear. Avoid long clothing when working with a saw.
- Mark cut lines with masking tape to make them more visible. Set the tape next to where you need to cut, then slice along the edge of the tape to finish the surround.
-
8Cut out the holes for the shower accessories with a saw. Double-check your measurements to ensure you marked the correct locations on the surround. Then, carefully cut into the surround with a hole saw or jigsaw. When you set the panels on the wall, the holes will line up perfectly with features like the spout and showerhead.[15] [16]
- You only get 1 shot at making these holes! If you don't mark and cut the holes properly, you may need to buy a new surround.


Gluing and Sealing the Surround
-
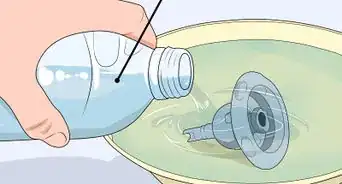
1Use a caulk gun and trowel to spread an adhesive over the wall. Choose an adhesive designed specifically for tub surrounds, which comes in a tube. Cut the tip off the tube and load it into a caulk gun. Press the gun’s trigger to spread the adhesive in a zigzag pattern, then smooth it out into a thin, even layer with a trowel.[17]
- The adhesive sets quickly. If your surround comes in multiple pieces, focus on installing 1 section at a time. Spread more adhesive once you finish installing the first panel.
-
2Press the tub surround flat against the wall. Lift up the surround and fit it against the wall according to the guidelines you marked. Make sure it is flush against the wall. If your surround comes in sections, apply each panel individually, fitting them together.[18]
- The easiest way to install panels is usually by starting with the side panels. Place the back panel next, then finish with the corner panels.
-
3Finish installing the tub’s faucet and other accessories. Fit new accessories you purchased or return old pieces you had to remove during the installation process. Place the accessories according to your bathroom and its unique layout. Some faucets, for instance, fit on a backplate you fit to the wall first. Others attach directly to bathtubs or a pipe on the floor.[19]
- For specialty accessories like grip bars and soap holders, you may need to drill holes in the surround. Screw the accessory brackets to support beams behind the surround to prevent them from coming loose. To find the support beams, use a wall stud finder.
- If the holes you make in the surround are too big, the accessories won’t fit properly. You can fill in small gaps with caulk. If the gaps are so big the accessories don’t fit tightly against the wall, you may need to start over with a new surround.
-
4Let the adhesive dry for 24 hours before continuing. Leave the surround alone until it adheres properly to the wall. When you come back to work on the tub the next day, make sure the panels feel impossible to remove. If they wiggle at all, they aren’t properly bonded to the wall. Apply more adhesive to stick them in place.
- If the surround is loose, water may seep behind it or it may fall down, which can cause a lot of damage.
-
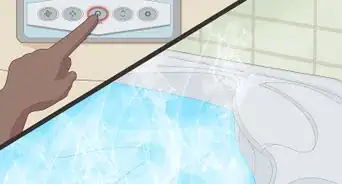
5Seal cracks in the surround and accessories with caulk. Get a bottle of waterproof silicone caulk and load it into a caulk gun. Cut the tip off and press the trigger to shoot caulk directly into any spaces that need to be filled. Then, after letting the caulk dry for 24 hours, turn on the water supply to enjoy your new surround.[20]
- You will need to squeeze a bead of caulk between the tub and the bottom of the surround. If your surround came in panels, also put caulk between each panel.
- While you have caulk available, spread a bead of caulk underneath fixtures like the faucet escutcheon to waterproof it.


Warnings
- Cutting through grout releases dust known to be an irritant. Always wear goggles, a dust mask, and long-sleeved clothing when removing bathroom tiles.⧼thumbs_response⧽
- Saws are dangerous, so take precautions while using them. Put on goggles, a dust mask, and ear protection. Avoid long-sleeved clothing that may get caught in the saw.⧼thumbs_response⧽
Things You'll Need
Removing an Old Surround
- Drop cloth
- Utility knife or saw
- Screwdriver
- Hammer
- Chisel
- Crescent wrench
- Putty knife
- Wall putty
- Spackle
- Soft rag
- Water
- Safety goggles
- Dust mask or respirator
Fitting a New Surround
- Measuring tape
- Pencil
- Paper
- Tub surround
- New faucets and other accessories as needed
- Long carpenter's level or straightedge
- Utility knife
- Jigsaw or hole saw
Gluing and Sealing the Surround
- Tub surround adhesive
- Silicone caulk
- Caulk gun


References
- ↑ https://www.marinwater.org/264/Emergency-Preparedness
- ↑ https://www.youtube.com/watch?v=EN_iyNnfhlA&feature=youtu.be&t=124
- ↑ https://www.youtube.com/watch?v=rSysed-P-ok&feature=youtu.be&t=232
- ↑ Eric Shipe. Home Improvement Specialist. Expert Interview. 12 July 2021.
- ↑ http://www.planitdiy.com/how-to/painting-decor/how-to-repair-drywall/
- ↑ https://www.bhg.com/homekeeping/house-cleaning/surface/how-to-clean-painted-walls/#
- ↑ https://www.youtube.com/watch?v=MZU5oGnwmCg&feature=youtu.be&t=83
- ↑ https://www.youtube.com/watch?v=_TEVf4DubtI&feature=youtu.be&t=119
- ↑ https://www.youtube.com/watch?v=rX84oiYykqU&feature=youtu.be&t=18
- ↑ https://www.youtube.com/watch?v=_TEVf4DubtI&feature=youtu.be&t=131
- ↑ Eric Shipe. Home Improvement Specialist. Expert Interview. 12 July 2021.
- ↑ https://www.youtube.com/watch?v=e4DM7DB0unA&feature=youtu.be&t=978
- ↑ https://www.youtube.com/watch?v=Rkf_2c4VBNU&feature=youtu.be&t=4
- ↑ https://www.youtube.com/watch?v=p9VGut3HuZE&feature=youtu.be&t=150
- ↑ https://www.youtube.com/watch?v=Rkf_2c4VBNU&feature=youtu.be&t=21
- ↑ Eric Shipe. Home Improvement Specialist. Expert Interview. 12 July 2021.
- ↑ https://www.youtube.com/watch?v=ohfbEEkq1NY&feature=youtu.be&t=17
- ↑ https://www.youtube.com/watch?v=e4DM7DB0unA&feature=youtu.be&t=1047
- ↑ https://www.youtube.com/watch?v=_TEVf4DubtI&feature=youtu.be&t=189
- ↑ https://www.youtube.com/watch?v=rX84oiYykqU&feature=youtu.be&t=42
- ↑ https://www.youtube.com/watch?v=_TEVf4DubtI&feature=youtu.be&t=154
- ↑ https://www.youtube.com/watch?v=zQOob4TZxkg&feature=youtu.be&t=19
- ↑ https://www.youtube.com/watch?v=-bViu_9CJ58&feature=youtu.be&t=69
About This Article

To install a tub surround, start by marking spots on the surround for the faucets and other accessories. Then, trim the surround panels to size using a utility knife or jigsaw, and cut out the holes you marked for the accessories. Next, spread adhesive over the wall using a caulk gun and a trowel, and press the tub surround flat against the wall. Finally, let the adhesive dry for 24 hours before sealing any gaps with caulk. To learn how to remove an old tub surround, keep reading!