This article was co-authored by wikiHow Staff. Our trained team of editors and researchers validate articles for accuracy and comprehensiveness. wikiHow's Content Management Team carefully monitors the work from our editorial staff to ensure that each article is backed by trusted research and meets our high quality standards.
This article has been viewed 52,144 times.
Learn more...
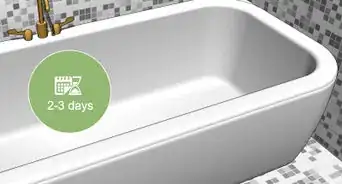
A whirlpool tub can be an enjoyable addition and add value to a home. However, you should be aware that whirlpool tub installation requires electrical work that is not required for a standard tub. Depending on the size of the tub, you may also need to tear up and replace some of the tile or other flooring that’s currently in your bathroom. The project can be time consuming, so plan to spend at least 2 or 3 days installing your whirlpool tub.
Steps
Removing the Old Tub and Tile
-
1Decide what size whirlpool tub you wish to install. You can buy a whirlpool tub that fits in the same space as a regular tub. Traditional bath tubs are generally sized at 30 by 60 inches (76 cm × 152 cm), but whirlpool tubs can be much larger than this. In some cases, they’re twice as large. Replacing your tub with a larger size adds steps to the process. However, some people enjoy the extra space of a larger tub.[1]
- If you install a new tub that’s the same size as the old one, you may not need to demolish much of the tile on the surrounding walls.
-
2Obtain necessary permits from your local building department. Depending on the type of county and residential area you live in, you will almost certainly need an electrical permit. In some areas, you’ll need to get building permission before modifying your home to accommodate the large whirlpool tub. Look online to find an email address or telephone number for your county’s building department, and ask how you can get the needed permits.[2]
- Also ask your building department if there are any special rules regarding whirlpool tubs that you must obey when locating the tub in your home.
Advertisement -
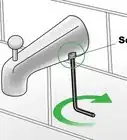
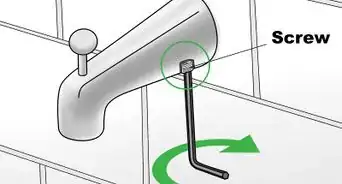
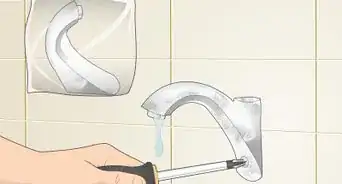
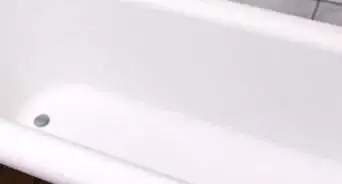
3Turn off the water to your old tub and remove the tub piping. Find the main water shutoff for the bathroom and turn it to the “off” position. In most cases, you can turn the water off by twisting the water-control knob counterclockwise.[3]
- Once you’ve shut the water off, disconnect the waste, overflow and water pipe to your old tub.
- If you’re worried about dust or debris falling into the exposed trap hole in your floor, stuff it with an old rag.
-
4Remove the old bathtub either whole or in pieces. At this point, if you have a few strong helpers with you, you can lift the tub up in 1 piece and carry it out to a nearby dumpster. If the tub is heavy, though, you’ll need to remove it piece by piece. Fiberglass or steel tubs can be broken into pieces with a reciprocating saw. Cast iron tubs can be broken with a sledgehammer.[4]
- If you decide to break the tub, wear safety glasses. You may also want to wear earplugs, especially if you’re going to use a reciprocating saw.
-
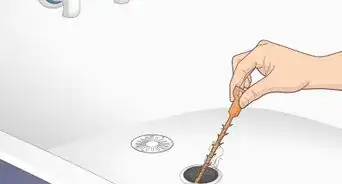
5Replace a worn or metal P trap with a new plastic P trap. The P trap is the P-shaped curve in the drainpipe that prevents gases from your drainage system from escaping up into your house. Inspect the trap, and reuse your P trap if it is plastic and in good condition. Replace your P trap if it is metal (meaning that it’s likely decades old) or in bad shape.[5]
- You can purchase a new P trap at any large hardware store or plumbing-supply store.
-
6Mark sections of old tile to remove from the wall around the tub. If the old wall tile doesn’t match your new whirlpool tub—or if it’s in the way of the newer, larger, tub—you’ll need to remove the tile and underlying drywall. To begin, cover the floor with a drop cloth. Use a plumb line and level to mark the area of old wall tile that needs to be removed.[6]
- Make sure that the new tile will cover the joint from the drywall you are about to remove.
-
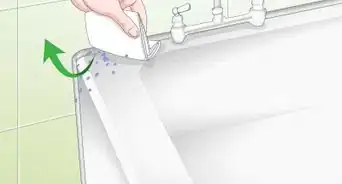
7Remove the old tile from the walls with a utility knife and pry bar. Once you’ve plumbed and marked the tile for removal, you’re ready to start removing it. Use a utility knife to cut through the drywall behind the tile. If you use a saw, you are more likely to hit wiring or plumbing. Then use a pry bar to pull out the tile in large sections or piece by piece.[7]
- If necessary, you can use a hammer to make a hole in the tile to get you started at the top. Wear safety glasses while you are removing the tile.


Wiring and Framing the Tub
-
1Contact a registered electrician to do the necessary wiring. In order for your whirlpool tub to meet your city or county standards, the electrical components should be installed by a registered electrician.[8] Speak to someone at your local building department and ask for a recommendation. Then contact the electrician and find a 3–hour window in which they can come to your home and do the wiring.
- If you don’t have a registered electrician install the wiring for you, the building department may deny your permit.
-
2Install a 2 in × 4 in (5.1 cm × 10.2 cm) backer between 2 studs. This backer is technically part of the wooden frame that you’ll build to house the whirlpool tub. Cut a 2 in × 4 in (5.1 cm × 10.2 cm) piece of wood 16 inches (41 cm) long so it’ll fit between 2 studs. Install the backer on the side of the frame that the tub’s faucet will be on.[9]
- Before situating the backer in your wall, check the dimensions recommended in the whirlpool-installation instructions. If recommended, install a tub spout and shower head backers.
-
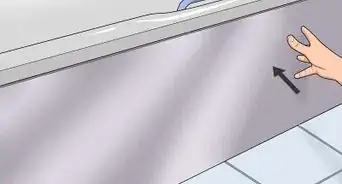
3Install 2 in × 4 in (5.1 cm × 10.2 cm) edge supports to frame the tub. Measure to the top of the whirlpool tub (under the tub’s edge) and attach 2x4 beams to the wall at this height. This will be the frame in which you’ll set your whirlpool tub. Since the tub won’t butt up against the wall on all 4 sides, you’ll need to connect free-standing frame sides to the framing attached to the wall. Follow the manufacturer’s directions to accomplish this.[10]
- Depending on the location of your tub and the number of walls it borders, you may need to erect freestanding frame on 1, 2, or 3 sides of the tub.
- When calculating the dimensions of the frame, be sure to measure the dimensions of the tub (not including the upper tub edge) so the tub fits snugly inside the frame.


Installing the Tub
-
1Apply mortar below the tub. Use a trowel to spread a 1 inch (2.5 cm) layer of the mortar to the base of the frame where you’ll set the tub. Smooth the mortar with a trowel so that it’s in an even layer beneath the tub. The mortar will help absorb some of the floor’s vibrations and keep the tub seated firmly in place.[11]
- You can purchase mortar at a local hardware store. If you’d like to use a lighter adhesive than regular cement, try using fiber-based cement.
-
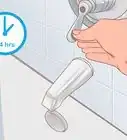
2Set the tub in place on top of the mortar. With at least 1 other person helping you, lift the whirlpool up and over the frame you’ve constructed. Center the tub in the frame (over the mortar) and lower the tub into place. The whirlpool tub’s weight will pull it down into the mortar.[12]
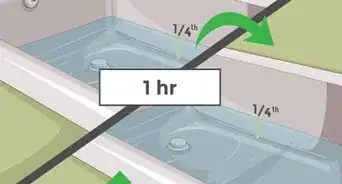
- Avoid putting any additional weight in the tub until the mortar has had 8-10 hours to fully dry.
-
3Seat the tub’s drain in the drain pipe with a layer of plumber’s putty. Roll some plumber’s putty into a 3 in (7.6 cm) rope with a diameter of about 1⁄2 in (1.3 cm). Place the putty on the base of the drain and then insert the drain through the drain hole. Use a tub drain wrench to hold the drain in place, and be certain the putty squeezes out on all sides of the edge of the drain. Tighten the waste line until the rubber seal is snug while holding the drain in place.[13]
- The plumber’s putty will keep water from leaking through the drain, and should also prevent the drain from shifting around.
-
4Assemble the copper pipes and solder them together. Connect the new tub to the existing plumbing hookups by connecting them with copper fittings. Once the pipes and fittings are in place, solder the copper piping together. Wait to solder the tub spout until after you have put in the tub.[14] Be sure to closely follow the directions in the manufacturer’s instructions.
- If you stuffed a rag in the trap hole before, remove it before connecting the new plumbing.
- If you are soldering onto the valve, be certain to take off the cartridge beforehand.
- Check to make certain that the P trap will reach the new drain. If it needs to be extended, extend it at this time.
-
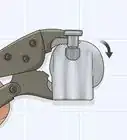
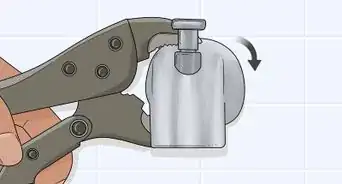
5Install the waste-and-overflow unit to complete the plumbing setup. Slip the waste-and-overflow unit into the whirlpool tub’s drain trap. Once the unit is in place, connect it to the drain. Tighten all nuts by hand and then give them a quarter turn with slip joint pliers. At this point, also go ahead and plug in the whirlpool’s electrical plug to a GFCI outlet.[15]
- Your new whirlpool tub should have come with copper waste-and-overflow unit. If it didn’t, purchase one at a hardware store. To ensure it fits your tub, also purchase a copper extension.
-
6Turn on the water and check for any leaks in the tub or plumbing. Connect the whirlpool tub’s faucet handles. Then, open the water shutoffs and then turn on the faucets. Fill the tub until it reaches the overflow and starts to drain through it and check to make sure that the overflow doesn’t leak. While the water is running, check all joints and seals for moisture. If there is any moistness, re-tighten the slip nuts and check joints for broken washers.[16]
- Start the jets running. With the jets running, check for leaks again.
-
7Secure the tub rim in place using wafer-head screws or roofing nails. This process should be clearly described in the manufacturer’s directions. Either roofing nails or wafer-head screws will slip through pre-drilled holes in the rim of the tub and pass into the wooden frame below. Tighten wafer-head screws 1 by 1 until they’re as tight as you can get them.[17]
- If you’re driving the nails in with a hammer, be careful that you don’t accidentally hit and shatter the rim of the tub.


Things You'll Need
- Whirlpool tub and associated whirlpool tub plumbing
- Plumbing and soldering tools
- Plastic P trap
- Drop cloth
- Plumb line
- Level
- Utility knife
- Pry bar
- Hammer
- Reciprocating saw
- Sledgehammer
- Plumber's putty
- Tub drain wrench
- 2 in × 4 in (5.1 cm × 10.2 cm) beams
- Slip joint pliers
- Safety glasses (optional)
- Earplugs (optional)


References
- ↑ https://www.familyhandyman.com/bathroom/remodeling/how-to-install-a-whirlpool-tub/view-all/
- ↑ https://www.familyhandyman.com/bathroom/remodeling/how-to-install-a-whirlpool-tub/view-all/
- ↑ https://www.familyhandyman.com/bathroom/remodeling/how-to-install-a-whirlpool-tub/view-all/
- ↑ https://www.familyhandyman.com/bathroom/remodeling/how-to-install-a-whirlpool-tub/view-all/
- ↑ https://www.familyhandyman.com/bathroom/remodeling/how-to-install-a-whirlpool-tub/view-all/
- ↑ https://www.familyhandyman.com/bathroom/remodeling/how-to-install-a-whirlpool-tub/
- ↑ https://www.familyhandyman.com/bathroom/remodeling/how-to-install-a-whirlpool-tub/view-all/
- ↑ https://www.familyhandyman.com/bathroom/remodeling/how-to-install-a-whirlpool-tub/view-all/
- ↑ https://www.familyhandyman.com/bathroom/remodeling/how-to-install-a-whirlpool-tub/view-all/
- ↑ https://www.bhg.com/home-improvement/plumbing/how-to-install-a-whirlpool-tub/
- ↑ https://youtu.be/T1MeeNFRalQ?t=103
- ↑ https://www.familyhandyman.com/bathroom/remodeling/how-to-install-a-whirlpool-tub/view-all/
- ↑ https://www.familyhandyman.com/bathroom/remodeling/how-to-install-a-whirlpool-tub/view-all/
- ↑ https://www.bhg.com/home-improvement/plumbing/how-to-install-a-whirlpool-tub/
- ↑ https://www.bhg.com/home-improvement/plumbing/how-to-install-a-whirlpool-tub/
- ↑ https://www.familyhandyman.com/bathroom/remodeling/how-to-install-a-whirlpool-tub/view-all/
- ↑ https://www.familyhandyman.com/bathroom/remodeling/how-to-install-a-whirlpool-tub/view-all/
About This Article