This article was co-authored by Anthony "TC" Williams. Anthony "TC" Williams is a Professional Landscaper in Idaho. He is the President and Founder of Aqua Conservation Landscape & Irrigation, an Idaho Registered Landscape Business Entity. With over 21 years of landscaping experience, TC has worked on projects such as the Idaho Botanical Garden in Boise, Idaho. He is a Idaho Registered Contractor and a previously Licensed Irrigator in the State of Texas.
This article has been viewed 307,693 times.
Insulating a shed will reduce damage to your stored tools, equipment, or boxes. It can also make it more versatile, allowing you to store plants or use it as a rec room. Properly insulating a shed requires you to seal gaps, install sheets of insulation, and possibly cover them with drywall.
Steps
Sealing the Structure
-
1Replace broken windows. There is no use insulating the walls if the windows are gapped or broken.
-
2Consider installing double glazed windows. If you are going to use it for a guest room or home office, this is essential, since single glazed windows will allow a large amount of heat loss, and depending on which side your shed faces, let a lot of heat in during summer.Advertisement
-
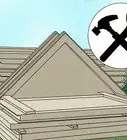
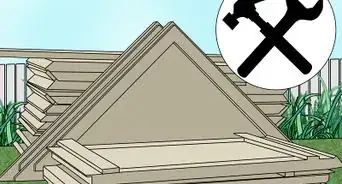
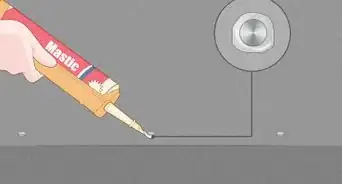
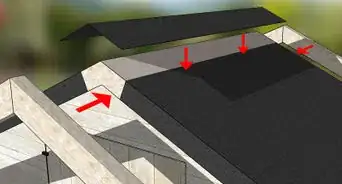
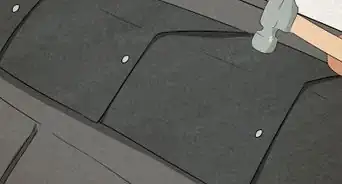
3Patch gaps in the roof, siding, and around the foundation. Seal thin gaps with caulk. Use expandable spray foam for larger holes.
-
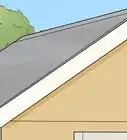
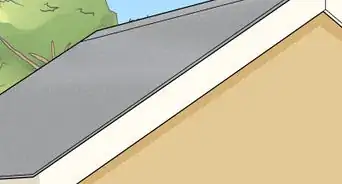
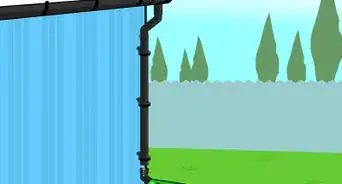
4Examine the shed during rainfall, to see if any water is leaking in. Install a roof with a good drainage system. You can use shingles, metal roofing, or fiberglass.
- In the absence of rain, use a garden hose and spray it over the roof. Look inside for signs of leakage.
-
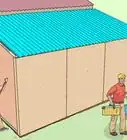
5Consider siding the shed if there are a lot of gaps. Filling holes and establishing a barrier between the outside is important if you are going to keep the temperature constant inside the shed. Look for dark stains in the walls to identify water leaks in the shed.
-
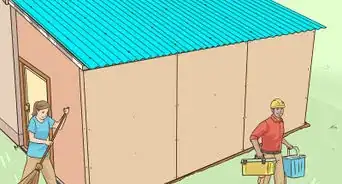
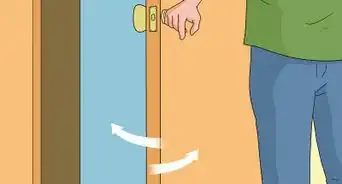
6Buy a weatherproof door. Most shed kits don’t come with a weatherproof model. You may need to purchase a custom size if your shed door is smaller than a standard home door.
-
7Get the shed fitted with electrical wiring if you want to install a heating system or lights. Hire an electrician to ensure it will be safe. Extension cords from the house are not safe.


Choosing Insulation
-
1Measure the space between the studs. This space will dictate the width of the sheets or batting you are going to buy.
-
2Pick blanket or batt insulation if your studs are 18 to 24 inches (45.7 to 61.0 cm) apart. These standard wall sizes allow you to roll out and secure the insulation between studs, joists, and beams. It is relatively expensive and best on unfinished walls.
-
3Move to foam board or polystyrene sheets if the studs are not a standard length but they are at regular intervals. They are fairly thin but work well, although they are not recommended if you have a lot of electrical outlets.
-
4Choose wool insulation if you need an insulation that can withstand high temperatures. Keep in mind that wool will need regular upkeep and maintenance. Without proper cleaning, wool will break down and rot over time from its natural dirt and oils. Although fiberglass insulation is a similar option, it must be covered or it is unsafe for humans.
-
5Choose foam, loose fill, or spray insulation if the shed walls are already finished with drywall. You can cut holes into the walls and blow the insulation into the frame.[1]
-
6Select reflective foil-faced insulation if you want a do-it-yourself insulation on a standard frame. It is flexible, so that it can bend around corners or other obstructions.[2]


Installing Insulation
-
1Hire a professional contractor if you choose blown-in in or foam insulation. Some of these methods require special equipment.
-
2Take your shed measurements into the home improvement store. They should help you to purchase enough to cover the shed. They will require your stud spacing measurements as well.
-
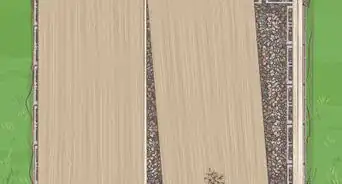
3Roll the sheets of batting or foil out horizontally. Set the polystyrene against the frame.
-
4Attach batting or with a staple gun if you are using foil sheets or batting. Staple it into the studs.[3] You will need to glue polystyrene sheets onto the walls and studs with a special adhesive.
-
5Overlap sheets of insulation where they meet. Continue moving up the wall in horizontal sheets. You can cut the insulation sheets with scissors to make a smaller section.
-
6Insulate the ceiling as well as the walls. You will need to leave at least a two-inch gap between the top of the ceiling and the insulation to let moisture escape.
-
7Cover the insulation sheets with sheets of drywall if you want the shed interior to be attractive. You will want to hang the sheets on the ceiling first, followed by wall sheets.


Expert Q&A
Did you know you can get expert answers for this article?
Unlock expert answers by supporting wikiHow
-
QuestionDo shed walls need a moisture barrier?
 Anthony "TC" WilliamsAnthony "TC" Williams is a Professional Landscaper in Idaho. He is the President and Founder of Aqua Conservation Landscape & Irrigation, an Idaho Registered Landscape Business Entity. With over 21 years of landscaping experience, TC has worked on projects such as the Idaho Botanical Garden in Boise, Idaho. He is a Idaho Registered Contractor and a previously Licensed Irrigator in the State of Texas.
Experienced LandscaperIt would certainly be beneficial if you were able to install a moisture barrier for your shed walls.
Support wikiHow by unlocking this expert answer.
-
QuestionHow do I insulate a wooden shed with electrical already installed?Anthony "TC" WilliamsAnthony "TC" Williams is a Professional Landscaper in Idaho. He is the President and Founder of Aqua Conservation Landscape & Irrigation, an Idaho Registered Landscape Business Entity. With over 21 years of landscaping experience, TC has worked on projects such as the Idaho Botanical Garden in Boise, Idaho. He is a Idaho Registered Contractor and a previously Licensed Irrigator in the State of Texas.
Experienced LandscaperYou will need to be careful as you install the insulation around the wiring and outlets.Support wikiHow by unlocking this expert answer.
-
QuestionDoes insulation go over or behind wiring?
 Andy OrrCommunity AnswerSort of both, you make a shallow cut/score horizontally across the batt and slide half of the fiberglass behind the wire and flab, with the remaining half in front of the wire - essentially sandwiching the wire in-between the fiberglass.
Things You'll Need
- Measuring tape
- Caulk
- Expandable spray foam
- Double glazed windows (optional)
- Weatherproof door
- Siding (optional)
- Scissors
- Foam/spray insulation
- Polystyrene sheets
- Blanket/batt insulation
- Foil bubble wrap insulation
- Wool insulation
- Staple gun
- Staples
- Glue
- Drywall sheets (optional)
References
About This Article

Before insulating your shed, make sure it's sealed, replace any broken windows, and patch any holes in the roof if necessary. Then, measure the space between the studs and the size of your shed so you know what width of insulation to buy. If your measurement is between 18 and 24 inches, purchase blanket or bat insulation and roll it out between the studs. As you move up the wall, overlap sheets of insulation where they meet. Alternatively, if your studs are closer together or further apart, use an insulation spray instead. For tips on when to use wool insulation or when you should call in a contractor, keep reading!