This article was co-authored by wikiHow Staff. Our trained team of editors and researchers validate articles for accuracy and comprehensiveness. wikiHow's Content Management Team carefully monitors the work from our editorial staff to ensure that each article is backed by trusted research and meets our high quality standards.
The wikiHow Video Team also followed the article's instructions and verified that they work.
This article has been viewed 23,341 times.
Learn more...
Water-based ceramic clay and air-dry clay will dry out completely if you expose them to air for too long. Keep your clay moist in order to prevent it from becoming hard and unmalleable. There’s really not much to it—all you need is some water and a few easy-to-find supplies like plastic bags. Whether you’re working with clay at home or using it during an art class, you’ll be glad you took the extra steps to keep your clay from drying out when you finish a beautiful sculpting project! Note that there is no need to keep oil-based clay moist as it will not harden.
Steps
Works in Progress
-
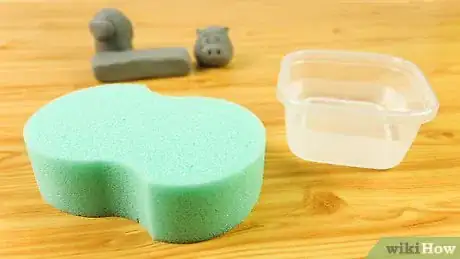
1Keep a small dish of water and a clean sponge near your work area. Fill a small bowl or container with water and set it somewhere reachable from your workstation. Place a clean sponge next to or in the dish.[1]
- Alternatively, you could keep a small spray bottle filled with water near your work area.
- As long as you keep it hydrated and store it properly, your clay will stay moist and workable indefinitely.
-
2Wet the clay periodically while you’re working with it using the sponge. Dip the sponge in the water and wring out the excess moisture, so it’s not dripping. Pat it all over the clay you’re working with whenever it starts to feel dry to keep it nice and malleable.[2]
- If you used a spray bottle instead of a sponge and a dish of water, just lightly spritz the clay all over instead.
- You can also do this if you get your work in progress out from storage and it feels a bit dry. However, as long as you store your project properly, that shouldn’t be a problem.
Advertisement -
3Wrap damp paper towels around your piece when you’re not working on it. Moisten as many paper towels as you think you need to cover your piece. Use just enough water to dampen them without getting them so wet that they fall apart. Wrap the paper towels carefully around your work in progress, making sure to cover all the surfaces of the clay.[3]
- You can do this either to keep a piece you’re working on moist if you’re taking a quick break or when you’re getting ready to put an unfinished sculpture away for the day into your overnight storage spot.
- As an alternative to using wet paper towels, you can wrap clay projects in a damp cloth or a damp piece of burlap.
-
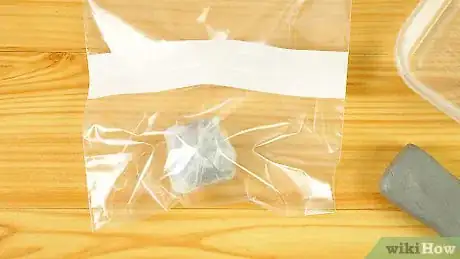
4Place the piece in a sealed plastic bag to keep it moist between work sessions. Carefully slide your wet-paper-towel-wrapped work in progress into a sealable plastic bag large enough to hold it, such as a zip-top plastic freezer bag or sandwich bag. Gently squeeze out as much air from the bag as possible and seal the top of the bag tightly.[4]
- This traps all the moisture from the paper towel inside the bag with the clay to preserve the moisture content of the clay, so it’s nice and moldable the next time you work on it.
- If you can’t fit your piece in a plastic bag, you could also wrap plastic cling wrap tightly around it as an alternative.
-
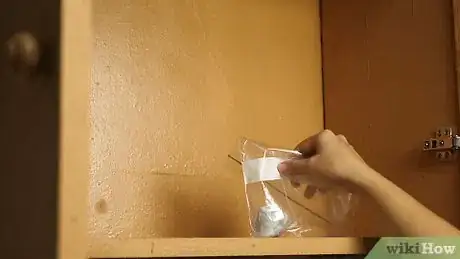
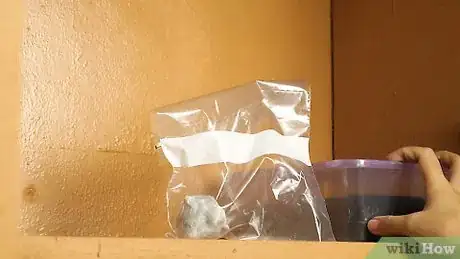
5Store your project in a dark, cool place. Place the bag with your clay piece in it somewhere away from light sources, ideally where it’s slightly cooler than room temperature. Inside a storage cabinet or in a dark, sealed container are 2 examples of good storage locations.[5]
- Don’t ever store your clay projects in a freezer or somewhere else with freezing temperatures, or the water content of the clay can cause it to freeze over, leading to flaking and fracturing.
- Be extra careful to keep clay out of direct sunlight, which can quickly cause it to dry out and crack.
- Basements and cellars are other good spots to keep clay pieces that you’re working on in between your creative sessions.
- Consider purchasing a specialized clay storage cabinet to store your projects in and keep them moist between work sessions if you’re going to be working with clay a lot. You can purchase these from art and ceramic supply sellers.
Blocks of Clay in Storage
-
1Spritz blocks of clay with a spray bottle of water. Fill a spray bottle with clean, cool water. Lightly spray the water all over the surfaces of clay blocks before you put them in storage.[6]
- This helps compensate for moisture the clay loses while you have it out in the open.
-
2Seal smaller blocks of clay inside plastic bags. Choose a plastic bag larger than the block of clay and place it on a flat surface with the opening towards you. Set the clay on top of the bag near the opening, then flip the top layer of the bag over the block as you roll the clay toward the bottom of the bag. Continue to roll the clay up tightly in the bag, away from you, like you’re wrapping a burrito. Tuck the rolled clay into the bag when you get to the bottom edge.[7]
- You can do this with any kind of plastic bag. For example, you can fit fairly large blocks of clay inside kitchen trash bags or even thick yard waste bags.
-
3Put big blocks of clay in a garbage bag inside a lidded bin. Set a large garbage bag inside a plastic trash bin or another type of lidded bin. Place a block of clay inside the trash bag and close up the top of the bag, if possible, then put the lid tightly on the bin.[8]
- You can just keep really big blocks of clay in storage this way and cut smaller chunks off the block whenever you need some clay for a project. That way, you’re not exposing the whole clay block to the air for long when you just need a little bit.
-
4Keep your clay in a dark, cool area away from extreme cold and sunlight. Store your blocks of clay somewhere like a storage cabinet, a basement, or a cellar. Anywhere dark and where it’s slightly cooler than room temperature works great.[9]
- If you’re storing a large block of clay inside a covered plastic bin, just make sure to store the bin away from direct sunlight and other heat sources.
- Don’t leave clay in a freezer or anywhere else with freezing temperatures or it will freeze over, flake, and fracture.
- There are also specialized clay storage cabinets available that help control humidity. If you’re going to be working with clay a lot, consider purchasing one of these for storing your projects between work sessions. You can buy these from sellers of art and ceramic supplies.
-
5Revive dry clay by soaking it until it becomes malleable. Soak a towel with water and wrap it around the clay in storage for a few days until it becomes moist again. Use a wire cutter to cut smaller blocks from the dry clay and soak them in water in a sealed plastic bag until they soften up, as an alternative.[10]
- You can also try poking holes in dried-out blocks of clay and pouring water into them to restore the inner water content and bring the clay back to life.
Warnings
- Water-based, air-dry clays can crack and break apart if you don’t keep them moist, which means you’ll probably have to start your work in progress over from the beginning or get a new block of clay to start your next project with.⧼thumbs_response⧽
Things You’ll Need
Works in Progress
- Small dish
- Water
- Sponge
- Paper towels
- Sealable plastic bag
Blocks of Clay in Storage
- Spray bottle
- Water
- Plastic bags
- Lidded bin (optional)
References
- ↑ http://artsedge.kennedy-center.org/~/media/ArtsEdge/LessonPrintables/grade-3-4/listening_doll_working_with_clay.ashx
- ↑ http://artsedge.kennedy-center.org/~/media/ArtsEdge/LessonPrintables/grade-3-4/listening_doll_working_with_clay.ashx
- ↑ http://artsedge.kennedy-center.org/~/media/ArtsEdge/LessonPrintables/grade-3-4/listening_doll_working_with_clay.ashx
- ↑ https://expandusceramics.com/qa/how-do-you-keep-clay-moist.html
- ↑ https://expandusceramics.com/qa/how-do-you-keep-clay-moist.html
- ↑ https://spinningpots.com/how-to-store-your-pottery-clay/
- ↑ https://www.youtube.com/watch?v=KIOkO2D3KZ8&feature=youtu.be&t=70
- ↑ https://spinningpots.com/how-to-store-your-pottery-clay/
- ↑ https://spinningpots.com/how-to-store-your-pottery-clay/
