This article was co-authored by wikiHow Staff. Our trained team of editors and researchers validate articles for accuracy and comprehensiveness. wikiHow's Content Management Team carefully monitors the work from our editorial staff to ensure that each article is backed by trusted research and meets our high quality standards.
There are 16 references cited in this article, which can be found at the bottom of the page.
The wikiHow Video Team also followed the article's instructions and verified that they work.
This article has been viewed 21,473 times.
Learn more...
Knit ties are great gifts for men on their birthdays, anniversaries, Father’s Day, Christmas, and other holidays! You can knit a tie in any color of yarn and stitch type you want. Knitting a tie is quick and easy, so it’s a great project for knitters of all levels. Create a unique knit tie for the special guy in your life, or make one for yourself!
Steps
Stitching the Main Body
-
1Make a slipknot. Wrap the yarn around your index finger and your middle finger. Bring the second loop over the first loop, and pull on the tail end of the yarn to tighten the base of the loop. Then, slide the loop onto your right-hand knitting needle and tug the tail to tighten the loop around the needle.[1]
- This will count as your first cast on stitch.
-
2Cast on 11 stitches. Use the working yarn (yarn attached to the ball) to make a loop over the tip of the left-hand needle. Then, insert the tip of your right-hand needle into the loop. Bring the working yarn over the tip of your right-hand needle, and then pull this yarn through the loop to create a cast on stitch.[2]
- Keep casting on until you have a total of 12 stitches on your right-hand needle.[3]
Advertisement -
3Knit 1.[4] Insert the right-hand needle into the first stitch on the left-hand needle going towards the back of the stitch. Then, bring the working yarn over the tip of the needle, and pull this yarn through the cast on stitch. This will create a new stitch on the right-hand needle.[5]
- Keep the yarn behind your work every time you knit a stitch.
-
4
-
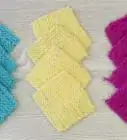
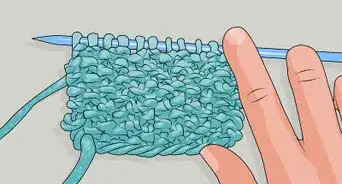
5Repeat this sequence to the end of the row. This is the first row of what is called the seed (or moss) stitch. It will create a textured surface all over the tie.[8]
- Follow this stitch sequence for every odd row in the pattern.
-
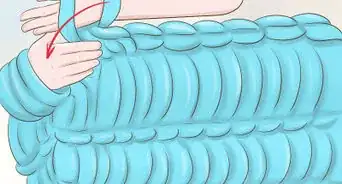
6Reverse the stitch sequence for the second row. Instead of knitting then purling, purl and then knit for the even rows. Purl the first stitch in the row, and then knit the second stitch in the row.
- Repeat this stitch sequence to the end of the row.
-
7Continue the seed stitch until the tie measures 21 inches (53 cm). When your tie is 21 inches (53 cm) long, you will begin working decreases to shape the narrow section of the tie.[9]
Working Decreases
-
1Knit 2 together. Insert your right-hand needle into the first 2 stitches in the row. Bring the yarn over the tip of the needle, and then pull through the 2 stitches. The new stitch on your right-hand needle will replace the 2 stitches you knit into.[10]
- Working a decrease at the beginning of the row will reduce the total number of stitches in the row.[11]
-
2Knit 1 and purl 1 until you reach the last 2 stitches. Pick up where you left off with the seed stitch, which should be a knit and then purl row. Knit 1 and purl 1 across the row, but stop before you knit the last 2 stitches.[12]
- If your last row was a knit 1 and purl 1 row, then you can reverse the stitch order for this row and purl 1 and knit 1 instead.
-
3Decrease by knitting 2 together again. Finish the row by knitting the last 2 stitches together. Use the same technique as you did before.[13]
- You should now have 10 stitches in the row.
-
4Continue in the seed stitch for 8 more rows. After the decrease row, resume working in the seed stitch. If you knit 1 and purled 1 for this row, then your next row will be purl 1 and then knit 1.[14]
- You can use a row counter to keep track of the rows, or just keep a tally using a sheet of paper.
-
5Work another decrease at the beginning and end of the ninth row. Knit the first 2 stitches together, continue in the seed stitch for the center part of the row, and then knit the last 2 stitches together. This is the last decrease row you will work.[15]
- You should have 8 stitches at the end of this decrease row.
Finishing the Tie
-
1Continue working until the tie is 58 inches (150 cm) long. This is the suggested length, but you can make your tie a little longer or shorter if desired. Measure the tie with measuring tape when it looks like to is getting close to the desired length.[16]
- This next section of the tie is the longest, but it is also narrow so you can knit it quickly.
-
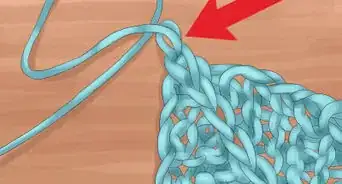
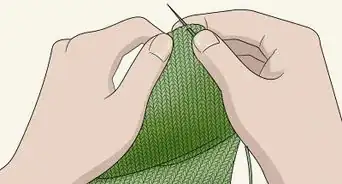
2Bind off the last row. Knit the first 2 stitches in the row, and then use the left-hand needle to lift the first stitch on the right-hand needle over the second stitch. Bring the first stitch up and over the second stitch so it slides off the end of the needle. Then, knit 1 and lift the new first stitch up and over the new second stitch.[17]
- Continue to bind off your stitches this way to the end of the row.
-
3Cut or weave in the ends. Cut the working yarn about 6 inches (15 cm) from the last stitch. Use the strand to tie a knot through the last stitch. Then, either cut the excess yarn about 0.25 in (0.64 cm) from the last stitch, or leave the yarn long and use a yarn needle to sew the end into the edge of the tie.
- Repeat this for the tail end of yarn at the beginning of the tie.
- Your tie is now finished! Put it on and tie it to see how it looks!
Things You’ll Need
- Yarn in medium, worsted-weight
- A pair of US size 8 (5.0 mm) knitting needles
- Scissors
- Yarn needle
References
- ↑ https://www.bhg.com/crafts/knitting/basics/making-a-slipknot/
- ↑ http://newstitchaday.com/knitting-techniques/cast-ons/
- ↑ https://www.youtube.com/watch?v=6a6GyiRpGx0&feature=youtu.be&t=1m11s
- ↑ https://www.youtube.com/watch?v=6a6GyiRpGx0&feature=youtu.be&t=1m24s
- ↑ https://www.craftyarncouncil.com/instructions_kn.php3
- ↑ https://www.youtube.com/watch?v=6a6GyiRpGx0&feature=youtu.be&t=1m24s
- ↑ http://newstitchaday.com/knitting-101-how-to-knit-the-purl-stitch-for-beginners/
- ↑ http://newstitchaday.com/seed-stitch/
- ↑ https://www.youtube.com/watch?v=6a6GyiRpGx0&feature=youtu.be&t=2m1s
- ↑ https://www.craftyarncouncil.com/decrease_k2tog.html
- ↑ https://www.youtube.com/watch?v=6a6GyiRpGx0&feature=youtu.be&t=2m9s
- ↑ https://www.youtube.com/watch?v=6a6GyiRpGx0&feature=youtu.be&t=2m15s
- ↑ https://www.youtube.com/watch?v=6a6GyiRpGx0&feature=youtu.be&t=2m18s
- ↑ https://www.youtube.com/watch?v=6a6GyiRpGx0&feature=youtu.be&t=8m31s
- ↑ https://www.youtube.com/watch?v=6a6GyiRpGx0&feature=youtu.be&t=2m41s
- ↑ https://www.youtube.com/watch?v=6a6GyiRpGx0&feature=youtu.be&t=2m50s
- ↑ http://newstitchaday.com/knitting-101-the-basic-knit-bind-off-for-beginners/
About This Article