This article was co-authored by wikiHow Staff. Our trained team of editors and researchers validate articles for accuracy and comprehensiveness. wikiHow's Content Management Team carefully monitors the work from our editorial staff to ensure that each article is backed by trusted research and meets our high quality standards.
There are 11 references cited in this article, which can be found at the bottom of the page.
This article has been viewed 34,673 times.
Learn more...
One of the most exciting things in movies are the fantastical backgrounds, whether it’s of collapsing buildings or dragons flying through the sky. If you want to achieve this in your own videos, you can use a green screen. The most important thing when using a green screen is lighting it properly. If you've never had to light a green screen before, don't worry. This article will walk you through the best way to light a green screen at home. Check out the tips below to learn how to do a basic green screen lighting setup.
Steps
Setting up Your Green Screen Equipment
-
1Correct wrinkles, tears, or scuffs in the green screen material. These imperfections can create shadows when light is shone on the green screen and make it harder to capture a smooth and even color.[1]
- If you are using fabric and it’s wrinkled, steam or iron the fabric until it’s smooth again. If the fabric is still bunching, stretch it out more tightly to eliminate the creases.
- If you are using paint, check for areas that are chipped or scuffed and repaint them. If there are a lot of chipped or scuffed areas, you should repaint the entire surface to ensure evenness of color.
-
2Eliminate reflective material in the room. Items such as glasses or jewelry can bounce light around the room and make it harder to isolate one solid color for the green screen.[2] Make sure your subject isn’t wearing anything reflective and hang black drapes around the room to stop light from bouncing.Advertisement
-
3Make sure your camera shoots in a file format compatible with your computer. Nothing’s worse than filming an entire scene and then realizing that it can’t be exported to your computer for editing. Check your camera before you start shooting to save yourself time.
- File formats that compress your image less, such as RAW or ProRes, are larger in file size but preserve all the small details of your video file, giving you a higher-quality image.[3]
-
4Make sure your lights are all the same type. Different lights will have different color temperatures, resulting in an uneven color balance.[4] You should at least use identical lights to light the green screen.


Lighting the Green Screen
-
1Place one light on either side of the green screen. Keep the lights a few feet away from the green screen and angle them at 45 degrees. Do not place a light directly in front of the green screen, because this will create a hotspot, or an area where light is more concentrated.[5]
- If your screen is particularly large and the lights on the side can't reach all of it, place an additional two lights at the bottom of the green screen pointing up.[6] Every green screen is different, however, so start with this basic setup and move the lights as necessary to adjust.
-
2Check that all areas of the green screen are lit. Take a step back and see if there are any areas that the light hasn’t reached, or where there are shadows. The key is to see one consistent color.[7]
- You can add more lights if necessary, but using too many lights increases the amount being reflected back, or spilling, onto your subject. This will make it harder to separate your subject from the green screen in editing.[8]
-
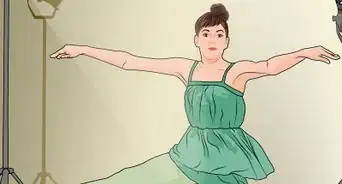
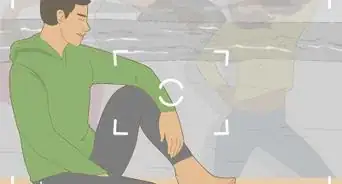
3Position your subject far away from the screen. This will reduce the amount of light being reflected onto them from the green screen. In general, 5 to 10 feet (1.5 to 3.0 m) is a good distance.[9] If your green screen isn’t big enough, position the subject as far away as possible.
- If your subject is standing on part of the green screen, place a differently colored mat underneath them to prevent light bouncing up at them.[10]
-
4Light your subject with a key light. The key light is the main light used to illuminate your subject. When placing it, consider where light will be coming from in the final scene. Place the key light accordingly, making sure that it is a few feet higher than the subject.[11]
- Do not light your green screen and subject at the same time. Light your subject separately to reduce shadows and light spilling.[12]
-
5Place a fill light opposite to the key light. The fill light is a weaker light used to eliminate any shadows cast by the key light. Start by placing the fill light on the other side of the key light and then adjust it until there are no shadows on your subject.[13]
- The fill light is meant to diffuse the key light, so it should be softer than the key light. Lower the intensity of the fill light, or tape a diffuser such as wax paper over the lens to soften the effect.[14]
-
6Place a backlight behind and to the side of the subject. The backlight will create a halo effect around the subject and separate them from the background. This will help your subject look more 3-dimensional.[15]


Exposing Your Green Screen Correctly
-
1Look at your camera monitor to check the exposure. Exposure is how much light the camera is taking in, or how bright the picture is. You should aim for a little less brightness than you would for a normal video to avoid capturing colors other than green.[16]
- Using a waveform monitor is more accurate than simply looking at the camera monitor. If you do not have a waveform monitor, you can download a smartphone app such as Cine Meter or Green Screener. These apps can check the evenness and exposure of your lighting.[17]
-
2Adjust your camera’s aperture to get the correct exposure. The aperture is the hole in your camera lens that allows light into the camera.[18] If your green screen is underexposed, or too dark, widen the aperture. If it’s too bright, narrow the aperture.
-
3Lower your ISO to reduce digital noise. Digital noise refers to random specks of color that can appear in your video or photo. ISO is a camera setting that brightens or darkens a picture, so higher ISOs may lead to more noise, which can make it harder to isolate a single color for your green screen.[19]
- You don’t want to lower your ISO too much, as this may underexpose your green screen. Experiment with your camera's ISO settings while making sure that it isn’t making the picture too dark.
-
4Add or remove lights as necessary. If adjusting your camera’s aperture and ISO is not correcting your exposure problems, try adding or removing lights to brighten or dim the green screen. If your lights are too harsh, tape a diffuser over the lens to soften the lights.[20]


References
- ↑ https://nofilmschool.com/2016/05/heres-what-you-need-remember-when-lighting-green-screen
- ↑ https://www.videomaker.com/article/c13/18075-green-screen-lighting-mistakes-and-how-to-fix-them
- ↑ https://nofilmschool.com/2015/09/5-secrets-pulling-hollywood-level-chroma-key-besides-good-lighting
- ↑ https://www.techsmith.com/blog/get-perfect-lighting-video/
- ↑ https://www.premiumbeat.com/blog/lighting-green-screen/
- ↑ https://www.mediacollege.com/video/special-effects/green-screen/lighting.html
- ↑ https://www.mediacollege.com/video/special-effects/green-screen/lighting.html
- ↑ https://www.zacuto.com/greenscreen-tips
- ↑ https://www.videomaker.com/article/c13/18075-green-screen-lighting-mistakes-and-how-to-fix-them
- ↑ https://blog.pond5.com/4800-working-with-green-screens-production-and-post-production-techniques/
- ↑ https://blog.pond5.com/4800-working-with-green-screens-production-and-post-production-techniques/
- ↑ https://blog.pond5.com/4800-working-with-green-screens-production-and-post-production-techniques/
- ↑ https://blog.pond5.com/4800-working-with-green-screens-production-and-post-production-techniques/
- ↑ https://www.techsmith.com/blog/get-perfect-lighting-video/
- ↑ https://blog.pond5.com/4800-working-with-green-screens-production-and-post-production-techniques/
- ↑ https://nofilmschool.com/2015/09/5-secrets-pulling-hollywood-level-chroma-key-besides-good-lighting
- ↑ https://nofilmschool.com/2016/05/heres-what-you-need-remember-when-lighting-green-screen
- ↑ https://photographylife.com/what-is-aperture-in-photography
- ↑ https://photographylife.com/what-is-iso-in-photography
- ↑ https://www.premiumbeat.com/blog/lighting-green-screen/
- ↑ https://wistia.com/learn/production/down-and-dirty-lighting-kit
About This Article