This article was co-authored by Jeff Baldwin. Jeff Baldwin is a Residential Painter and the Owner of Baldwin Custom Painting. With two decades of painting experience, Jeff specializes in high-end residential and small commercial painting projects. Dedicated to quality craftsmanship, Jeff and Baldwin Custom Painting provide bonded/insured, licensed, and lead-safe certified services in residential painting, light commercial painting, and wood refinishing.
This article has been viewed 23,775 times.
A paint roller increases the surface area you'd be able to cover with a convention brush and can make painting walls and ceilings a lot easier. Before you start to paint it's important that you correctly load your paint roller. You can load a paint roller with a paint tray or a bucket. Loading paint onto your roller before you start painting will help give you a smooth and even paint job and will cut down on the number of coats you need to put on the wall.
Steps
Loading Paint with a Paint Tray
-
1Pour paint into the well until it's halfway filled. Carefully pour the paint from the can into your paint tray well. Do not overfill the paint tray or the paint could overflow on the sides. Overfilling the well will also make it harder to load your roller.[1]
-
2Roll the paint roller into the well. Starting from the ribbed section of the paint tray, slowly roll your paint roller into the well filled with paint. You don't have to go all the way to the bottom of the well, just go into it enough to saturate your paint roller.Advertisement
-
3Roll the paint roller over the ribbed section of the paint tray. Once the roller is saturated, you'll want to roll it back onto the ribbed part of the tray to remove some of the paint. Go back and forth over the ribbed section of the paint tray to get excess paint off your roller.
-
4Do this five to six times and evenly distribute the paint. Continue to go back and forth from the well to the ribbed section of the paint tray until your roller is evenly saturated with paint. Once it feels heavy and the paint looks even on the roller, it's loaded.

Loading Paint with a Bucket
-
1Hang a roller screen in the bucket. Get a 5-gallon (18.92 l) bucket with an accompanying roller screen from the hardware store or online. Screens will come with two hooks that you can use to hang the screen on the lip of your bucket. Hang the screen so that it hangs on the inside of the bucket.[2]
- Sometimes buckets will come with the roller screen attached.
-
2Fill your bucket with paint. Carefully fill the bucket halfway with paint and make sure that at least half of the roller screen is out of the bucket.[3]
-
3Dip the roller into the paint. Dip the roller 1/2 in. (1.27 cm) into the paint. Use the roller screen to guide your paint roller as you dip it into the paint. You don't want to dip the roller too deep into the bucket, or you'll get paint on the side of your roller.[4]
-
4Roll the paint roller against the roller screen. Once you've saturated the roller with paint, you should roll it up against the roller screen. The paint should be dripping off the roller and back into the bucket as you do this.[5]
-
5Repeat the steps five or six times. Continue dipping the roller slightly into the water before rolling it onto your screen. Once your roller is fully saturated, you're ready to paint.[6]

Preparing the Paint and Roller
-
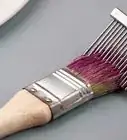
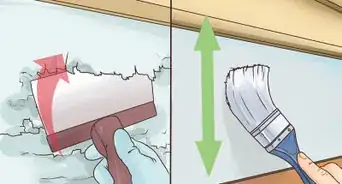
1Remove lint from the roller with painter's tape. Take a strip of painter's tape and wrap it around your fingers with the sticky side facing outward. Dab the tape over the roller until it's completely free of lint.
- Removing lint from the roller with ensure that you have an even paint job.
-
2Mix the paint thoroughly. Before you load your roller, you'll want to make sure that the paint doesn't have any lumps and is smooth as possible. To do this, make sure that you thoroughly stir the paint with a painter's mixing stick or paddle before transferring it to your paint tray or bucket.[7]
-
3Let the roller sit for a minute after loading it. Once you've loaded your paint roller, you should wait for a minute to allow the paint to soak into the roller. This will make your paint job more even and smooth.
-
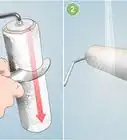
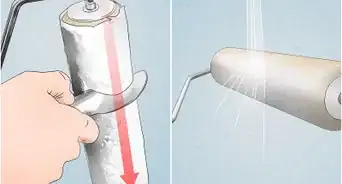
4Prime the roller with water for water-based paints. For water based paint like latex, priming your roller may make it easier to load it. Saturate your roller under cold water from the faucet. Quickly roll the roller six or seven times in the air, then dry the rest of it off with paper towels.[8]
- While priming your paint roller isn't necessary, it may make applying and loading your paint roller easier.

Expert Q&A
-
QuestionDo I need to prep the roller at all before I use it?
 Jeff BaldwinJeff Baldwin is a Residential Painter and the Owner of Baldwin Custom Painting. With two decades of painting experience, Jeff specializes in high-end residential and small commercial painting projects. Dedicated to quality craftsmanship, Jeff and Baldwin Custom Painting provide bonded/insured, licensed, and lead-safe certified services in residential painting, light commercial painting, and wood refinishing.
Residential PainterI recommend wetting the roller sleeve with clean water and then spinning out the excess water. Make sure to remove any loose fuzz so it doesn’t end up on the surface you plan to paint. -
QuestionHow much paint should I get on the roller?Jeff BaldwinJeff Baldwin is a Residential Painter and the Owner of Baldwin Custom Painting. With two decades of painting experience, Jeff specializes in high-end residential and small commercial painting projects. Dedicated to quality craftsmanship, Jeff and Baldwin Custom Painting provide bonded/insured, licensed, and lead-safe certified services in residential painting, light commercial painting, and wood refinishing.
Residential PainterSaturate the roller with plenty of paint, and keep it saturated throughout the painting process. Don’t roll until it feels dry.
Things You'll Need
- Paint roller
- Paint tray
- Paint
- Bucket
- Roller screen
- Painter's tape
- Paint mixing stick or paddle
- Water


References
- ↑ http://www.woosterbrush.com/reviews-advice/how-to-load-a-roller-cover/
- ↑ https://www.thisoldhouse.com/more/using-paint-roller-pro
- ↑ http://www.house-painting-info.com/articles/paintbucket/#.WS8PyGjyvcc
- ↑ https://www.familyhandyman.com/painting/techniques/paint-roller-techniques-and-tips/view-all
- ↑ http://www.house-painting-info.com/articles/paintbucket/#.WS8PyGjyvcc
- ↑ https://www.familyhandyman.com/painting/techniques/paint-roller-techniques-and-tips/view-all
- ↑ http://www.woosterbrush.com/reviews-advice/how-to-load-a-roller-cover/
- ↑ http://www.woosterbrush.com/reviews-advice/how-to-load-a-roller-cover/
About This Article