This article was co-authored by wikiHow staff writer, Jack Lloyd. Jack Lloyd is a Technology Writer and Editor for wikiHow. He has over two years of experience writing and editing technology-related articles. He is technology enthusiast and an English teacher.
The wikiHow Tech Team also followed the article's instructions and verified that they work.
This article has been viewed 1,391,655 times.
Learn more...
This wikiHow teaches you how to use the "Mail Merge" feature in Microsoft Word. Mail Merge allows you to use a spreadsheet of contact information to assign automatically a different address, name, or other piece of information to each copy of a document. This is useful when personalizing newsletters or statements, as you don't have to write by hand each person's name or address at the top of each document.
Things You Should Know
- Create your contact sheet in Microsoft Excel. Add your headers beginning in column "A1" and moving right. Save your file and remember your save location.
- Open Word and go to Blank document > Mailings > Select Recipients > Use an Existing List…. Choose your Excel sheet.
- Go to the spot you want to insert contact information and click Insert Merge Field. Select the desired headers from your Excel document. Click Finish & Merge.
Steps
Creating a Contact Sheet
-
1Open Microsoft Excel. Microsoft Excel's app icon resembles a white "X" on a dark-green background. The Excel "New" page will open.
- If you already have a contact sheet in Excel, skip ahead to importing the Excel contacts instead.
-
2Click Blank workbook. It's in the upper-left side of the "New" page. This will open a new, blank Excel document.Advertisement
-
3Add your contact headers. Starting in cell A1 and moving right from there, enter the following headers:[1]
- FirstName - Your contacts' first names will go in this column (cell A1).
- LastName - Your contacts' last names will go in this column (cell B1).
- Tel - Your contacts' phone numbers will go in this column (cell C1).
- StreetAddress - Your contacts' street addresses will go in this column (cell D1).
- City - Your contacts' cities of residence will go in this column (cell E1).
- State - Your contacts' states of residence will go in this column (cell F1).
- ZIP - Your contacts' ZIP codes will go in this column (cell G1).
- Email - Your contacts' email addresses will go in this column (cell H1).
-
4Enter your contacts' information. Starting in column A, cell 2, begin entering the contact information for each of the people for whom you want to generate a mail merge.
- Make sure that this information is accurate before proceeding.
-
5Save your document. To do so:
- Windows - Click File, click Save As, double-click This PC, click a save location on the left side of the window, type the document's name into the "File name" text box, and click Save.
- Mac - Click File, click Save As..., enter the document's name in the "Save As" field, select a save location by clicking the "Where" box and clicking a folder, and click Save.
- Keep in mind your selected save location—you'll need to find the Excel spreadsheet later.
-
6Close Excel. Click the X in the upper-right corner of Excel (Windows) or the red circle in the upper-left corner (Mac). You can now proceed to creating the mail merge in Microsoft Word.


Importing Contacts to Word
-
1Open Microsoft Word. The Word app icon looks like a white "W" on a dark-blue background. As with Excel, the "New" page will open.
- If you have an existing Microsoft Word document into which you want to import the Excel contacts, you'll instead double-click it to open it and skip the next step.
-
2Click Blank document. It's a white box in the upper-left side of the page. A blank Microsoft Word document will open.
-
3Click the Mailings tab. This tab is at the top of the Microsoft Word window. A toolbar will appear just below the row of tabs here.
-
4Click Select Recipients. It's in the "Start Mail Merge" section of the Mailings toolbar. Doing so prompts a drop-down menu.
-
5Click Use an Existing List…. You'll find this option in the drop-down menu. A new window will open.
- If you ever want to use Outlook contacts instead, you can select the Choose from Outlook Contacts option in the drop-down menu.
- You can also type a temporary list of contact information into Word by selecting the Type a New List option. This is useful when you only need to create a handful of contacts' information.
-
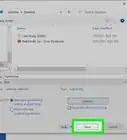
6Select your Microsoft Excel contact sheet. On the left side of the window, click the folder in which you saved the Excel sheet, then click the Excel sheet to select it.
-
7Click Open. It's in the bottom-right corner of the window.
-
8Confirm the decision. Click the Excel sheet's name in the pop-up window, then click OK at the bottom of the window. Your Excel sheet will be selected as the location from which your contacts will load.
- Make sure that the "First row of data contains column headers" checkbox at the bottom of this window is checked.


Using Mail Merge
-
1Go to the place in which you want to insert contact information. Find the place where you want to insert contact information (e.g., the top of the document) and click it to place the cursor there.
-
2Click Insert Merge Field. It's an option in the "Write & Insert Fields" section of the Mailings tab. A drop-down menu will appear.
- You may have to click the Mailings tab again before doing this.
-
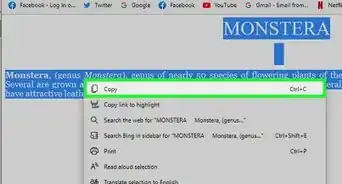
3Select a type of information. In the drop-down menu, click the name of one of the headers from your Excel document to insert it.
- For example, you would click FirstName in the drop-down menu if you wanted to insert a tag for contacts' first names.
-
4Add other information where necessary. This might include contacts' addresses, last names, phone numbers, and so on.
-
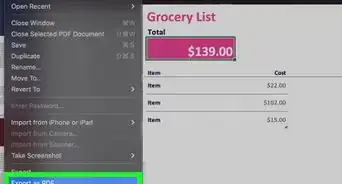
5Click Finish & Merge. It's in the far-right side of the Mailings tab's toolbar. This prompts a drop-down menu.
-
6Select a merge option. Click one of the following:
- Edit Individual Documents - Opens each recipient's document, allowing you to personalize further the documents.
- Print Documents... - Allows you to print out a copy of your document for each individual listed in your contact sheet.
- Send Email Messages... - Allows you to send out the documents as emails. The contacts' email addresses will be selected as the destination email addresses.
-
7Follow the on-screen instructions. Depending on your selected option, you will have an additional form to review (for example, if you selected Email, you'll have to enter a subject and then click OK). Doing so will complete the mail merge process.


Community Q&A
-
QuestionHow can I perform a mail merge on MS word?
 Community AnswerGo to the Mailings tab and click on the tab "Start Mail Merge;" it should be on the left side of the Mailings panel. Then select recipients and either make a list, or find a file if you already made one by choosing "Use existing list." Type your letter, and press "Add merge field" whenever you need to use something from your list. Make any additional changes needed, and press "Finish and merge," and then print if you need to.
 -
QuestionIf I don't use Outlook can I still send a mail merge?
 Community AnswerYes. You can either copy and paste, print, or click finish and merge and then go to settings regarding where you want to send your documents, and choose your destination. Also you can save to somewhere else in your computer and send it from there.
 -
QuestionWhat are the features of Microsoft Excel?Community AnswerThere are hundreds of formulas available to use, as well as a tool for copying data entries, continuing data patterns (1,2,3, or Monday, Tuesday, Wednesday, etc.). Also you can convert data into charts or import and edit files from other programs.
Warnings
- Always double-check your contact information before importing it to Word. Failing to do so could result in anything from using the wrong name to sending documents to the wrong email addresses.⧼thumbs_response⧽


References
About This Article
1. Open a blank document in Microsoft Word.
2. Click the Mailings tab.
3. Click Select Recipients, then click Use an Existing List....
4. Select your Mail Merge file, then click Open.
5. Click OK when prompted.