X
This article was co-authored by wikiHow Staff. Our trained team of editors and researchers validate articles for accuracy and comprehensiveness. wikiHow's Content Management Team carefully monitors the work from our editorial staff to ensure that each article is backed by trusted research and meets our high quality standards.
There are 14 references cited in this article, which can be found at the bottom of the page.
This article has been viewed 16,916 times.
Learn more...
You can protect your family's water from contaminants and save water on costly repairs by keeping your private well in good condition. Fortunately, our how-to guide will show you the simple steps you can take to keep your well in great shape.
Steps
Part 1
Part 1 of 3:
Inspecting Your Well
-
1Check your well cover and well cap every 1-2 weeks to ensure it is intact. A broken or missing cap can lead to well pollution, so take a peek at your well cover and cap periodically. If your cap is removed or broken, hire a professional to test your water and replace the cap.[1]
- Look for any broken pieces, and ensure your cap is still attached to your well.
-
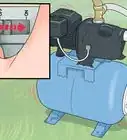
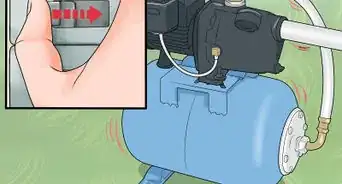
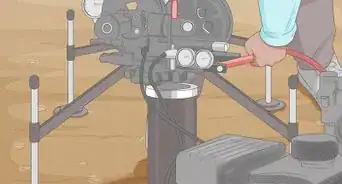
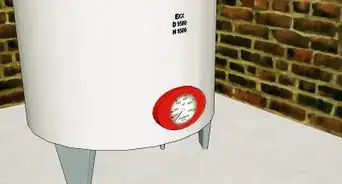
2Examine your well pump for leaks every 1-3 months. Your well pump is located either in your basement or above your well, and it consists of a motor housing and attached pipe that goes into the ground. Inspect the motor and pipe for any leaks, and keep your eyes out for loose or frayed wires.[2]
- You can also ask a friend or family member to flush a toilet or turn on a sink and listen to the running water. Get a professional involved if you hear any grinding noises.
Advertisement -
3Schedule a professional check-up each year. Have your wells inspected routinely to make sure your well is operating properly and prevent any well construction problems before they strike. To find a professional, search online for a licensed or certified water well professional, or contact your health department for a recommendation.[3]
- Regular inspections also protect your health by maintaining proper water conditions.
-
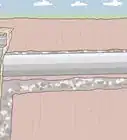
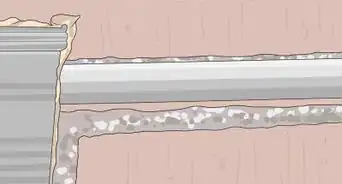
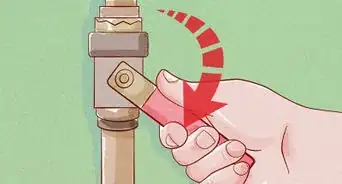
4Hire a professional if you suspect or notice cracks or corrosion. Cracks and corrosion can result in pollutants entering your water supply, which can make you and your family sick. If you encounter any damages to your well or changes in water conditions, contact a professional to come and inspect your system.[4]
- A professional can also assist you with repairs if needed.
- You should also contact a professional if there are changes to your water pressure, if you taste or smell something odd in your water, or any time the well cap has been removed.


Advertisement
Part 2
Part 2 of 3:
Preventing Contamination
-
1Learn about potential well water contaminants by researching online. If your well water is polluted, it is unsafe to drink and can cause health complications. Search for "well water contaminants" on the Internet to review how different pollutants can wind up in your well water. That way, you'll be prepared in the event of an issue.[5]
- Your water can get contaminated by fecal contamination from feedlots, high concentrations of naturally-occurring chemicals (like radon and arsenic), septic system problems, fertilizers, and pesticides.
- For more information on water-related contaminants, visit: https://www.cdc.gov/healthywater/drinking/private/wells/diseases.html
-
2Ask the health department about any common groundwater issues. Find the website for your your local health department online, and call their customer service number. Mention your location to the employee, and ask if there are any common chemicals or bacteria found in local water.[6]
- This is helpful because you will know what to look for when performing well water tests.
- You can also call state environmental agency officials and nearby public water system officials.
-
3Keep fertilizers, pesticides, oils, and debris away from your well. To prevent contamination, never use fertilizers or pesticides near your well site. They can get absorbed into the ground and eventually into your well water. Keep any oil or debris away from the area around your well.[7]
- Herbicides, degreasers, and fuels are all toxic if ingested, so keep them far away from your water supply!
-
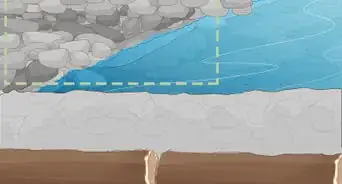
4Ensure your well is at least 50 feet (15 m) away from your septic tank. Take a yard stick or tape measure, and measure how far away your well is from your septic system. If it is under 50 feet (15 m), you should relocate your well. Hire a professional to help with removing your existing well and installing a new well 50 feet (15 m) away.[8]
- Keep your well at a safe distance from major sources of pollutants, like livestock yards and silos. They should also be at least 50 feet (15 m) from your well.
-
5Keep your well away from petroleum tanks and manure storage. Make sure your well is at least 100 feet (30 m) away from petroleum storage and fertilizer storage and handling. If you have manure stacks, keep them at least 250 feet (76 m) from your well.
- If your well is closer than the minimum distances, seek a professional for help replacing your well.
-
6Avoid drinking water and contact the health department if your well floods. Disasters like flooding, earthquakes, and landslides can result in contaminants entering your private well system. After the disaster strikes, call your health department and ask for advice on testing your well and inspecting any damage. They can recommend an experienced contractor to assist you.[9]
- Do not drink or wash from flooded water, and keep your distance from the well pump to prevent electrical shocks.
- You can also contact a local environmental agency.
- For more information on what to do after a flood, check out the Center for Disease Control’s instructions here: https://www.cdc.gov/disasters/floods/cleanupwater.html


Advertisement
Part 3
Part 3 of 3:
Testing Your Well Water
-
1Pick up a well water testing kit from your local health department. There are 2 kinds of tests you can use, and they are usually free at most health departments. Use a test kit for harmful bacteria and chemicals like arsenic, uranium, and fluoride every 3-5 years. Complete a basic test for bacteria, pH level, nitrates, and nitrites every year. Visit your local health department to retrieve either kit.[10]
- To find your local health department, search online. You can also call if you have questions about the water testing process.
- Be aware that bacteria tests are time sensitive, and you must return them to the lab within 30 hours.[11]
- In addition to regular tests, test your water immediately if there are any major changes, problems, or replacements with your well. You should also test your water if someone in your home is pregnant.
-
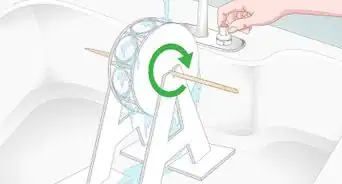
2Remove the strainer or aerator on your kitchen sink faucet. You should test the water at your kitchen sink, since this is the water you drink and cook with. Use a pair of pliers or a wrench, and unscrew the strainer or aerator from your faucet.[12]
- You may need to apply a little pressure at first, but the strainer should easily unscrew with the help of a tool.
-
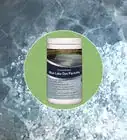
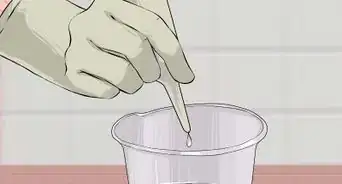
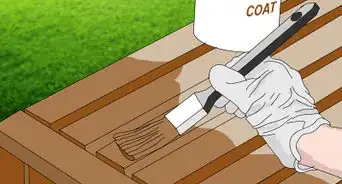
3Disinfect your faucet with either rubbing alcohol or bleach. Fill a small cup with rubbing alcohol or bleach, and hold the cup up to the faucet for about 60 seconds. The head should be completely submerged in your cup.[13]
- Both bleach and rubbing alcohol work well to disinfect your faucet.
-
4Turn on your water and let it run for 5 minutes to flush out your pipes. You want the stream of water run consistently with medium pressure. Aim for room temperature water, right in between cold and hot. Set a timer on your stove, microwave, or cell phone for about 5 minutes, and let your water run continuously. While the water runs, place a clean paper towel and your test kit on the counter next to your sink. In addition, wash your hands thoroughly with soap and water.[14]
- This helps flush your pipes and provide an adequate sample for your test.
- After the 5 minutes are up, do not turn off the water. Let it run until after you take your samples.
- Avoid touching the faucet with your hands! Touching the faucet can contaminate your water test. If you happen to bump the faucet, disinfect the faucet again and restart your 5 minute timer.
-
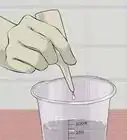
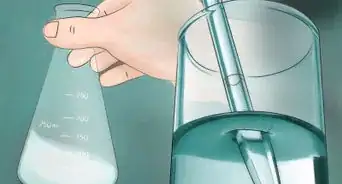
5Fill the testing bottles with water and close them when they are full. Before you fill your bottles, review the instructions on your particular test kit. Some directions call for different fill levels. Avoid changing the flow of your water, and avoid rinsing or touching the inside of your testing bottles. Remove your bottle from the stream of water before it overflows.[15]
- If the water overflows out of the bottle, it may remove some of the necessary testing chemicals, resulting in inaccurate tests.
- Most test kits will instruct you to fill the bottles up to the shoulder, the part of the bottle below the neck.
- Some of the bottles may have some moisture or powder in the containers. Don't worry about this, as it is just part of the test kit.
-
6Complete the water testing form included with your test kit. Your testing kit comes with a form, which provides the testing center necessary information about your water and location. Fill in things like the date and time collected, your address, any chlorine treatment, and well type.[16]
- Fill out the form neatly and completely using a pen or pencil.
-
7Place your form and your testing bottles in the box and seal it up. Once you have completed the forms and filled up your sample bottles, your test kit is ready to go back to the lab. Place the bottles inside the box, and put the form over top of your bottles. Close the box up, and seal it with packaging tape if you are mailing it.[17]
- You don’t have to tape up your box if you are dropping it off at a local center.
-
8Bring your testing bottles to a local lab or health department. You can drop off your test kit at the local health department location where you retrieved your kit, and they can test your sample on site. If it is more convenient, you can also mail in your samples. In your test kit directions, there are directions about mailing back your sample, including which address to send it to.[18]
- If you are mailing back bacteria test kits, keep in mind that they must reach the lab within 30 hours. You may need an expedited shipping method.[19]
-
9Follow any instructions for water treatments when you get the results. You will receive the results of your water test in the mail. Your results include levels of bacteria or chemicals in your water, like e. coli, chlorine, or flouride. The results will detail any further steps needed to treat your water.[20]
- Additional steps may include a well water flush, adding chlorine, adjusting pH levels, and other actions.
-
10Contact your local health department to help you with the results. If you need assistance, call your local health department by phone or visit the location with your results. They can explain the process and answer any questions you may have.[21]
- Your local health department have expert staff members that can help determine how to correct problems your well water.


Advertisement


References
- ↑ https://www.epa.gov/privatewells/protect-your-homes-water
- ↑ https://brightnest.com/todos/inspect-your-well
- ↑ https://wellowner.org/resources/water-well-maintenance/annual-inspection/
- ↑ https://wellowner.org/resources/water-well-maintenance/annual-inspection/
- ↑ https://www.cdc.gov/healthywater/drinking/private/wells/location.html
- ↑ https://www.epa.gov/privatewells/protect-your-homes-water
- ↑ https://www.epa.gov/privatewells/protect-your-homes-water
- ↑ https://www.cdc.gov/healthywater/drinking/private/wells/location.html
- ↑ https://www.epa.gov/privatewells/protect-your-homes-water
- ↑ https://www.michigan.gov/documents/deq/deq-ess-faq-water-wb-homewaterwells-testing_206706_7.pdf
- ↑ https://youtu.be/aUE7PcGRKxc?t=1m4s
- ↑ https://youtu.be/aUE7PcGRKxc?t=50s
- ↑ https://youtu.be/aUE7PcGRKxc?t=1m8s
- ↑ https://youtu.be/aUE7PcGRKxc?t=1m14s
- ↑ https://youtu.be/aUE7PcGRKxc?t=1m35s
- ↑ https://youtu.be/aUE7PcGRKxc?t=2m22s
- ↑ https://youtu.be/aUE7PcGRKxc?t=2m26s
- ↑ https://youtu.be/aUE7PcGRKxc?t=2m30s
- ↑ https://youtu.be/aUE7PcGRKxc?t=1m4s
- ↑ https://www.michigan.gov/documents/deq/deq-ess-faq-water-wb-homewaterwells-testing_206706_7.pdf
- ↑ https://youtu.be/aUE7PcGRKxc?t=2m36s
- ↑ https://www.epa.gov/privatewells/protect-your-homes-water
About This Article

wikiHow Staff
wikiHow Staff Writer
This article was co-authored by wikiHow Staff. Our trained team of editors and researchers validate articles for accuracy and comprehensiveness. wikiHow's Content Management Team carefully monitors the work from our editorial staff to ensure that each article is backed by trusted research and meets our high quality standards. This article has been viewed 16,916 times.
Co-authors: 5
Updated: December 4, 2022
Views: 16,916
Categories: Outdoor Water Features
Advertisement