This article was co-authored by wikiHow Staff. Our trained team of editors and researchers validate articles for accuracy and comprehensiveness. wikiHow's Content Management Team carefully monitors the work from our editorial staff to ensure that each article is backed by trusted research and meets our high quality standards.
The wikiHow Video Team also followed the article's instructions and verified that they work.
This article has been viewed 15,407 times.
Learn more...
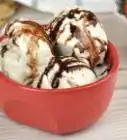
Ice cream is a delicious treat. Most recipes contain dairy, which means that those who are vegan or lactose-intolerant cannot use them. Fortunately, it is possible to make vegan-friendly ice cream using almond milk and thickeners, such as xanthan gum. If you are only lactose intolerant, then you can use popular recipes containing eggs, and use almond milk instead!
Ingredients
- 13.5-ounce (398 mL) can full-fat coconut milk
- 1 cup (240 mL) unsweetened almond milk
- 1/2 cup (120 mL) maple syrup (or honey, agave, or brown rice syrup)
- 2 to 3 teaspoons vanilla extract
- 1/2 teaspoon xanthan gum
- 1/4 teaspoon salt
Makes 1 quart (576 g)
- 3 cups (700 mL) unsweetened almond milk
- 6 large egg yolks
- 3/4 cup (170g) white, granulated sugar
- 1/3 cup (35 g) unsweetened cocoa powder
- 1/4 teaspoon xanthan gum (optional)
- 1 1/2 teaspoons vanilla extract
Makes 1 quart (576 g)
Steps
Making Vegan Vanilla Ice Cream
-
1Combine all of your ingredients in a blender or food processor. Pour the coconut milk and almond milk into a blender or food processor. Add in the maple syrup, vanilla extract, xanthan gum, and salt.
-
2Blend the mixture on high for 1 to 2 minutes until it thickens. If you are using a food processor, be aware that the mixture may leak from under the lid; it would be a good idea to cover the lid with a towel to absorb any leaked mixture.
- Pause the blender or food processor from time to time, and use a rubber spatula to scrape any unmixed mixture towards the bottom.
Advertisement -
3Pour the mixture into a large bowl and cover it with plastic wrap. If you cant to prevent a skin from forming on top of the mixture, be sure to press the plastic wrap against the surface. If you don't do this, you may get a skin, which you will have to remove.[4]
-
4Chill the mixture in the fridge for 2 to 4 hours. If you have not already, put your ice cream maker's canister into the freezer. Both need to be as cold as possible. This will help speed up the freezing process and reduce the formation of ice crystals.
-
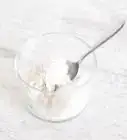
5Freeze the ice cream mixture in your ice cream maker. Set up your ice cream maker, then pour the chilled ice cream base into the canister. Churn the ice cream for 20 to 30 minutes, or until it reaches a soft-serve consistency.
- If you got a skin on top of your mixture, scoop it off with a fork or spoon so that you don't blend it into your ice cream.
- Each ice cream maker is different, so follow the instructions that came with yours carefully.
-
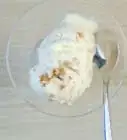
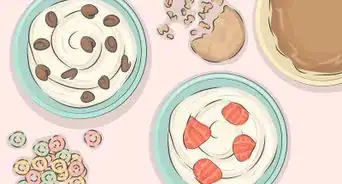
6Add in some flavoring extras, if desired. If you want to make your ice cream more flavorful, toss in a handful of extras, such as crushed nuts, sprinkles, chocolate chips, or fruit pieces. Let the ice cream churn for a few more seconds to blend everything in.[5]
-
7Transfer the ice cream into a container and cover it with wax paper. Use a rubber spatula to scoop the ice cream into a freezer-safe container. Press a sheet of wax paper against the surface of the ice cream, then cover the container with a lid.[6]
- The wax paper will help prevent ice crystals from developing in your ice cream.
- If you don't have any wax paper, you can use parchment paper instead.
-
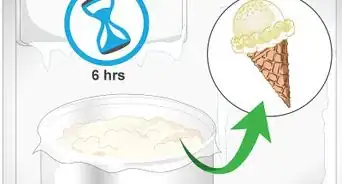
8Freeze the ice cream until it hardens. Transfer the ice cream into a freezer-safe container, and cover it with a lid. Place the ice cream into the freezer, and leave it there until it hardens. This can take anywhere from 4 to 8 hours.
- If the ice cream is too hard when you serve it, let it soften on the counter for 10 to 15 minutes first.


Making Dairy-Free Chocolate Ice Cream
-
1Simmer the cocoa powder and the milk for 2 to 3 minutes. Pour half of the almond milk into a saucepan, then whisk in the cocoa powder. Add the rest of the almond milk, then simmer the mixture over medium heat for 2 to 3 minutes. Remove the saucepan from the stove once it is done cooking.
- Leave out the cocoa powder if you want plain vanilla ice cream.[7]
- This recipe contains eggs, making it non-vegan. Because of the almond milk, however, it is a great alternative for those who are lactose-intolerant.
-
2Whisk the eggs in a large mixing bowl. Separate 6 egg yolks from 6 egg whites. Place yolks into a large mixing bowl and whisk them until they turn pale yellow.
- You won't be cooking these eggs, so make sure that they are pasteurized.
- Save the egg whites for another recipe, such as meringues.
-
3Stir the sugar gradually into the egg yolks until it thickens. Measure out the sugar first, then scoop out a few spoonfuls and vigorously whisk them into the eggs. Keep adding the sugar in small increments and whisking until the mixture thickens.
- The mixture is thick enough when you lift the whisk and the mixture streams from it in a ribbon.
- Don't add all of the sugar at once, or the mixture won't mix properly.
-
4Stir 1/3 cup (90 mL) of the almond milk mixture into the eggs. Measure out 1/3 cup (90 mL) of the warm almond milk mixture. Pour it into the eggs, and stir it with a whisk. This is known as tempering, and will prevent the eggs from scrambling.
-
5Whisk the rest of the almond milk mixture into the eggs. Slowly pour the rest of the almond milk mixture into the beaten eggs. Stir the eggs with a whisk while you pour. Be careful not to pour too fast, or you will risk scrambling the eggs.
- If you want thicker ice cream, sift 1/4 teaspoon of xanthan gum into the eggs after you've added the almond milk. Stir it in well.
-
6Add in the vanilla extract. Measure out the vanilla extract and pour it into your ice cream mixture. Give the mixture a good stir to ensure that it gets mixed in. Because you are using unsweetened cocoa powder, the vanilla extract will help make it sweeter and more flavorful.
- If you omitted the cocoa powder, increase the vanilla extract to 2 teaspoons.[8]
-
7Cover the bowl with a sheet of plastic wrap. It would be even better if you were to press the plastic wrap against the surface of the mixture. This way, the mixture won't develop a skin as it cools. If you can't manage this, don't worry; you can scoop the skin off later.[9]
-
8Chill the ice cream mixture for 6 to 8 hours. Place the bowl into the refrigerator, and leave it there for 6 to 8 hours. Remember to put the canister of your ice cream maker into the freezer as well, otherwise the ice cream will not freeze properly.
-
9Freeze the ice cream using your ice cream maker. Set up your ice cream maker, then pour the mixture into the canister. Churn the ice cream for 20 to 30 minutes, or until the ice cream develops a soft-serve consistency. Each ice cream maker is different, so follow the instructions that came with yours carefully.
- If you prefer soft-serve ice cream, stop at this step and serve the ice cream now.
-
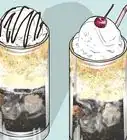
10Toss in a handful of extra goodies, if desired. If you want to make extra-fancy ice cream, toss a handful of goodies, such as crushed walnuts or chocolate chips. Churn the ice cream for a few more seconds, or until everything is just mixed in.[10]
- Use goodies that go well with chocolate. Nuts, chocolate chips, and cacao nibs are all great options.
-
11Transfer the ice cream into a container and cover it with wax paper. Press the wax paper against the surface of the ice cream, then cover it with a lid. The wax paper will help keep ice crystals from developing in your ice cream.[11]
- If you don't have wax paper, try parchment paper instead.
-
12Freeze the ice cream for 6 to 8 hours. Place the ice cream into the freezer, and leave it there for 6 to 8 hours. This will allow the ice cream to harden into a more traditional texture as opposed to soft-serve.
- If the ice cream is too hard when you take it out of the freezer, allow it to sit on the counter for 10 to 15 minutes before scooping it.


Things You'll Need
Vegan Vanilla Ice Cream
- Blender or food processor
- Rubber spatula
- Freezer-safe container
- Ice cream maker
- Plastic wrap
- Parchment paper or wax paper
Dairy-Free Chocolate Ice Cream
- Saucepan
- Large mixing bowl
- Whisk
- Freezer-safe container
- Ice cream maker
- Plastic wrap
- Parchment paper or wax paper


References
- ↑ https://minimalistbaker.com/dairy-free-chocolate-ice-cream/
- ↑ https://blog.kingarthurflour.com/2015/05/15/dairy-free-ice-cream/
- ↑ https://blog.kingarthurflour.com/2015/05/15/dairy-free-ice-cream/
- ↑ https://www.thekitchn.com/how-to-make-vegan-ice-cream-cooking-lessons-from-the-kitchn-204755
- ↑ https://www.thekitchn.com/how-to-make-vegan-ice-cream-cooking-lessons-from-the-kitchn-204755
- ↑ https://www.thekitchn.com/how-to-make-vegan-ice-cream-cooking-lessons-from-the-kitchn-204755
- ↑ https://www.cuisinart.com/recipes/desserts/5835/
- ↑ https://www.cuisinart.com/recipes/desserts/5835/
- ↑ https://www.thekitchn.com/how-to-make-vegan-ice-cream-cooking-lessons-from-the-kitchn-204755
- ↑ https://www.thekitchn.com/how-to-make-vegan-ice-cream-cooking-lessons-from-the-kitchn-204755
- ↑ https://www.thekitchn.com/how-to-make-vegan-ice-cream-cooking-lessons-from-the-kitchn-204755
- ↑ https://blog.kingarthurflour.com/2015/05/15/dairy-free-ice-cream/
- ↑ https://blog.kingarthurflour.com/2015/05/15/dairy-free-ice-cream/
About This Article