This article was co-authored by wikiHow staff writer, Amber Crain. Amber Crain has been a member of wikiHow’s writing staff for the last six years. She graduated from the University of Houston where she majored in Classical Studies and minored in Painting. Before coming to wikiHow, she worked in a variety of industries including marketing, education, and music journalism. She's been a radio DJ for 10+ years and currently DJs a biweekly music program on the award-winning internet radio station DKFM. Her work at wikiHow supports her lifelong passion for learning and her belief that knowledge belongs to anyone who desires to seek it.
The wikiHow Video Team also followed the article's instructions and verified that they work.
This article has been viewed 444,155 times.
Learn more...
Most ice cream is made with lots of heavy cream and eggs. It tastes delicious but it’s not very health-conscious. Using milk can be a tasty and healthier alternative to traditional cream. For something a little richer, try an ice cream made with sweetened condensed milk. If you prefer vegan options, you can even make ice cream with coconut milk.
Ingredients
- 4 cups (960 mL) milk (any level of fat)
- 1 cup (120 g) sugar
- 1 teaspoon vanilla extract
Makes 8 servings
- 14 ounces (400 mL) sweetened condensed milk (fat-free or regular)
- 2 cups (450 mL) whipping cream, cold
- 1 teaspoon vanilla extract
Makes 3 pints of ice cream
- 2 (13- to 15-ounce) cans full-fat coconut milk
- 1/2 cup (60 g) agave syrup, maple syrup, honey, turbinado sugar, or cane sugar
- 1/4 teaspoon salt
- 2 tablespoons cornstarch
- 1 1/2 teaspoons vanilla extract
- Optional extras: nuts, chocolate (or carob) chips, fruit puree, cacao nibs, etc.
Makes 6 to 8 servings
Steps
Making Vanilla Ice Cream with Regular Milk
-
1Combine milk, sugar, and vanilla in a medium bowl. Measure out each ingredient and add it to a medium-sized bowl. Use a large spoon to stir the ingredients together. Continue stirring until all of the sugar has dissolved.
- For the milk, any level of fat will do, whether it’s fat-free, 2% or full fat.
- You can also experiment with chocolate milk to create chocolate ice cream.
-
2Add the mixture to an ice cream maker. If you have an ice cream making machine, pour the mixture into it. Turn it on and process the mixture for about 20 minutes until the mixture has significantly thickened. Pour the mixture in an airtight Tupperware container and put it in your freezer.Advertisement
-
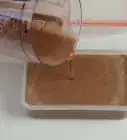
3Pour it in a shallow dish if you don’t have an ice cream maker. Ice cream makers are nice, but using one is not necessary for this recipe. Pour the milk, sugar and vanilla mixture into a shallow dish that is freezer-safe. Place this dish into your freezer.
-
4Stir the mixture every 2 to 4 hours. The consistency of the ice cream can be improved by taking it out every 2 to 4 hours and stirring it around. Then place it back into your freezer.
- If you used an ice cream maker, stir every 4 hours.
- If you did not use an ice cream maker, stir every 2 to 4 hours after the initial ice crystals have formed.
-
5Freeze the mixture for 8 hours or overnight. After about 8 hours (and periodic stirring) the ice cream should be fully frozen. It should have an ice cream-like consistency and is ready to serve immediately.
-
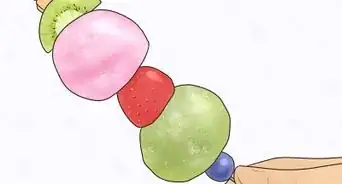
6Top with your favorite toppings and serve. Use an ice cream scoop to transfer the ice cream into serving bowls. Top with chocolate syrup, whipped cream, nuts, dried or canned fruit, and anything else you enjoy on your ice cream.
- Return any leftovers to the freezer. They will keep for several days.


Making Vanilla Ice Cream with Condensed Milk
-
1Put the sweetened condensed milk in the refrigerator. Condensed milk is typically sold in non-refrigerated cans. For this recipe, you want make sure the milk is good and cold before mixing your ingredients. Place it in the fridge for a few hours before you get started.
-
2Use a stand mixer to beat the heavy cream. Take the heavy cream out of the refrigerator and get to work immediately, since you want to make sure your ingredients are very cold when you mix them together. Start by beating the cream at a medium speed using a whisk attachment. Continue beating until stiff peaks form.
- If you don’t have a stand mixer, a hand mixer will work fine.
-
3Turn the speed to low and add the condensed milk and vanilla. Once your stiff peaks have started to form, take the chilled condensed milk out of the fridge. Turn the mixer speed down to low and slowly pour the condensed milk in with the cream. Add the vanilla extract.
-
4Turn the speed back up to medium. After the additional ingredients have been added, turn the mixer back up to medium speed. Keep beating the mixture until it thickens and stiff peaks begin to form again. The peaks will be much thicker this time around.
-
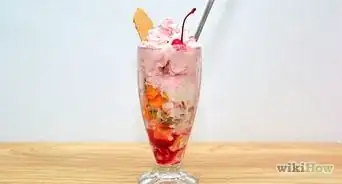
5Customize your ice cream with your favorite add-ins (optional). If you like your vanilla ice cream with additional flavors and additives, now is the time to add them! You can add anything you want, so experiment and have fun. Try adding crushed cookies, fruit purees, nuts, cake pieces, chocolate syrup and more to create your own custom flavor. Stir the mixture well to fully incorporate your add-ins.
- For example, to make strawberry cheesecake ice cream, add 1 cup of cheesecake and your desired amount of strawberry puree.
- Mix in 2/3 cup crushed Oreos to make cookies and cream ice cream.
- Add 1/4 cup mango puree for a fruity mango ice cream.
-
6Scoop the mixture into a container and freeze it for 6 hours. Transfer your ice cream mixture into a large freezer-safe container that can be resealed (like Tupperware). Put it in the freezer for at least 6 hours, or overnight. After 6 hours, your ice cream is ready to be enjoyed.


Making Vegan Ice Cream with Coconut Milk
-
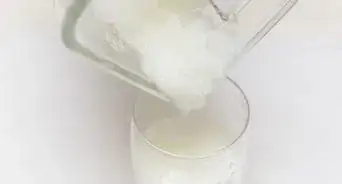
1Pour coconut milk into a saucepan. Shake the cans of coconut milk up vigorously before opening them. Measure out ½ cup of it and set this aside for now. Pour the remaining coconut milk into a saucepan.
- Coconut milk separates inside the can, so giving it a good shake before using it will reincorporate the liquid with the solid elements.
-
2Add the sweetener of your choice and salt. Measure out agave, maple syrup, honey or sugar for your ice cream, depending on which you like the best. Add this to the saucepan. Measure out the salt and add that too.
-
3Stir the coconut milk over medium-low heat for 1-2 minutes. Turn your stove’s burner to medium-low heat. Stir the coconut milk mixture as it warms up. Keep stirring until the mixture is warmed through and the sweetener is completely dissolved. This should take 1-2 minutes.
-
4Combine cornstarch and the reserved coconut milk. Put the cornstarch in a small bowl with the ½ cup coconut milk you reserved. Whisk it briskly. Keep whisking until the cornstarch is completely dissolved.
-
5Pour the cornstarch mixture into the warm coconut milk. Add the cornstarch mixture to the saucepan with the warm, sweetened coconut milk. Whisk gently to incorporate the two.
-
6Turn the heat up to medium and cook for 6-8 minutes. Increase the heat and stir the mixture as it begins to cook and thicken. Keep stirring until the mixture is thick enough to coat the back of a spoon. This should take anywhere from 6-8 minutes. Keep your eye on it and don’t let it come to a boil.
-
7Remove from heat and add vanilla. Once your base has thickened, turn off the burner and move the saucepan off the heating element. Add the vanilla to the base and stir to incorporate them. Allow the base to cool for a few minutes.
-
8Pour the base into a container and refrigerate it. Transfer the base to a shallow container. Cover the container with plastic wrap. Refrigerate it for at least 4 hours or up to 3 days.
-
9Churn the chilled base for 10-20 minutes. Remove the container from the fridge and take off the plastic covering. The base should have a texture similar to pudding at this point. Pour it into your ice cream maker and start churning. You want the base to thicken quite a bit, until it reaches a similar consistence to soft serve ice cream.
- Every machine is different, but this should take between 10 and 20 minutes.
- Add any extras you want at the very end of the churning session, then churn a few more seconds.
-
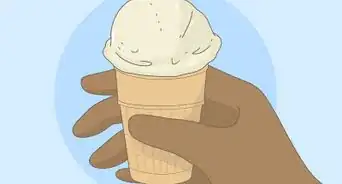
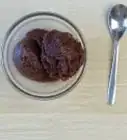
10Transfer your ice cream to a container and freeze for 4 hours. Scrape the ice cream from the maker’s bowl into a freezer container with a resealable lid. Cover it with a piece of wax or parchment paper, which will protect it from ice crystal formations. Freeze it for 4 hours, until the mixture hardens, and then serve.
- You may want to remove it from the freezer and place it on the counter for a few minutes to defrost slightly before scooping it.


Community Q&A
-
QuestionIf I use a different substance besides vanilla extract, will it result in a different flavor?
 Community AnswerYes, it will. If you use another flavor of extract, it will take on that flavor.
 -
QuestionIs there any difference if I don't add the vanilla extract?
 Community AnswerThe difference is that the flavor will be more subtle, and you won't be able to taste the vanilla.
 -
QuestionWhat's the recommendation for how many times I stir the regular milk mixture(if I won't use an ice cream maker) before I freeze it for 8 hours?Community AnswerA long time. The idea is to incorporate a LOT of air so that the finished texture is different than that of ice cube.
-Step-10.webp)


References
About This Article

To make ice cream with milk, start by combining 4 cups of milk, 1 cup of sugar, and 1 teaspoon of vanilla extract. Continue stirring until all the sugar has dissolved, then pour the mixture into a freezer-safe bowl. Next, place the mixture in the freezer for 8 hours, stirring it every 2 hours to help improve the consistency. Finally, serve the ice cream with your favorite toppings, or transfer it to a sealable container and keep it in the freezer for up to 3 days. To learn more, like how to make ice cream with condensed milk or coconut milk, read on!


-Step-10.webp)


