This article was co-authored by wikiHow Staff. Our trained team of editors and researchers validate articles for accuracy and comprehensiveness. wikiHow's Content Management Team carefully monitors the work from our editorial staff to ensure that each article is backed by trusted research and meets our high quality standards.
This article has been viewed 91,267 times.
Learn more...
Baking soda is a white powder that’s often used in baking, for cooking, and for other purposes around the house. Baking soda can also be used in some fun experiments, including making crystals. Making baking soda crystals is a fun project, and because you only need a few supplies, the hardest part of the experiment is waiting for the crystals to grow! All you need for this experiment is baking soda, water, string, and some glass jars.
Ingredients
- 2 cups (470 ml) water
- ¼ cup (55 g) baking soda
- Food coloring (optional)
Steps
Making the Baking Soda Solution
-
1Boil the water. To make baking soda crystals, you start by making a water solution that’s saturated with baking soda. The baking soda will dissolve better in warm water. Measure 2 cups (470 ml) of water into a kettle. Turn on the kettle to boil the water.
- Be very careful when using appliances and electronics. Ask a parent, guardian, or adult to help you.
-
2Pour the water. When the kettle boils, carefully pour the water into a large heat-proof bowl, glass, or jar. Be very careful not to spill the water, as it’s very hot and can burn your skin. You may want to ask an adult to pour the water for you.Advertisement
-
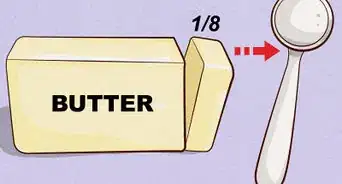
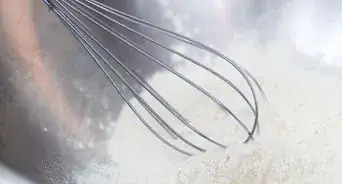
3Add the baking soda. Sprinkle half the baking soda into the jar with the hot water. Stir the mixture to dissolve the baking soda in the water. Then, add the remaining baking soda 1 teaspoon (5 g) at a time, stirring each time to dissolve the baking soda.[1]
- Continue adding baking soda until no more will dissolve in the water and a thin layer of powder forms on the bottom of the jar.
- You may need to add slightly more or less baking soda than the ¼ cup (55 g) to completely saturate the water.
-
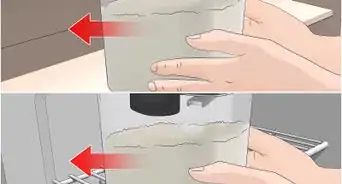
4Cool and divide the water. When the water won’t absorb any more baking soda, set it aside to cool for about 20 minutes. Once the solution has cooled, divide it equally between two small jars or glasses.[2]
- Leave the last bit of solution in the original jar, and throw out the undissolved baking soda that’s settled on the bottom.
-
5Separate the jars. Select a flat surface where you can leave the jars undisturbed for about a week. Good places include a work table or counter. Place the jars on the table or counter about 6 inches (15 cm) apart from each other. Place a plate between the jars to catch any water that may drip.
- The crystals will need several days to grow, and you don’t want to move them once they start growing. That’s why it’s important to find a place now where you can set up the experiment.
-
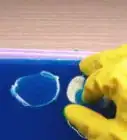
6Color the water. To make colored baking soda crystals, you can add five to 10 drops of food coloring to each jar. Stir the solution to mix the color into it.[3] You can make both jars the same color, or you can color each solution a different color.
- If you make each jar a different color, half your crystals will be one color, and the other half will be another color.
-
7Cut a piece of string. Baking soda crystals need a medium to form on, and string is great for this. Any type of fabric string will work, like string, twine, or yarn. Use scissors to cut a foot-long (30-cm) length of string.
- Always be very careful when using scissors, and make sure you have adult supervision when cutting or using sharp tools.
-
8Tie weights to the string. To keep the strings weighted in the baking soda solution, you can tie weights to each end of the string. Good weights include beads and paper clips.[4] Run each end of the string through the hole in a bead or end of a paper clip, and tie a small knot in the string to secure it to the weight.
-
9Place one end of the string in each jar of water. Take one end of the string and gently drop the weight into one of the jars. Pick up the other end of the string and drop the weighted end into the other jar. The string running between the two jars should be loose and hanging down slightly, like a smile.[5]


Watching the Crystals Form
-
1Leave the jars alone for several days. The baking soda crystals will form as the solution saturates the string and the water evaporates. When the water does evaporate, it will leave behind the baking soda crystals. You can check on the experiment whenever you like, but don’t stir the water or touch the string.
- The crystals will need about five to seven days to fully form.[6]
-
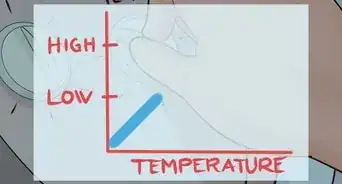
2Take notes about how much growth happens every day. To find out how quickly the crystals are growing, check on the experiment at the same time every day. Each day, make a note of any changes that have happened since the day before. You can document the experiment by:
- Taking notes about the length and thickness of the crystals
- Noting the water level in the jars
- Making drawings of the experiment
- Taking pictures of the project
-
3Remove the string and dry the crystals. When crystals have formed on the entire length of the string after about five days, you can remove the string of crystals. Use two hands to grab the string where it attaches to the jars. Carefully pull the string of crystals from the jars and lay it down on a clean plate. Leave the string to dry for several hours.[7]


Getting Creative with Crystals
-
1Create stalactites and stalagmites. Stalactites and stalagmites are mineral deposits that often form inside of caves. You can watch how these formations are made by adding extra water to the string when you're creating your crystals:
- Each day, remove a spoonful of baking soda solution from one of the jars
- Drizzle a few drops of the solution on the center of the string to saturate it
- As the water drips onto the plate below and evaporates, baking soda crystal deposits will form that dangle from the center of the string (stalactites) and grow up from the plate below (stalagmites).[8]
-
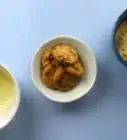
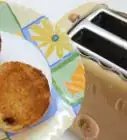
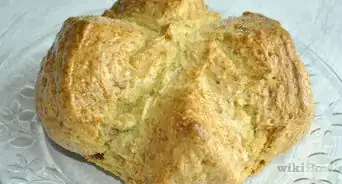
2Grow them in eggs. Place a few drops of your colored baking soda solution into a clean egg shell half. Swirl the water around to coat the inside of the shell. Place the egg on a plate and set it aside for a day or two to allow the water to evaporate. Add a few more drops of water every day. As the water evaporates, the crystals will form inside the egg shell.
-
3Make different crystal types. You can also make other types of crystals using the same method as with baking soda crystals. Other crystal types you can make include sugar, salt, and Epsom salt crystals. To make these types of crystals:
- Dissolve ⅔ cup of sugar, salt, or Epsom salts in a glass of hot water
- Divide the solution between two clean jars
- Cut a piece of string to a length of 1 foot (0.30 m) (30 cm)
- Place each end of the string in one of the jars
- Leave the experiment for several days so the crystals can form


Community Q&A
-
QuestionCan I put the bowl of baking soda water in the fridge to speed up the cooling process?
 Community AnswerYou can, but it probably will not cool as well; this will result in poor-quality or malformed crystals.
 -
QuestionCan crystals grow in 3 days?
 Community AnswerSome can, but it depends on the amount of water and the quality of the baking soda.
 -
QuestionHow long will they keep growing?
 Community AnswerBaking soda crystals can keep growing for weeks.
References
- ↑ https://www.thoughtco.com/baking-soda-crystals-606227
- ↑ https://www.thoughtco.com/baking-soda-crystals-606227
- ↑ http://www.indypl.org/kids/blog/?p=8930
- ↑ https://www.youtube.com/watch?v=yXCiV_Zo3-U
- ↑ http://www.indypl.org/kids/blog/?p=8930
- ↑ https://www.youtube.com/watch?v=kv_8Um5fUCs
- ↑ https://www.thoughtco.com/baking-soda-crystals-606227
- ↑ http://www.scholastic.com/parents/blogs/scholastic-parents-learning-toolkit/create-baking-soda-crystal-caves
About This Article