This article was co-authored by wikiHow Staff. Our trained team of editors and researchers validate articles for accuracy and comprehensiveness. wikiHow's Content Management Team carefully monitors the work from our editorial staff to ensure that each article is backed by trusted research and meets our high quality standards.
There are 18 references cited in this article, which can be found at the bottom of the page.
wikiHow marks an article as reader-approved once it receives enough positive feedback. This article received 16 testimonials and 89% of readers who voted found it helpful, earning it our reader-approved status.
This article has been viewed 443,211 times.
Learn more...
Making soap at home is a cost-effective and creative hobby. The simplest way to make bar soap at home is through the melt and pour method, which uses a melted soap base instead of active lye. To start from scratch, mix water, oils, and additives with lye. No matter which way you choose, you can enjoy custom soap bars with few chemical additives after the batter cures.
Ingredients
- 1 lb (0.45 kg) goat’s milk soap base
- 2.6 oz (74 g) pink Himalayan salt
- 20 drops grapefruit essential oil
- 38 oz (1,100 g) pomace olive oil[1]
- 13.2 oz (370 g) distilled water
- 4.8 oz (140 g) sodium hydroxide
Steps
Making Lye-Free Pink Himalayan Grapefruit Soap Batter
-
1Cut a soap base into chunks that are easy to melt. Chop up about 1 lb (0.45 kg) of soap or glycerine into cubes 1⁄2 in (1.3 cm) in size. These small pieces melt evenly so your finished batter is less likely to be chunky. Using small chunks also prevents the batter from burning while you stir it.[2]
- You can also try shredding the soap with a grater or vegetable peelers.
- Glycerine is a common base available online or at craft supply stores. It is made with lye like any bar of soap but doesn’t have any active lye in it, so it’s safe to touch.
- Choose white and clear-colored soaps if you plan on adding coloring later. Darker soaps aren’t as great for customizing, although you can still add fragrances and thickeners to them.
-
2Place the cut soap base into a heatproof pot or bowl. The container you need depends on how you plan on melting the soap. The easiest way to do it is on a stovetop. Simply place the soap in a stainless steel pot, crockpot, or double boiler. If the stove isn’t an option, melt the soap in a microwave.
- If you use a microwave, choose a microwave-safe. Look for a label on the bottom of the container or on its packaging.
Advertisement -
3Heat and stir the soap constantly until it melts. Heat the soap on a stovetop or in your microwave to about 120 °F (49 °C). Move the melting soap around with a rubber spatula to help it melt. Don’t let it sit still for more than 30 seconds or else it may burn. Stir it until it reaches a smooth consistency.
- If the soap batter looks thick and dry, mix a little bit of water into it. Add water gradually, stirring the batter to keep it at a liquid consistency.
- Many soap bases reach a good consistency within a couple of minutes. Depending on the base you use, you may need to keep stirring for 15 minutes or more to make the batter smooth.
- If you’re using a microwave, heat the soap for 30 seconds at a time. Give it a good stir to distribute the heat.
- Soap bases begin to burn around 140 °F (60 °C). Use a kitchen thermometer as needed to track the temperature.
-
4Add tea, salt, and other ingredients to color the soap. Fresh-brewed coffee and tea change the batter’s color but don’t often leave much of a smell in the finished product. Mix in some blended fruits or vegetables to give your soap a deep, vibrant color. Soap dyes are another option for unusual colors. Also, use colored salt and spices for additional variety.[3]
- For example, add about 2.6 oz (74 g) of pink Himalayan sea salt to turn a batter pink, or mix in a little tumeric to give the batter an orange color.
- Brew coffee and tea separately from the soap batter. Remove coffee grounds and tea bags before adding the liquid to the batter.
-
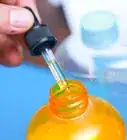
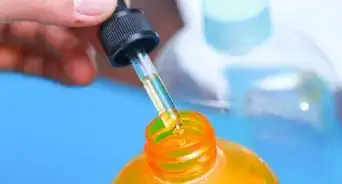
5Mix in essential oils and other ingredients to make your soap fragrant. Stir a few drops of any essential oil into your batter to customize it. Flowers and herbs are some alternatives to essential oils. Try using ingredients like powdered beet root or sandalwood. Ingredients like vanilla, honey, and brown sugar can also give your soap a pleasant quality that makes it difficult to put down.[4]
- Whole flowers and herbs lose color over time and may discolor your soap. Try placing them on top of the batter after you pour it into the mold instead of mixing them in.
-
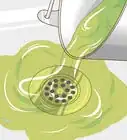
6Use oils and other ingredients to change the soap’s texture. For softer soap bars, heat cooking oil in a separate pan, then mix it into the batter. Olive oil, coconut oil, and vegetable oil are a few good options for softer, silkier soap bars. Some people melt glycerine cubes to add to the batter. To thicken the batter, add a scoop of oatmeal, honey, or beeswax.


Making Basic Olive Oil Soap with Lye Batter
-
1Choose vegetable oils to form a base for your soap. You can use all kinds of vegetable oil to create soap. The type of oil you choose determines the amount of other ingredients you need. For your first time making soap, keep it simple by sticking to 1 or 2 different types of oils. Pomace olive oil from a grocery store is a common base to start with. Measure out 38 oz (1,100 g) of oil on a kitchen scale by weight instead of volume.[5]
- For a recipe that is a little fancier than a basic olive oil soap, try pure hemp seed or palm oil. Mix the oil with equal parts olive oil.
- For a creamier soap with more lather, try mixing 1 part coconut oil, 1 part palm oil, and 1 part olive oil. Add some sweet almond oil to give the soap a pleasant scent.
-
2Use a lye calculator to determine how much lye you need to make soap. If you are following a specific soap recipe, use the amount of lye specified in the recipe. Otherwise, rely on a lye calculator. The amount of lye you need varies depending on the oil you use. Use the correct ratio of lye to oil to make solid bars of soap that don’t sting your skin when you use them.[6]
- Search online to find your own lye calculator or use the one at http://www.pinemeadows.net/lyecalc.php.
- Another lye calculator is available at https://www.thesage.com/calcs/LyeCalc.html.
- Some calculators have an option for superfatting, which means using extra fat to make the soap softer. For a good default consistency, set the option at 5%.
-
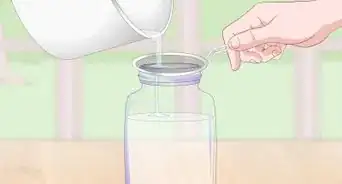
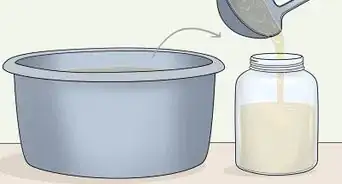
3Pour the water into a heat-proof mixing bowl. For a basic olive oil soap, you need about 13.2 oz (370 g) of water. Measure out the water into a heat-safe glass or plastic measuring cup placed on a kitchen scale. Transfer the water into a stainless steel pot or glass bowl. Keep in mind that lye does corrode glass and plastic a little bit over time, so stainless steel is usually your best bet when mixing lye and water.[7]
- If you’re making a different type of soap, use the amount of water specified by the recipe or lye calculator.
- Tap water often has minerals that affect how your soap turns out. To avoid this, purchase distilled water from a grocery store.
- If you halved a recipe to make a small batch of soap, remember to halve every ingredient accordingly.
-
4Measure out the lye into a separate container on a kitchen scale. Carefully pour about 4.8 oz (140 g) of lye into a heat-safe glass or plastic measuring cup. Weigh it on the scale. Make sure you have the amount specified by your recipe or lye calculator. Handle it with caution to avoid spills, and use stainless steel or glass containers you don’t plan on cooking with in the future.[8]
- Lye is available online or at most hardware stores.
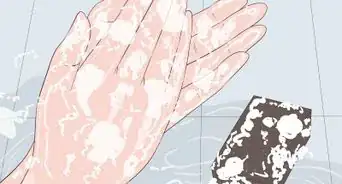
- Lye is very caustic, so handle it carefully. Cover yourself with protective goggles, rubber gloves, and long-sleeved clothing. If you get any on your skin, wash it off immediately with cold water.
- The most common type of lye is sodium hydroxide (NaOH). Potassium hydroxide (KOH), or potash, is also available and used in soap making. Read the label to figure out which type you have. They are similar but need to be added in different amounts.
-
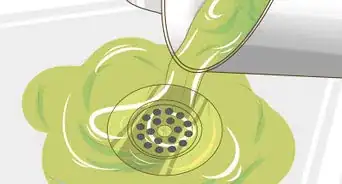
5Pour the lye into the water gradually while stirring it. Stir the ingredients together with a stainless steel or heat-safe plastic whisk. Let the mixture warm up and turn white before adding more lye. Continue stirring and pouring until you finish dissolving all of the lye. The mixture will be scalding hot.[9]
- Never pour the water into the lye or dump all of the lye into the water at once. This can lead to a lye explosion splattering everything with dangerous chemicals.
- Lye and water release heat and fumes when mixed together. Make sure you’re ready for this before continuing. Ventilate your area and consider wearing a dust mask.
-
6Test the lye water with a thermometer until it reaches 110 °F (43 °C). Set the container aside while you wait. After the lye begins cooling, stick a stainless steel thermometer in it to keep track of its temperature. Let it cool to a temperature between 100 and 110 °F (38 and 43 °C).[10]
- Begin preparing your oils while you wait for the lye to cool. You will need the oils ready to mix into the lye.
-
7Mix and heat the base oils to about 110 °F (43 °C). The goal is to get the oils to the same temperature as the lye water. Weigh the oils using a kitchen scale, then melt solid oils over low heat. Stir in the liquid oils and heat them until they are between 100 and 110 °F (38 and 43 °C).[11]
- Heat the oils to 125 °F (52 °C) only if the recipe you’re using specifies that the mixture can handle the higher temperature.
- Hot oil mixtures are called “fixed oils” in some recipes.
-
8Blend the oils with the lye water until the mixture thickens. Pour the hot oil into the lye water, stirring it with a stainless steel whisk or mixing spoon. Wooden spoons and stirrers also work but splinter with repeated uses. Stirring on average takes between 15 minutes to half an hour. You may need even more time to get the batter to the consistency of pudding or toothpaste.[12]
- The finished mixture is called a trace. When it is done, the stirrer leaves lingering trace lines in it. If you lift the stirrer, the batter will stay clumped on it.
- Use an electric hand mixer or stick blender to speed up the stirring process. Put the soap batter in a deep container to prevent splattering.
- If you use a stick blender, fully submerge it in the batter before turning it on. Tap it against the side of the container to release air bubbles. Start on a low setting at first, then turn it to medium or high as the mixture thickens.
-
9Add fragrances or additives if you wish to customize your soap. Essential oils, herbs, and thickeners are a few ways to make your soap unique. Use different ingredients to color and scent your soap. After choosing your additives, stir them into the batter with a spoon, spatula, or whisk. Typically, a soap contains no more than 6% additives by volume.[13]
- Research the benefits of herbs and essential oils. For example, add lavender to scent the soap and nourish your skin.
- Oatmeal, coffee grounds, and honey are a few common thickeners that make soap coarser for exfoliation.


Molding and Curing the Soap
-
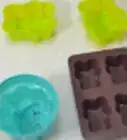
1Clean and line your soap molds. Soap molds are basically boxes for the liquid batter to set in. Any dry plastic container works, or you can buy silicone molds specifically for soap. If you have a wooden container, cover the inside with a silicone liner or freezer paper.[14]
- Soap molds are available online and at some general stores. If you need a liner, freezer papers are available at most supermarkets.
-
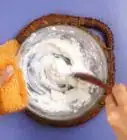
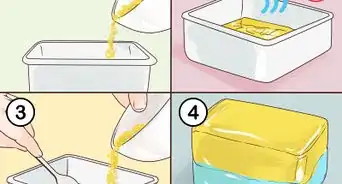
2Pour the soap batter into the mold. Fill each mold close to the top. Tap the mold against a hard surface a few times to break up air bubbles. Use a rubber spatula to scrape out excess batter to pour into a different mold or throw away.[15]
- Bump the mold against a hard surface a few times if it looks frothy. Try dropping it from a low height to knock out stubborn air bubbles.
- Don’t worry about breaking the soap into smaller bars yet. Wait until the soap solidifies for that.
-
3Wrap the mold inside cardboard and a clean towel. Tape a piece of cardboard over the mold to cover the soap. Then, wrap a towel around the entire mold to insulate it. Doing this helps the mold set properly, leading to better soap.[16]
- If you don’t have cardboard, place parchment paper over the mold.
-
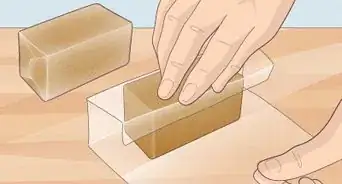
4Wait 24 hours before cutting into bars. The saponification process takes at least a day to happen. When you remove the soap from the mold, it will be hard and ready for cutting. Use a sharp kitchen knife to break the soap down into smaller bars. To smooth out the sides, scrape the soap with a vegetable peelers.[17]
- Keep your soap at room temperature and out of the reach of children and pets. If you used fresh lye, the soap is still dangerous to touch at this point.
- If your soap is too soft to cut, let it rest for an extra day. This happens most often in large, single molds.
-
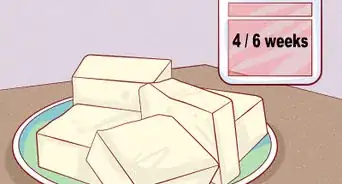
5Dry the soap for several weeks before using it. Move the soap bars into a cool but well-ventilated area. Try placing them near a window in your basement or on a countertop. Put them on top of wax paper or another disposable material to prevent the oils from damaging the surface the soap is on. Soap takes about 4 weeks to finish curing.[18]
- Soap can take anywhere from 3 to 8 weeks to cure completely. The time it needs depends on the oils you used. Check your recipe for the recommended curing time.
- Soap made using the melt and pour method typically solidifies within a few hours. At most, let it rest overnight before taking it out of the mold.


Community Q&A
-
QuestionWhere can I find locally made lye?
 Community AnswerYou can make you own lye using the helpful tips in this wikiHow article or you can buy it at a hardware store.
 -
QuestionHow can I get the most out of my materials in terms of cost?Community AnswerGo to a wholesale store like brambleberry.com to get your materials, it's a whole lot cheaper.
-
QuestionIs lye same as caustic soda?
 Mzm555Top AnswererThe term "lye" can be used to refer to caustic soda or caustic potash, or even the mixed solution of caustic soda and water to be ready for soap making. To avoid confusion and possible mistakes, ensure you correctly identify which definition of lye you are reading - especially important when calculating SAP values.
Warnings
- Soap is still dangerous when it is fresh. Don’t handle it until it has had at least a month to fully cure.⧼thumbs_response⧽
- Lye is very dangerous when handled incorrectly. Always wear safety gear when making soap, including safety goggles and rubber gloves. Ventilate your area to eliminate lye fumes.⧼thumbs_response⧽
- Soap made with too much lye can burn your skin. Always use a lye calculator to ensure you add the proper amount of lye for the oils you have.⧼thumbs_response⧽
Things You'll Need
Making Lye-Free Soap Batter
- Pot or microwavable container
- Measuring cup
- Kitchen scale
- Rubber spatula
- Oven or microwave
- Essential oils or other additives
- Molds
- Plastic wrap
- Sharp knife
Mixing Lye Soap Batter
- Lye
- Vegetable oils
- Safety goggles
- Long sleeve shirt or coveralls
- Long pants
- Rubber, plastic, or latex gloves
- Stainless steel, glass, or plastic mixing containers
- Measuring cups
- Kitchen scale
- Stainless steel, glass, plastic, or wooden mixing tools
- Stainless steel thermometers
- Stove
- Pot or pan for heating oil
- Silicone, plastic, or wooden soap molds
- Cardboard
- Towel
- Sharp knife


References
- ↑ https://www.youtube.com/watch?v=T4kPgD8esfE&feature=youtu.be&t=10
- ↑ https://gluesticksblog.com/2011/12/candy-cane-soap.html
- ↑ https://www.offthegridnews.com/current-events/top-headlines/how-to-color-homemade-soap/
- ↑ https://www.soapqueen.com/bath-and-body-tutorials/tips-and-tricks/how-to-blend-essential-oils-safely/
- ↑ https://www.youtube.com/watch?v=Qevq073tjxg&feature=youtu.be&t=19
- ↑ https://www.savvyhomemade.com/creating-homemade-lye-soap-recipes/
- ↑ https://www.youtube.com/watch?v=Xv9qmZt5grk&feature=youtu.be&t=382
- ↑ https://www.youtube.com/watch?v=Xv9qmZt5grk&feature=youtu.be&t=415
- ↑ https://www.youtube.com/watch?v=xlUM_-7Nr_Y&feature=youtu.be&t=535
- ↑ https://www.youtube.com/watch?v=Qevq073tjxg&feature=youtu.be&t=267
- ↑ https://www.youtube.com/watch?v=xlUM_-7Nr_Y&feature=youtu.be&t=584
- ↑ https://www.youtube.com/watch?v=qGfXLznJJY0&feature=youtu.be&t=183
- ↑ https://www.youtube.com/watch?v=3wqjfBsiViY&feature=youtu.be&t=207
- ↑ https://www.youtube.com/watch?v=Qevq073tjxg&feature=youtu.be&t=449
- ↑ https://www.youtube.com/watch?v=xP7mvbAdYWc&feature=youtu.be&t=348
- ↑ https://www.youtube.com/watch?v=vcCOruzFTgQ&feature=youtu.be&t=618
- ↑ https://www.youtube.com/watch?v=vcCOruzFTgQ&feature=youtu.be&t=627
- ↑ https://www.youtube.com/watch?v=vcCOruzFTgQ&feature=youtu.be&t=775
About This Article

If you want to make your own bar soap, use caution and wear eye protection and gloves, since you'll be working with the dangerous chemical lye. When you're ready to start, heat water on a stove while you measure out the lye. Pour the lye into the water a little at a time while stirring continuously until the lye dissolves. Then, heat the oils in a separate pan, add the oil mixture to the lye, and keep stirring until the batter thickens. Finally, pour the soap batter into molds and let it cure for 24 hours. For tips on adding fragrance to your soap, read on!