This article was co-authored by wikiHow Staff. Our trained team of editors and researchers validate articles for accuracy and comprehensiveness. wikiHow's Content Management Team carefully monitors the work from our editorial staff to ensure that each article is backed by trusted research and meets our high quality standards.
This article has been viewed 52,501 times.
Learn more...
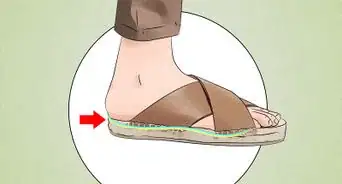
Barefoot "sandals" are a trendy type of jewelry for people who choose to go barefoot. They are essentially a combination of a toe ring, an ankle bracelet, and a strap or straps connecting the two. Some barefoot sandals create the illusion that the wearer is wearing sandals with soles, while others are simply meant as decorations in their own right. Barefoot sandals are especially popular at beach weddings and other occasions where one might want to look fashionable without wearing shoes.[1]
Steps
Making Beaded Barefoot Sandals
-
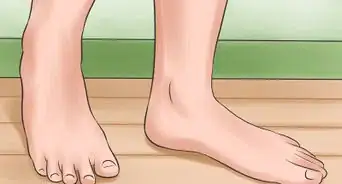
1Start with some sort of ring around your toe of choice. This can be either a toe ring you bought at the store or a simple loop of twine. For barefoot sandals, ring placement is generally best on the second toe. However, the sandal will work with any toe on your foot. Just keep in mind that commercially-made toe rings are generally not made to fit your biggest toe.[2]
-
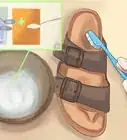
2Fasten an anklet around your ankle. Like the toe ring, the type of ankle bracelet you choose is entirely up to you. Some possible choices of anklet are:
- A store-bought anklet or bracelet.
- Beads threaded onto an elastic cord. Just make sure that you can fit the stretched-out loop over your feet.
- Simple lace or other decorative material that can be tied around your ankle. If you're tying your "anklet" directly to your ankle, be sure to pick a knot that is both secure but easy to undo at the end of the day.
Advertisement -
3Stretch out a length of twine across your foot. Place one end of the twine slightly past your anklet and your toe ring. Make sure the twine is fairly tight and without slack.
- You may also use cloth, lace, or elastic cord instead of twine.
- Do this step with your foot extended, unless your string is extra stretchy. If you measure with your foot flat on the ground, your string may be too short.
-
4Cut the twine. Once you've positioned your twine how you want it without slack, cut it with a pair of scissors. While you want your sandal to be tight, make sure to leave about an extra inch on each end. You'll use this extra material to tie your sandal together.
-
5Decorate the twine with beads. Sparkly beads that look like gems are popular for wedding sandals. If you're going for a hippie look, wood beads may be the best choice. For kids' anklets, plastic craft beads also work well.[3] Try to coordinate the colors of your beads to match your toe ring and anklet. If you made your own beaded anklet, consider using the same beads for the strap.
-
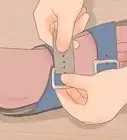
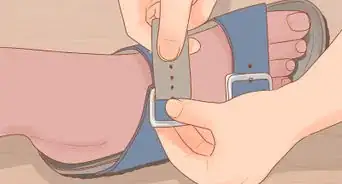
6Tie one end of the strap to your anklet and the other to your toe ring. Make a secure double knot at each end. When tying the first end, you'll need to make sure the beads don't slide off the other side. Either ask a friend to hold the other end or use a bead stopper. A small piece of tape can act as a bead stopper as long as your beads aren't made of a heavy material like metal.
-
7Trim any excess thread from each knot. Try to get as close to the knot as possible. Using small cuticle scissors will make this task much easier. Be very careful so as not to cut your bracelet or toe ring while you trim.
- This completes your first barefoot sandal.
-
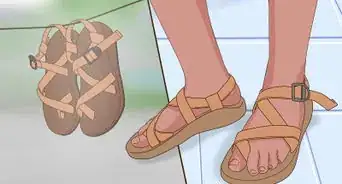
8Make a second "sandal" if you would like a matching set. You may also choose to wear just one or barefoot sandals in completely different colors. However, making an identical pair will be more likely to create the illusion of real sandals.


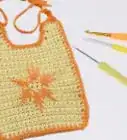
Crocheting Barefoot Sandals
-
1Gather your materials. You'll need an H8/5 millimeter crochet hook and yarn. Pick a yarn that matches your hook size. Size 3 or "light" yarn is generally recommended for an H8 hook.[4] However, double-check your yarn's label, which should list its recommended hook size.
- You may also choose to add some beads, but these are optional.
- Because this pattern is very simple, this is a great project for people new to crochet. However, you should practice your stitches before starting this project.
- If you're already an advanced crocheter and would like to try something more challenging, try looking for more complicated patterns online.
-
2Make your toe ring. Start off by making 11 chain stitches. Join the two ends of this chain together using a slip stitch.[5]
- The ring you've just made will loop around the wearer's second or third toe. If the wearer has very small or large toes, you will need to start with a shorter or longer chain. Try measuring the width of the wearer's toe before you begin to ensure a perfect fit.
-
3Start off the main sandal top. Do four more chain stitches. Next, make two double crochet stitches off of the third chain stitch from the hook. Turn your work for the next row.[6]
- When making a "turn" in crochet, you want to make it so that the row that was previously closest to you is now furthest. Likewise, your crochet hook should now be on the opposite side from where it was before.
-
4Stitch the second row of your sandal top. Start by making two more chain stitches. Next, double crochet into every chain stitch from your first row. You should finish this row by double crocheting into those two chains stitches you made coming off of your first row at its third chain. Turn your work to start the next row. You should notice a triangle beginning to form.[7]
-
5Repeat the pattern of your second row a few more times. Make two chain stitches, double crochet into every chain of the previous row, and finish in what were the two chain stitches of the previous row. Be sure to turn at the end of each row.
- How many times you make this repeat will depend on the size of the wearer's foot. The average adult woman's foot should take about three repeats after the second row. Check your work against the wearer's foot or an outline of it. The sandal top should end near the beginning of the ankle.[8]
-
6Do 100 chain stitches and tie off. Make 100 chain stitches, creating a long string. Finish the chain by binding off. This section will make one side of what will tie around the ankle.[9]
- If you'd prefer a simpler look without complicated bows, you can make the chain shorter. Just remember that it has to be about the length it takes to wrap around the wearer's ankle.
-
7Finish up with one more long chain. Attach yarn to the opposite end of the last row in your triangle. Make either another 100 chain stitches on the other side or however many you did for the first long chain. Complete your barefoot sandal with one final bind off.[10]
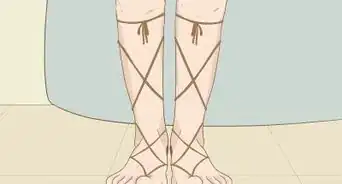
- Wear the sandal by looping one end around one toe and tying the long chain around your ankle. One hundred chain stitches should give you a lot to work with. Try getting creative by tying a fancy bow.


-Step-13.webp)


References
- ↑ http://www.fashionlady.in/barefoot-sandals-interesting-beautiful-accessories-for-your-feet/15854
- ↑ http://www.huffingtonpost.com/2015/05/19/toe-rings_n_7308174.html
- ↑ http://www.positivelysplendid.com/2014/07/barefoot-sandals-kids-craft.html
- ↑ http://www.craftyarncouncil.com/weight.html
- ↑ http://blog.expressionfiberarts.com/2012/07/25/bohemian-barefoot-sandals-free-crochet-pattern/
- ↑ http://blog.expressionfiberarts.com/2012/07/25/bohemian-barefoot-sandals-free-crochet-pattern/
- ↑ http://blog.expressionfiberarts.com/2012/07/25/bohemian-barefoot-sandals-free-crochet-pattern/
- ↑ http://blog.expressionfiberarts.com/2012/07/25/bohemian-barefoot-sandals-free-crochet-pattern/
- ↑ http://blog.expressionfiberarts.com/2012/07/25/bohemian-barefoot-sandals-free-crochet-pattern/
About This Article

To make beaded barefoot sandals, start with a toe ring or a simple loop of twine around your second toe. Next, place an anklet around your ankle, stretch a length of twine across your foot, and decorate the twine with beads. Then, tie 1 end of the twine to your anklet and the other to your toe ring. Finally, trim any excess twine and make your matching sandal for the other side. To learn how to crochet barefoot sandals, keep reading!


-Step-13.webp)