This article was co-authored by Claire Donovan-Blackwood. Claire Donovan-Blackwood is an Arts & Crafts Specialist and CEO of Heart Handmade UK, a site dedicated to helping people live a happy, creative life. With over 13 years of experience, Claire uses art as a form of therapy and focuses on mindfulness in the making of art. She makes crafting easy and accessible for those she works with. Claire received her B.A. in Photography & Visual Imagery from The University of Huddersfield.
This article has been viewed 28,797 times.
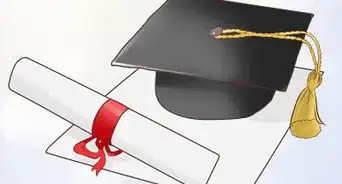
One of the most popular traditions for graduation is presenting the graduate with a lei. Real leis can be expensive, nor do they last very long. Luckily, homemade leis cost much less to make. Best of all, you can make them more special by using the school's colors. This wikiHow will teach you how to make the two most common leis: money and candy.
Steps
Making Money Leis
-
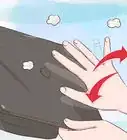
1
-
2Make some more fans using colored paper, if desired. Cut some colored paper down to the same size as your bills, about 2½ by 6 inches (6.35 by 15.24 centimeters) first.[3] Then, fold them into fans starting from the narrow edge. You will need about 30 to 35 pieces as well.[4]
- Add school spirit by using one or both of your school's colors.
- Cardstock or colored printer paper will give you a nicer look, but you can use construction paper if you have nothing else.
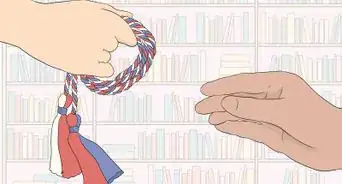
Expert AnswerQWhen asked, “How can you make graduation leis?”
Claire Donovan-Blackwood is an Arts & Crafts Specialist and CEO of Heart Handmade UK, a site dedicated to helping people live a happy, creative life. With over 13 years of experience, Claire uses art as a form of therapy and focuses on mindfulness in the making of art. She makes crafting easy and accessible for those she works with. Claire received her B.A. in Photography & Visual Imagery from The University of Huddersfield.Arts & Crafts Specialist EXPERT ADVICEAnswer from Claire Donovan-Blackwood:
Claire Donovan-Blackwood, the owner of Heart Handmade UK, responded: “It depends on the materials you want to use and how fancy you want it to look. You can use string, yarn, or ribbon as a base. Then add whatever you want, like the heads of artificial flowers, beads, or candy.”
Advertisement -
3Tape the edges of your fan together. Fold your fan in half, widthwise. Tape the two side edges together. When you are done, you should have a half-circle, fan shape.[5]
- Do this for all of the folded bills and colored pieces of paper. Set them aside when you are done.
-
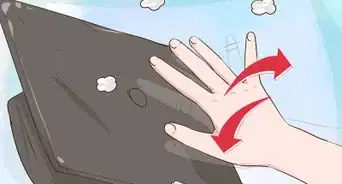
4
-
5Start taping the folded fans to the ribbon. Place the flat side of your first fan against the ribbon. Fold the two ends together over the ribbon, sandwiching it in between. You should now have something that looks like a disk. Tape the two ends of the paper together to secure the disk.[8]
- Start from the center of the ribbon and work your way outward.
-
6Continue taping the folded fans to the ribbon. Alternate between money and paper. You can do money-paper-money, or money-money-paper. Stop when you have about 6 inches (15.24 centimeters) of ribbon left on each side.
-
7Tie the ends of the ribbon together. If you have enough ribbon left over, you can tie the ends into a bow. This is not completely necessary, but it will give the lei a nicer touch.


Making Candy Leis
-
1Cut some cellophane about 6 inches (15.24 centimeters) wide. You can use any color you want, even clear. You could also use one of the school's colors to get into the school spirit.
-
2Place a small candy bar on top of the cellophane. Set the cellophane down on a flat surface. Place a small candy bar on top of it, about 3 inches (7.62 centimeters) from one of the narrow ends.[9] Make sure that both are oriented horizontally.
- It's best if you use wrapped candies so that they don't melt.
- If the candies are very small, you could fit 3 to 4.[10]
-
3Wrap the cellophane around the candy bar. Starting from the long, top edge, roll the cellophane around the candy, forming a tube. If you need to, secure the cellophane with a piece of tape first.[11]
-
4Tie a piece of curling ribbon to either side of the candy. Cut two 6 to 8-inch (15.24 to 20.32-centimeter) long pieces of curling ribbon in one of the school's colors. Tie each ribbon to either side of the candy bar.[12] You can tie the ribbon into a bow or a simple double-knot. If you use a double-knot, consider curing the ribbon with scissors.[13]
- Use one of the school's colors for the ribbon, if possible.
-
5Tuck another candy bar into the tube. You will need to tuck, wrap, and adjust the cellophane around the candy bar. Tie another piece of ribbon right above the candy bar.
-
6Continue adding candies until you are close to the end of the cellophane. Tie a piece of curling ribbon around the cellophane around each candy that you add.
- Consider alternating the ribbon colors for a more interesting lei. Be sure to match them to the school's colors!
-
7Make the lei longer, if necessary. The standard 3-foot (0.91-yard) long piece of cellophane may not be long enough to make a lei. If yours is too short, cut another strip of cellophane, and tape it to the end of your lei. Continue adding candies and ribbons until the cellophane is filled.[14]
- Something around 4 feet (1.2 meters) would be ideal, so trim off any excess.[15]
-
8


Warnings
- Avoid using chocolate candy if the graduation ceremony will be taking place outside, especially on a hot day.⧼thumbs_response⧽
- If you are making candy leis for someone else, take any food allergies into consideration.⧼thumbs_response⧽
Things You'll Need
Making Money Leis
- 30 to 35 dollar bills
- Colored paper
- Ribbon
- Tape
- Scissors
Making Candy Leis
- Cellophane
- Mini candy
- Ribbon
- Tape
- Scissors


References
- ↑ https://www.youtube.com/watch?v=jztXwKt13uk
- ↑ https://lilluna.com/how-to-make-money-leis/
- ↑ https://www.youtube.com/watch?v=imUBI7bNgsc
- ↑ https://lilluna.com/how-to-make-money-leis/
- ↑ https://www.youtube.com/watch?v=imUBI7bNgsc
- ↑ https://www.youtube.com/watch?v=imUBI7bNgsc
- ↑ https://www.youtube.com/watch?v=imUBI7bNgsc
- ↑ https://www.youtube.com/watch?v=imUBI7bNgsc
- ↑ http://ediblecraftsonline.com/candy_bouquets/cb9/
- ↑ http://www.ohnuts.com/blog/how-to-make-candy-leis/
- ↑ https://www.youtube.com/watch?v=VWHct0wl9qY
- ↑ http://www.ohnuts.com/blog/how-to-make-candy-leis/
- ↑ https://www.youtube.com/watch?v=VWHct0wl9qY
- ↑ https://www.youtube.com/watch?v=VWHct0wl9qY
- ↑ http://ediblecraftsonline.com/candy_bouquets/cb9/
- ↑ https://www.youtube.com/watch?v=VWHct0wl9qY
- ↑ http://ediblecraftsonline.com/candy_bouquets/cb9/
- ↑ https://www.youtube.com/watch?v=jztXwKt13uk
About This Article
To make a graduation leis out of candy, start by cutting a 4-foot long piece of cellophane that’s about 6 inches wide. Place a small candy bar length-wise on top of the cellophane. Take the long, top edge of the cellophane and roll it around the candy, forming a tube. Then, secure the ends of the candy bar with a piece of tape or ribbon. If you like, you can tie ribbons right above the end of the candy bar, making sure they match your school’s colors. Tuck another candy bar into the tube, wrap it, and tie it. Repeat this process until you are close to the end of your cellophane. Trim any excess cellophane, then tie the ends together in a double-knot. To learn how to make a graduation leis out of money, keep reading!