wikiHow is a “wiki,” similar to Wikipedia, which means that many of our articles are co-written by multiple authors. To create this article, volunteer authors worked to edit and improve it over time.
This article has been viewed 86,939 times.
Learn more...
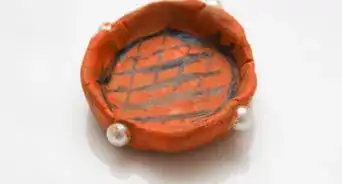
Modeling clays come in various different varieties. There are water-based and oil-based clays that you can make at home. The oil-based clay is sometimes called plasticine. The advantage of using oil-based clay is that it does not dry easily in open air. You can use it and reuse it for something else. Many of the ingredients used in making plasticine can be harmful to the respiratory system or eyes in the heating process, so be sure to wear safety equipment at all times. Learn how to make oil-based modeling clay.
Steps
Preparing Clay Ingredients
-
1Purchase hydrated lime from a home supply store or hardware store. It is also called calcium carbonate or calcium hydroxide powder. This will give the body to your clay.[1]
-
2Collect your wax to use as a binding agent. You can choose either paraffin wax or beeswax. Paraffin wax emits toxic fumes when it is heated, so choosing beeswax will reduce the risk of bad reactions.[2]Advertisement
-
3Buy baby oil and petroleum jelly from a local drugstore. Find coconut oil or linseed oil from a natural food store. These 2 oils contain 8 percent stearic acid, which will help the mixture to stay smooth.[3]
-
4Find some old heavy pots or saucepans and a wooden spoon. You will need to devote these to making clay, because the use of lime in the recipe will ensure they cannot be used for cooking again.
-
5Wear safety gear. Put on a long-sleeved shirt and gloves. Also, use a dust mask and safety goggles to avoid problems from lime fumes.
-
6Line several baking trays with aluminum foil. Place them near the stove.
-
7Create a double boiler. Place a large pot on your stove and fill it halfway with water. Bring the water to a boil.[4]
-
8Place a smaller pot inside the water to heat the ingredients. Turn the burner down to medium heat.[5]


Making Modeling Clay
-
1Melt your ingredients together in the smaller pot. Break off pieces of beeswax and place them in the pot. You should use 100g or 1 8 by 11 inch (20 by 28 cm) sheet of beeswax.
-
2Add 3/4 cup (112g) of lime powder once the beeswax is melted. Stir it with a wooden spoon until it is no longer lumpy.
-
3Pour in 6 tsp. (30ml) of baby oil, 3 tbsp. (44ml) of petroleum jelly and 2 tbsp. (30ml) of coconut oil. Stir them together for 30 seconds. Turn off the heat.
-
4Pour the modeling clay out onto the aluminum foil. If you want to split the batch into different colors, pour them onto different trays.
-
5Allow the clay to cool slightly. Test the texture with your fingers. Make adjustments to the texture as needed.
- If the modeling clay feels too firm, return it to the pot on low. Add more lime, more baby oil and more petroleum jelly in small amounts until it starts to loosen up. Stir well and pour it onto the sheet again.
- If the clay feels crumbly, it needs more wax and coconut oil. Melt some wax in the double boiler again. Add some coconut oil and place your crumbly wax in the pot. Stir until it is combined.
-
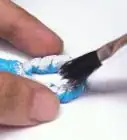
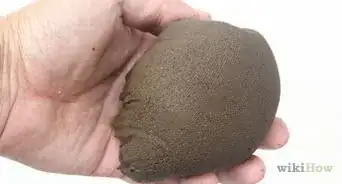
6Pick up the cooled modeling clay and work it in your hands. If it is still warm, use your plastic gloves to handle the clay.[6]


Coloring Modeling Clay


Community Q&A
-
QuestionWill this clay hold fine detail work?
 Community AnswerNo, you are looking for cold porcelain clay. You can refer to this article: How to Make Cold Porcelain.
 -
QuestionHow do I soften Plasticine?
 ChaosRosarioCommunity AnswerAll you have to do is warm it up some, if it's a good texture; otherwise, refer to Step 5.
 -
QuestionIs this clay toxic for little kids?
 Community AnswerYes, the lime is dangerous if ingested, so if your little ones don't wash their hands after, or are prone to eating things, this clay would not be safe for them.
Things You'll Need
- Petroleum jelly
- Beeswax
- Lime
- Baby oil
- Heavy saucepan
- Wooden spoon
- Dried color pigment/oil paint
- Plastic gloves
- Safety goggles
- Dust mask
- Long-sleeved shirt
- Coconut oil
- Aluminum foil
- Baking sheets
- Large pan
- Water
- Plastic wrap
- Hot water bottle
- Popsicle sticks
- Bowls
References
- ↑ https://www.instructables.com/id/Homemade-Oil-based-Modelling-Clay/
- ↑ https://www.instructables.com/id/Homemade-Oil-based-Modelling-Clay/
- ↑ https://www.instructables.com/id/Homemade-Oil-based-Modelling-Clay/
- ↑ https://www.rachaelraymag.com/real-life/technique-how-to-diy-double-boiler
- ↑ https://www.youtube.com/watch?v=63cWa6Zjv3k
- ↑ https://www.youtube.com/watch?v=QDcqZWhwTWU
- http://www.food.com/recipe/non-hardening-modeling-clay-25175