This article was co-authored by Julie Brow-Polanco. Julie Brow-Polanco is a Master Herbalist & Certified Aromatherapist with more than 11 years of experience. She is an expert on natural remedies and specializes in using them to support whole-body wellness, particularly immune, digestive, nervous, and reproductive health. Julie earned a Bachelor's Degree in Psychology from Dominican University, a Master Herbalist Certification from The School of Natural Healing, and a Certificate of Aromatherapy from the Pacific Institute of Aromatherapy. Julie is a member of the American Herbalist Guild and a Certified Aromatherapist through the National Association of Holistic Aromatherapy.
This article has been viewed 260,805 times.
Comprised only with organic ingredients like coconut oil and palm oil, organic soaps are a great way to naturally soften and heal your skin. While you can easily purchase organic soaps, with just a little bit of prep work to acquire the necessary tools and ingredients, you can learn to make your own organic soap at home. The process takes patience and even a bit of experimenting to get the proportions of additive ingredients right. Learning and mastering the basics of soap making will allow you to branch out into creating other unique, organic varieties.
Ingredients
- 2.14 oz (60 g) of food-grade lye (sodium hydroxide)
- 4.5 fluid ounces (130 mL) of distilled water
- 12 fluid ounces (350 mL) of olive oil
- 1.5 fluid ounces (44 mL) of castor oil
- 2.5 fluid ounces (74 mL) of melted coconut oil
- 1 US tbsp (15 mL) of an essential oil in a favorite scent
Makes 4 bars of soap
Steps
Creating the Lye and Oil Solutions
-
1Use a kitchen scale to properly measure out your ingredients. Having accurately measured ingredients is crucial to making soap successfully. If some of the ingredients are measured incorrectly, the skewed ratio could be significant enough to keep the soap from solidifying or curing properly.[1]
- If you don’t have a kitchen scale, you can purchase one in the kitchen or housewares section at a local department store, or you can order one online through major retailers.
- Any container, utensils, molds, or pitchers used to measure or make the soap should not be used to work with food. The contamination caused by the lye would not be safe for consumption.
-
2Wear protective clothing when working with lye. Lye is caustic and you want to avoid getting it on your skin or near your face. To protect your skin while working with the lye, wear long sleeves, gloves, and goggles. Avoid breathing in the fumes by working near an open window, or by having a fan circulate the air.[2]
- If you have breathing problems or are concerned about breathing in the lye fumes while working with it, wear a respirator mask. You can purchase one at your local hardware store or online with major retailers.
Advertisement -
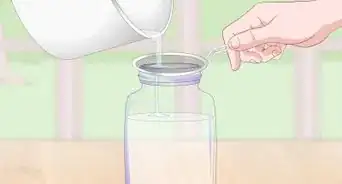
3Pour 4.5 fl oz (130 mL) of distilled water into a stainless steel pitcher. Use a thick, durable plastic pitcher if you do not have a stainless steel one. Avoid using aluminum, as the lye will negatively react to the element.[3]
-
4Stir in 2.14 oz (60 g) of food-grade lye to the pitcher with the water. Pour the lye slowly to keep it from plopping into the water. Use a silicone spatula to stir the water as you pour in the lye. Continue stirring the mixture to dissolve the lye.[4]
- Always add the lye second to the water. Pouring the water directly onto the lye will prematurely start the chemical reaction and heat up the lye.[5]
-
5Allow the lye solution to cool down for 30-40 minutes. Be careful when handling or transporting the lye solution. The natural chemical reaction of the lye with the water will create a hot solution.[6]
- When mixed with water, lye can reach temperatures as high as 200 °F (93 °C). Even after you have let it cool down the solution will still be considerably hot—around 100–110 °F (38–43 °C).[7]
-
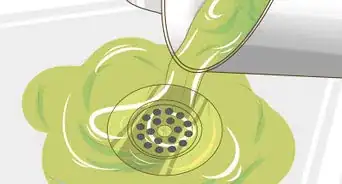
6Heat up the coconut oil in a double boiler to melt any solidified parts. Stir the coconut oil over a low heat to keep it from bubbling or burning. Once all solidified remnants of the oil have melted, remove it from the heat.[8]
- A similar product to coconut oil is babassu oil, which is a vegetable oil that comes from the babassu palm in South America. Use equal amounts of this oil if you are allergic to the coconut oil, or if you want to try something different.
-
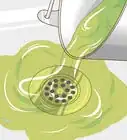
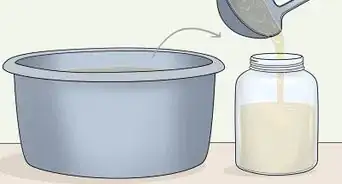
7Mix the oils in a second stainless steel pitcher to make the soap batter. Add 12 fluid ounces (350 mL) of olive oil, 1.5 fluid ounces (44 mL) of castor oil, and 2.5 fluid ounces (74 mL) of melted coconut oil. The castor oil will create the lather in the bar of soap when used, the olive oil will soften and condition your skin, and the coconut oil will help harden the soap.[9]
- The coconut oil will be hot, so be careful when mixing it with the other oils.


Mixing the Soap Batter
-
1Add the lye solution to the pitcher with the oils to make the soap batter. Pour in the mixture slowly to avoid spilling it. Be careful not to burn yourself, as both the lye and the oils are hot.[10]
- The temperature of the oils and lye solution should be around 100–110 °F (38–43 °C). Use a stainless steel thermometer to check this before mixing the two solutions. If the oil temperature is lower, heat in the double boiler until the temperatures are about the same.[11]
-
2Stir the solution with a stainless steel spoon to combine the ingredients. Any stainless steel spoon will work fine, but it will be easier to stir the mixture if the spoon has a long handle. Continue to gently stir the mixture for about 30 seconds. This will give the lye and oils a chance to mix before you blend them more thoroughly.[12]
- If you do not have a stainless steel spoon or one with a long enough handle, use an immersion blender in the off-position to gently mix the ingredients.
-
3Add special clay minerals, sugar, flowers, or herbs to color your soap or improve its appearance. Pick an ingredient that will change the appearance of the soap to match your favorite color or to include interesting texture. As is, the olive oil used to make the soap will give it a yellow or cream color after it is cured. If you enjoy or don’t mind that color, don’t add extra ingredients.[13]
- Add in a dash of cosmetic clays to change the soap color to pink, green, or white.
- Use a couple of drops of milk, cane sugar, or honey to give the soap a warm caramel color.
- For more vibrant colors, use the petals or leaves from your favorite flowers or herbs. For example, alkanet root will give the soap a purple hue and spinach leaves make the soap green.
- Herbs suitable for using in soap that are both beautiful in appearance/texture and good for your skin include: Calendula flowers (not to be confused with marigolds), geranium flowers, Irish moss, comfrey, carrot seed, and chickweed.
-
4Blend the solution for 1 minute with an immersion or stick blender. Submerge the bladed portion of the immersion blender into the mixture before turning it on; otherwise, the immersion blender will fling the solution out of the pitcher. Slowly rotate the immersion blender around the base of the pitcher to blend the solution.[14]
- If there are multiple speed settings for your immersion blender, have it on the lowest setting. Quickly pulsating the solution will create unnecessary air bubbles in your soap batter.
- If you do not have an immersion or stick blender, you can purchase one at a local department store or online.
-
5Alternate between stirring and blending the batter to thicken it. Use the immersion blender in the off-position to stir the batter. Switching between the spoon and immersion blender may cause you to drip or spill the batter. Continue this process for about 10-15 minutes.[15]
- For soap making, thickened soap batter is called “trace.” This means that the batter is thick enough for you to drip some onto the surface of the batter and have it remain on the surface. When a soap reaches this consistency, it no longer needs to be mixed and is ready to be poured into the mold.
-
6Add essential oils to the trace soap batter to give it a desired scent. Start by adding 1 US tbsp (15 mL) of the oil and stir it into the batter using your stainless steel spoon. The essential oils will smell stronger when added to the batter than when the batter is cured. So if the scent is not strong in the batter, add more in small increments until you can smell it.[16]
- Some common essential oils to add are vanilla, almond, lavender, lemongrass, geranium, or peppermint.
- Myrrh resin or frankincense essential oil are other suitable options for adding to soaps.


Molding and Curing the Soap
-
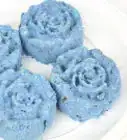
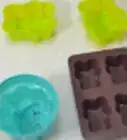
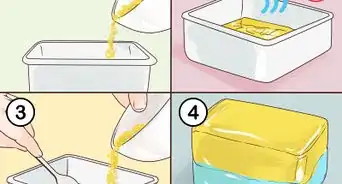
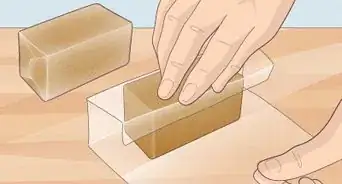
1Pour the batter into a 4 in (10 cm) silicone soap mold to shape it. Use a mold that will create 4 rectangular bars of soap. A standard mold will have an approximate 4 by 4 in (10 by 10 cm) length and width, and 3 in (7.6 cm) height. You can find one of these molds at a local craft store or online with major retailers.[17]
- Consider getting a silicone mold that has a fun pattern or design on it to further personalize your homemade soap. You can also use a loaf mold that is not sectioned off and just cut the soap into individual bars later.[18]
- Avoid using muffin tins or baking pans as the soap batter will most likely ruin the tins and the soap.[19]
-
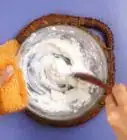
2Cover the filled mold with freezer paper and a towel to trap the heat. Leave the soap covered for at least 24 hours, but check on it periodically to make sure that it is not overheating and cracking. If it develops cracks, leave it covered, but move it to a cooler location like a dark closet or a cool basement.[20]
- Use freezer paper over standard wax paper, as freezer paper is thicker and the wax paper might melt against the heat of the soap batter. You can also use parchment paper.
-
3Uncover the mold and leave it to firm up over the next 2-3 days. Check on the soap at least once a day to make sure that it’s hardening properly and has not been disturbed. You will notice that the texture of the soap batter will gradually change to a gelatinous state over the 3 days. By the third day, it should seem fairly firm if you touch it with your finger.[21]
-
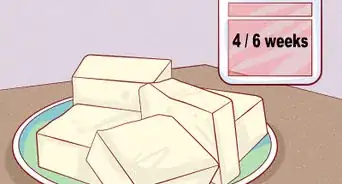
4Pop the soap bars out of the silicone mold to cure them. Place the bars in an area out of direct sunlight, and leave them alone for at least 6-8 weeks. The air will dry out and fully harden the soap. After that time, the soap will be ready for you to use and enjoy![22]


Community Q&A
-
QuestionHow can I tell if it is 100% sodium hydroxide?
 TurtisBoiCommunity AnswerIf store bought, it will say on the bottle. If you are not sure, ask a store clerk for assistance.
 -
QuestionHow is this organic soap if it contains lye? Can you use the "organic" label?
 Community AnswerWhile lye is non-organic, it is allowed in organic soaps according to the USDA's rules on organic soaps, since bar soaps require lye for their successful production.
 -
QuestionWhere can I get lye for my soap?
 Community AnswerYou can sometimes get lye in the supermarket or hardware store, but make sure that it is 100% sodium hydroxide; do NOT buy it if it is otherwise. The best place to buy lye is online, from candle and soap-making supply shops. You will also be able to find other soap-making supplies in those shops, including molds, fragrances, dyes, etc.
Warnings
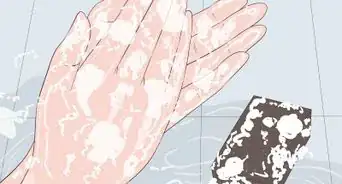
- Be aware of any allergies or skin sensitives when making organic soap. If you know that you are allergic to a given ingredient, opt for finding a close substitute. If you make the soap and find that it irritates your skin, stop using the soap immediately.[25]⧼thumbs_response⧽
Things You’ll Need
- Kitchen scale
- 4 by 4 in (10 by 10 cm) silicone soap mold
- 2 heat-resistant stainless steel pitchers
- Double boiler setup
- Stainless-steel spoon
- Stainless steel thermometer
- Immersion blender
- Rubber spatula
- Freezer or parchment paper
- Old towels or cloths
- Measuring cups and measuring spoons


References
- ↑ https://www.goodhousekeeping.com/home/cleaning/a20705805/how-to-make-homemade-soap/
- ↑ https://www.goodhousekeeping.com/home/cleaning/a20705805/how-to-make-homemade-soap/
- ↑ https://thenerdyfarmwife.com/how-to-make-a-simple-natural-homemade-soap/
- ↑ https://www.savvyhomemade.com/how-to-make-homemade-soap-using-cold-process/
- ↑ https://www.goodhousekeeping.com/home/cleaning/a20705805/how-to-make-homemade-soap/
- ↑ https://www.savvyhomemade.com/how-to-make-homemade-soap-using-cold-process/
- ↑ https://www.soapqueen.com/bath-and-body-tutorials/tips-and-tricks/back-to-basics-lye-safety-guide/
- ↑ https://thenerdyfarmwife.com/how-to-make-a-simple-natural-homemade-soap/
- ↑ https://thenerdyfarmwife.com/how-to-make-a-simple-natural-homemade-soap/
- ↑ https://www.savvyhomemade.com/how-to-make-homemade-soap-using-cold-process/
- ↑ https://www.goodhousekeeping.com/home/cleaning/a20705805/how-to-make-homemade-soap/
- ↑ https://thenerdyfarmwife.com/how-to-make-a-simple-natural-homemade-soap/
- ↑ https://lovelygreens.com/natural-soapmaking-for-beginners/
- ↑ https://thenerdyfarmwife.com/how-to-make-a-simple-natural-homemade-soap/
- ↑ https://thenerdyfarmwife.com/how-to-make-a-simple-natural-homemade-soap/
- ↑ https://thenerdyfarmwife.com/how-to-make-a-simple-natural-homemade-soap/
- ↑ https://thenerdyfarmwife.com/how-to-make-a-simple-natural-homemade-soap/
- ↑ https://www.savvyhomemade.com/how-to-make-homemade-soap-using-cold-process/
- ↑ https://thenerdyfarmwife.com/how-to-make-a-simple-natural-homemade-soap/
- ↑ https://www.savvyhomemade.com/how-to-make-homemade-soap-using-cold-process/
- ↑ https://thenerdyfarmwife.com/how-to-make-a-simple-natural-homemade-soap/
- ↑ https://thenerdyfarmwife.com/how-to-make-a-simple-natural-homemade-soap/
- ↑ https://lovelygreens.com/natural-soapmaking-for-beginners-make/
- ↑ https://lovelygreens.com/natural-soapmaking-for-beginners-make/
- ↑ https://thenerdyfarmwife.com/how-to-make-a-simple-natural-homemade-soap/
About This Article

To make organic soap, mix distilled water and lye together and let the solution cool for 30-40 minutes. Next, melt the coconut oil in a double boiler and add the castor and olive oil to it. Then, combine the cooled lye solution with the oil mixture, add any special ingredients like clay minerals or herbs, and blend the solution for about 15 minutes until it thickens. Finally, pour the soap batter into a 4 inch silicone soap mold, cover it, and let the soap set for 24 hours before popping the bars out of the mold! For tips on adding scent to your soap with essential oils, read on!